Love this? Save it for later!
Share the inspiration with your friends
I was standing at my stove, staring at a bag of green beans that had been sitting in my crisper drawer for three days, wondering how to make them actually exciting. The oven was already occupied with a sheet pan of balsamic glazed roasted vegetables for a separate dish, and I needed something fast. My husband had just texted that he was ten minutes out, and I had exactly zero energy for anything complicated.
Then I remembered the half-pound of bacon in the fridge. And the garlic bulb sitting on the counter like it had been waiting for its moment. I figured, why not? Bacon makes everything better, right? I grabbed a skillet, chopped some bacon into little pieces, and let it sizzle while I trimmed the ends off those green beans. The smell alone had me hooked before I even added the garlic.
What came together in that pan was honestly one of those accidents you secretly hope will happen again. The bacon turned crispy, the garlic got all fragrant and golden, and the green beans soaked up every bit of that salty, smoky flavor without turning mushy. My husband walked in, grabbed a fork, and ate three helpings before I could even plate the main dish. He asked me to make it again the next night.
That was three weeks ago. I’ve made this savory green beans with bacon and garlic at least five times since then. It is now my go-to side dish for busy weeknights, holiday dinners, and everything in between. It takes twenty minutes, uses ingredients I almost always have on hand, and somehow manages to feel both indulgent and like I’m eating my vegetables. Win-win, right?
Why You’ll Love This Recipe
Let me tell you why this recipe has earned a permanent spot in my weekly rotation. It is one of those rare dishes that checks every single box without trying too hard.
- Quick & Easy: From start to finish, this dish comes together in just 20 minutes. That is faster than ordering takeout, and honestly, way more satisfying.
- Simple Ingredients: Bacon, green beans, garlic, and a few pantry staples. No fancy grocery trips, no obscure spices you will never use again.
- Perfect for Any Occasion: Weeknight dinner? Check. Thanksgiving side dish? Absolutely. Random Tuesday when you need something green on your plate? You bet.
- Crowd-Pleaser: I have served this to picky kids, vegetable skeptics, and full-on carnivores. Everyone goes back for seconds.
- Unbelievably Delicious: The combination of crispy bacon, tender-crisp green beans, and fragrant garlic is honestly next-level comfort food. It is the kind of side dish that steals the show from whatever main course you pair it with.
What makes this recipe different from all the other green bean recipes out there? It is the technique. I don’t boil the green beans first, which means they keep their bright color and satisfying crunch. The bacon renders slowly, creating a flavorful base that coats every single bean. And the garlic goes in at just the right moment so it gets golden and sweet without burning. It is not just another version of green beans with bacon—it is the best version.
This recipe is the kind that makes you close your eyes after the first bite. It is comfort food reimagined—faster, simpler, but with the same soul-soothing satisfaction that makes you feel like you really cooked something special.
What Ingredients You Will Need
This recipe uses simple, wholesome ingredients to deliver bold flavor and satisfying texture without any fuss. Most of these are pantry staples for me, and I bet they are for you too.
- Fresh green beans (1 pound, ends trimmed) – Look for bright, crisp beans that snap when you bend them. Fresh really does make a difference here, though frozen can work in a pinch (just thaw and pat dry first).
- Bacon (6 slices, chopped into small pieces) – I prefer thick-cut bacon for this recipe because it renders more fat and stays chewy-crisp. My go-to brand is Wright Brand, but any good quality bacon will work.
- Garlic (4-5 cloves, minced) – Fresh garlic is non-negotiable here. The pre-minced stuff in a jar just won’t give you that same fragrant, sweet flavor when it hits the hot bacon fat.
- Olive oil (1 tablespoon) – Just a little to help the green beans cook evenly and get those lovely char marks.
- Salt (¼ teaspoon, or to taste) – Go easy here because the bacon adds plenty of salt already.
- Black pepper (¼ teaspoon, freshly ground) – Freshly ground pepper makes a real difference in the final flavor.
- Red pepper flakes (¼ teaspoon, optional) – I add these about half the time when I want a little heat. Totally optional, but highly recommended if you like a subtle kick.
- Lemon juice (1 tablespoon, freshly squeezed) – This brightens everything up at the end and cuts through the richness of the bacon beautifully.
For substitutions, you can use turkey bacon if you prefer, though it won’t render as much fat so you will need to add an extra tablespoon of olive oil. Coconut aminos or tamari could replace the salt if you want a slightly different flavor profile. And if you are dairy-free, rest assured this recipe is naturally dairy-free already!
Equipment Needed
You do not need much for this recipe, which is part of its beauty. Here is what you will need:
- Large skillet or frying pan (12-inch is ideal) – A good heavy-bottomed skillet distributes heat evenly and prevents hot spots. I use my trusty cast iron skillet for this, but a stainless steel or non-stick pan works great too.
- Sharp knife and cutting board – For trimming the green beans and chopping the bacon. A sharp knife makes the prep work so much faster and safer.
- Wooden spoon or spatula – For stirring the green beans as they cook. I prefer wooden utensils because they don’t scratch my pans.
- Paper towels – For draining the bacon if needed, though I usually skip this step to keep all that flavor in the pan.
- Measuring spoons – For the oil, salt, pepper, and lemon juice. Eyeballing works too, but measuring helps with consistency.
If you do not have a large skillet, you can use a Dutch oven or even a large saucepan. Just make sure the pan is wide enough so the green beans aren’t piled too high—they need room to cook evenly. Budget-friendly tip: a basic stainless steel skillet from a restaurant supply store costs about $20 and will last you forever.
Preparation Method
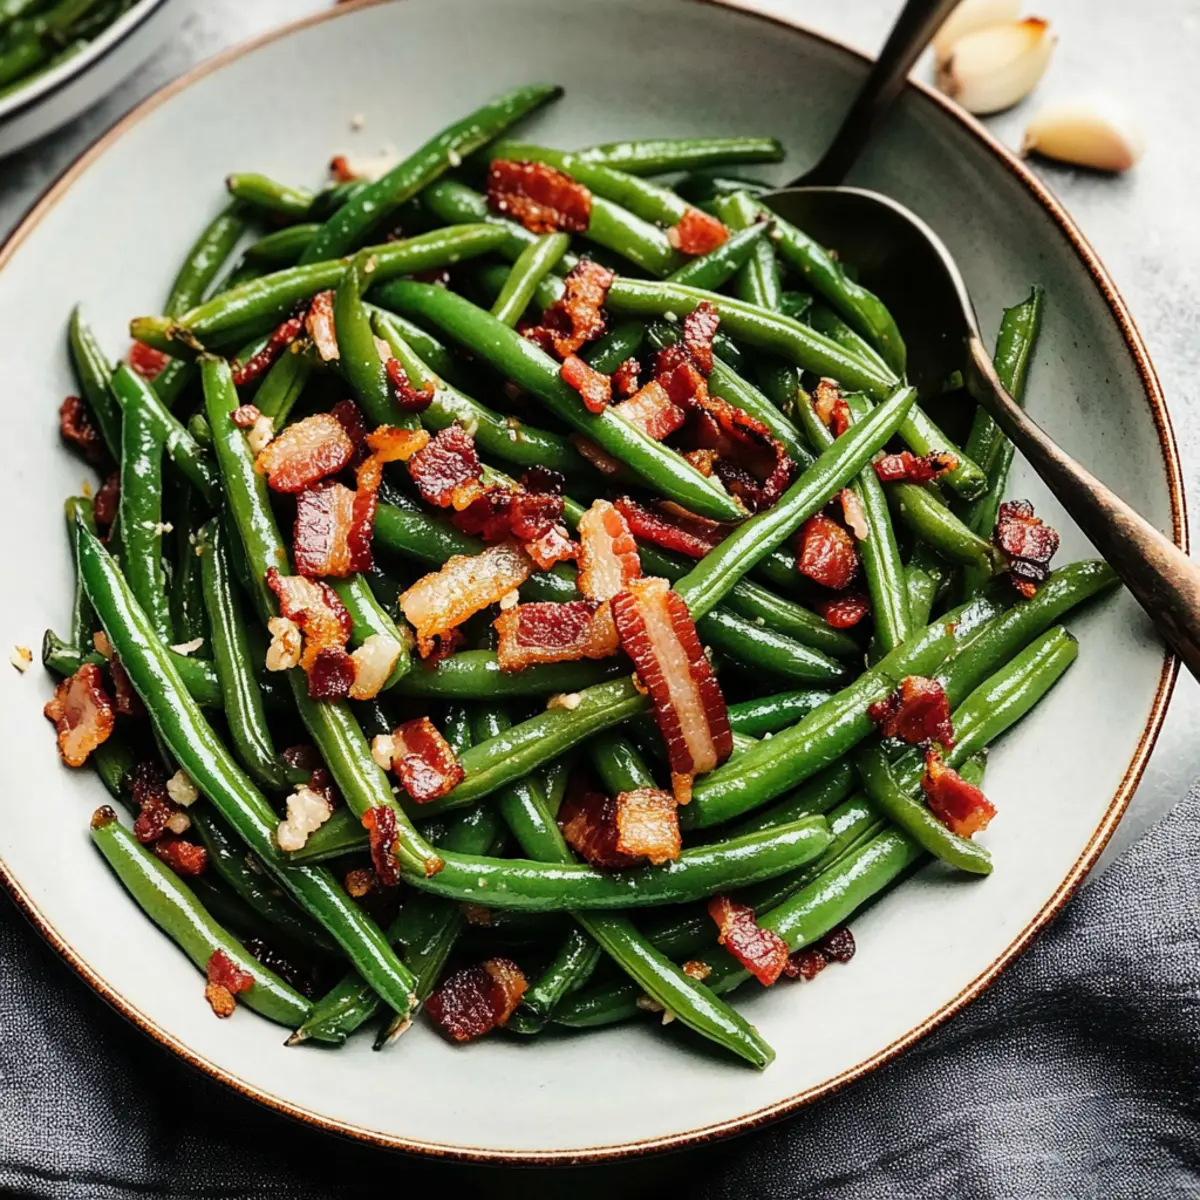
Alright, let us get cooking. This whole process takes about 20 minutes from start to finish, and I promise it is worth every second.
- Prep your ingredients first. Trim the ends off 1 pound of fresh green beans. I like to line them up in a neat pile and cut all the ends off at once—it is faster than doing them one by one. Chop 6 slices of bacon into small, bite-sized pieces. Mince 4-5 cloves of garlic. Having everything ready before you start cooking makes the process so much smoother.
- Heat your skillet over medium heat. Add the chopped bacon to the cold skillet, then turn the heat to medium. Starting the bacon in a cold pan helps it render more fat evenly. Cook the bacon for about 5-7 minutes, stirring occasionally, until it is crispy and golden brown. Use a slotted spoon to remove the bacon pieces and set them aside on a plate lined with paper towels. Leave the rendered bacon fat in the pan—this is liquid gold for flavor.
- Add the olive oil to the bacon fat. Turn the heat up to medium-high. Once the oil is shimmering (but not smoking), carefully add the trimmed green beans. Spread them out in an even layer as much as possible. Let them cook without stirring for about 2-3 minutes. You want them to develop some nice char marks and blisters on one side. This is where the flavor happens.
- Stir the green beans and let them cook for another 2-3 minutes. They should be bright green and starting to soften but still have a nice snap when you bite into them. If your pan seems dry at any point, add another tablespoon of olive oil or a splash of water to create some steam.
- Add the minced garlic. Push the green beans to one side of the pan and add the garlic directly to the hot surface. Let it cook for about 30 seconds, stirring constantly, until it becomes fragrant and just starts to turn golden. Be careful not to burn it—burnt garlic turns bitter and will ruin the whole dish. Stir the garlic into the green beans immediately.
- Season the green beans. Sprinkle with ¼ teaspoon salt (remember the bacon is already salty), ¼ teaspoon black pepper, and ¼ teaspoon red pepper flakes if using. Toss everything together to coat evenly. Cook for another 1-2 minutes until the green beans are tender-crisp—meaning they are cooked through but still have a little resistance when you bite into them.
- Return the bacon to the pan. Add the crispy bacon pieces back in and toss everything together. Cook for just 30 seconds to warm the bacon back up.
- Finish with fresh lemon juice. Remove the pan from the heat. Squeeze 1 tablespoon of fresh lemon juice over the top and give it one final toss. The lemon juice brightens everything up and balances the richness of the bacon and garlic beautifully.
- Serve immediately. Transfer the green beans to a serving platter or individual plates. Garnish with a little extra black pepper or a sprinkle of flaky sea salt if you are feeling fancy. These are best enjoyed hot, right off the stove.
A quick sensory cue: your kitchen should smell like a cozy diner at this point—smoky bacon, fragrant garlic, and a hint of lemon. The green beans should be bright green with some browned spots, and the bacon should be crispy enough to shatter when you bite into it. If everything looks and smells amazing, you did it right.
Cooking Tips & Techniques
After making this recipe more times than I can count, I have learned a few things the hard way. Let me save you some trouble.
Do not overcrowd the pan. This is probably the most common mistake people make with green beans. If you pile them too high in the skillet, they will steam instead of sauté, and you will end up with soggy, dull-colored beans. Cook them in batches if you need to, or use the largest skillet you own.
Pat your green beans dry. If you wash your green beans right before cooking, make sure to dry them thoroughly with a clean kitchen towel or paper towels. Wet beans will lower the temperature of your pan and create steam instead of that beautiful sear we are going for.
Watch the garlic like a hawk. I cannot stress this enough. Garlic goes from fragrant to burnt in about 15 seconds. Add it to the pan, stir it for 30 seconds, and immediately mix it into the green beans. If you see it turning dark brown, you have waited too long.
Cook the bacon slowly. Starting the bacon in a cold pan over medium heat allows the fat to render gradually, giving you perfectly crispy bacon without burning. Rushing this step will leave you with chewy, greasy bacon pieces.
Use the bacon fat. I know it is tempting to drain all the bacon fat and start fresh with oil, but do not do it. That rendered fat carries so much flavor and helps coat the green beans in a way that plain oil just cannot replicate. Your waistline will forgive you, I promise.
One time I was rushing and added the garlic at the same time as the green beans. The garlic burned before the beans were even close to done, and I had to start over. Learn from my mistakes—patience pays off with this recipe.
Variations & Adaptations
This recipe is wonderfully flexible, and I have tried several variations over the past few weeks. Here are some of my favorites:
Balsamic Glazed Version: After cooking the green beans, add 2 tablespoons of balsamic vinegar to the pan and let it simmer for 1-2 minutes until it reduces into a syrupy glaze. The tangy sweetness pairs beautifully with the bacon. This version reminds me of the balsamic glazed roasted vegetables I make for holiday dinners.
Mushroom & Bacon Green Beans: Add 8 ounces of sliced cremini mushrooms to the pan after removing the bacon. Cook them in the bacon fat for 4-5 minutes until golden brown, then proceed with the recipe. The earthy mushrooms add another layer of savory goodness.
Spicy Asian-Inspired Twist: Swap the salt for 1 tablespoon of soy sauce or tamari, add 1 teaspoon of sesame oil at the end, and toss in a tablespoon of toasted sesame seeds. This version is incredible served alongside sweet and spicy honey chipotle chicken rice bowls for a fusion dinner that hits all the right notes.
Low-Carb/Keto Adaptation: This recipe is naturally low-carb, but you can amp up the fat by adding an extra tablespoon of butter at the end and tossing the green beans in it. The butter adds richness and helps the seasonings stick even better.
Holiday Edition: Add ¼ cup of toasted slivered almonds and ¼ cup of dried cranberries at the end for a festive twist that looks beautiful on a Thanksgiving table. I made this version for Friendsgiving last year and it disappeared in minutes.
My personal favorite variation is the balsamic glaze version. Something about that sweet-tangy finish with the salty bacon just hits different. I have made it three times in the past week alone.
Serving & Storage Suggestions
These savory green beans are best served hot, straight from the skillet. I like to transfer them to a warm serving platter and garnish with a sprinkle of flaky sea salt and maybe some extra black pepper. The bright green color against the crispy bacon pieces makes for a gorgeous presentation—perfect for impressing dinner guests without any extra effort.
As for what to serve alongside them, the possibilities are endless. They pair beautifully with roasted chicken, grilled steak, pan-seared salmon, or even a simple fresh grilled chicken salad with blueberry vinaigrette for a lighter meal. I have also served them alongside creamy polenta with red wine mushrooms for a vegetarian dinner that felt incredibly indulgent.
For beverages, a crisp white wine like Sauvignon Blanc or a light Pinot Grigio complements the smoky bacon and garlic beautifully. If you prefer beer, a cold lager or pale ale works wonderfully too.
Storage: Leftover green beans can be stored in an airtight container in the refrigerator for up to 3 days. The texture will soften slightly upon reheating, but the flavor remains delicious.
Reheating: The best way to reheat these is in a hot skillet over medium-high heat for 2-3 minutes, stirring occasionally. You can also reheat them in the microwave, but they will be softer. If they seem dry, add a splash of water or chicken broth to create some steam.
Freezing: I do not recommend freezing these green beans, as the texture will become mushy upon thawing. They are so quick to make that fresh is always the better option.
One thing I have noticed: the flavors actually meld together even more after a day in the fridge. The garlic mellows out and the bacon flavor permeates every bean. They are almost better the next day, if you can believe it.
Nutritional Information & Benefits
Here is the approximate nutritional breakdown for one serving (about ⅙ of the recipe):
- Calories: 175
- Protein: 8g
- Fat: 13g
- Carbohydrates: 8g
- Fiber: 3g
- Sugar: 3g
- Sodium: 480mg
Green beans are a fantastic source of vitamins A, C, and K, as well as fiber and folate. They are low in calories but high in nutrients, making them a great addition to any balanced meal. The bacon adds protein and healthy fats (yes, rendered bacon fat contains monounsaturated fats!), while garlic provides allicin, a compound known for its immune-boosting properties.
This recipe is naturally gluten-free, low-carb, and keto-friendly. If you use turkey bacon, you can reduce the fat and calories significantly. The only potential allergen to note is that bacon is a processed meat, so those with sodium sensitivities should adjust the added salt accordingly.
From my personal wellness perspective, this recipe hits that sweet spot between indulgence and nutrition. I get my vegetables in, but I also get that satisfying, soul-warming feeling that only bacon and garlic can provide. It is balance, plain and simple.
Frequently Asked Questions
Can I use frozen green beans instead of fresh?
Yes, you can use frozen green beans, but you will need to thaw them completely and pat them dry with paper towels before cooking. Frozen beans contain more moisture, so they will steam more than sauté. The texture will be softer, but the flavor will still be delicious.
How do I keep the green beans from getting soggy?
The key to non-soggy green beans is high heat and not overcrowding the pan. Make sure your skillet is hot before adding the beans, and cook them in a single layer if possible. Also, avoid covering the pan, as trapping steam will make them limp.
Can I make this recipe ahead of time?
These green beans are best enjoyed fresh, but you can prep the ingredients ahead of time. Trim the green beans, chop the bacon, and mince the garlic up to 2 days in advance. Store everything separately in the refrigerator, then cook when you are ready to serve.
What can I use instead of bacon?
If you do not eat pork, you can use turkey bacon, beef bacon, or even coconut bacon for a vegan option. You will need to add an extra tablespoon of olive oil to compensate for the lack of rendered bacon fat. Smoked paprika can also add a similar smoky flavor.
How do I know when the green beans are done?
The green beans are done when they are bright green, slightly blistered in spots, and tender-crisp—meaning they offer some resistance when you bite into them but are not raw or crunchy. This usually takes about 6-8 minutes of cooking time over medium-high heat.
Conclusion
Look, I am not going to tell you that these savory green beans with bacon and garlic will change your life. But I will tell you that they will change your dinner. They are the kind of side dish that makes you actually look forward to eating your vegetables—and honestly, that is a pretty big deal in my book.
What I love most about this recipe is how forgiving it is. You can tweak the seasonings, swap ingredients, or adjust the cooking time to match your preferences, and it will still turn out delicious. It is the perfect recipe for those nights when you need something fast, flavorful, and foolproof.
I would love to hear how yours turn out! Drop a comment below and let me know if you tried any variations or if this has become a new favorite in your kitchen. Share your photos on Pinterest and tag me—I love seeing your creations. And if you have a special occasion coming up, this recipe is absolutely perfect alongside my cozy chicken stew with butternut squash for a meal that feels like a warm hug.
Now go make some green beans. Your dinner table is waiting.
Pin This Recipe!
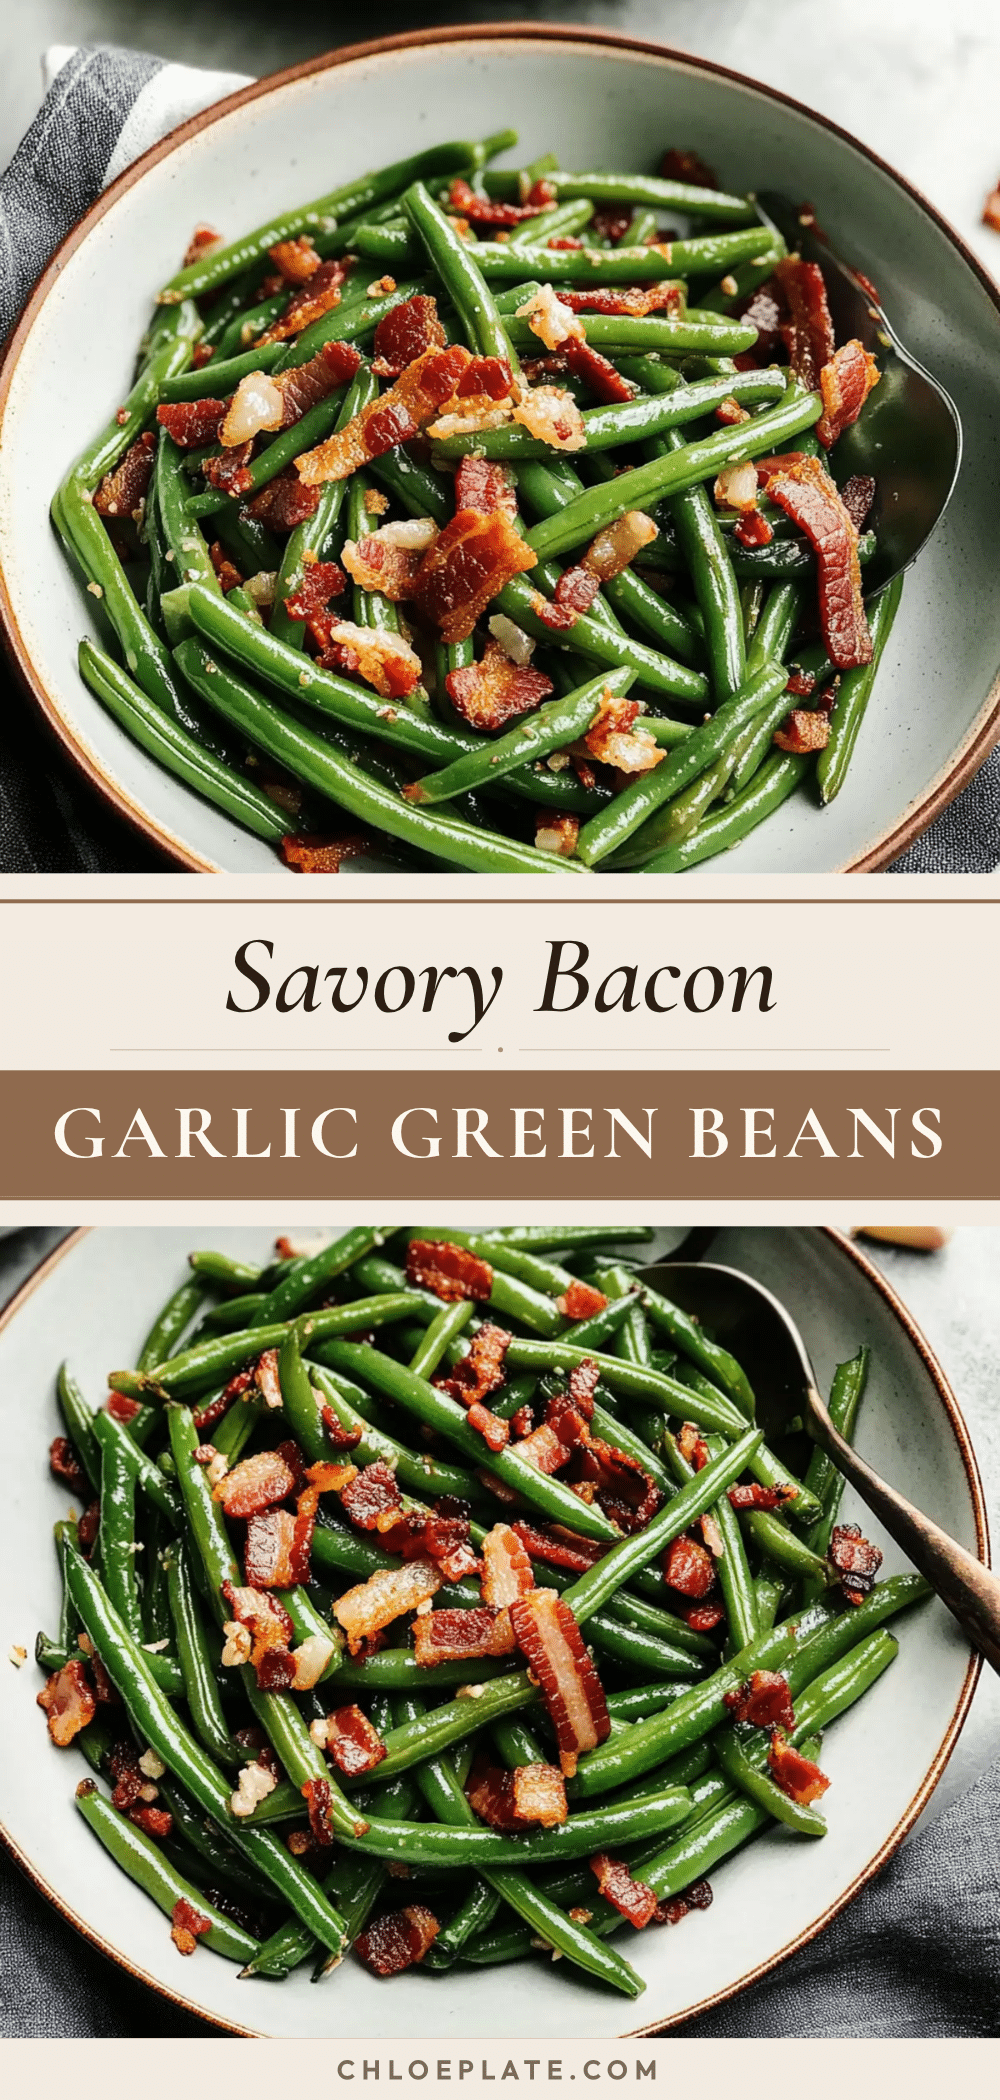
Savory Green Beans with Bacon and Garlic
A quick and easy 20-minute side dish featuring tender-crisp green beans, crispy bacon, and fragrant garlic. Perfect for busy weeknights or holiday dinners, this recipe uses simple ingredients to deliver bold, comforting flavor.
- Prep Time: 10 minutes
- Cook Time: 10 minutes
- Total Time: 20 minutes
- Yield: 6 servings 1x
- Category: Side Dish
- Cuisine: American
Ingredients
- 1 pound fresh green beans, ends trimmed
- 6 slices thick-cut bacon, chopped into small pieces
- 4–5 cloves garlic, minced
- 1 tablespoon olive oil
- ¼ teaspoon salt (or to taste)
- ¼ teaspoon freshly ground black pepper
- ¼ teaspoon red pepper flakes (optional)
- 1 tablespoon freshly squeezed lemon juice
Instructions
- Prep your ingredients: trim ends off green beans, chop bacon into small pieces, and mince garlic.
- Heat a large skillet over medium heat. Add chopped bacon to the cold skillet and cook for 5-7 minutes, stirring occasionally, until crispy and golden brown. Remove bacon with a slotted spoon and set aside on a paper towel-lined plate. Leave the rendered bacon fat in the pan.
- Add olive oil to the bacon fat and increase heat to medium-high. Once shimmering, add green beans in an even layer. Cook without stirring for 2-3 minutes to develop char marks.
- Stir green beans and cook for another 2-3 minutes until bright green and starting to soften but still crisp.
- Push green beans to one side of the pan. Add minced garlic to the hot surface and cook for 30 seconds, stirring constantly, until fragrant and just golden. Stir garlic into green beans immediately.
- Season with salt, black pepper, and red pepper flakes (if using). Toss to coat evenly. Cook for 1-2 minutes until tender-crisp.
- Return crispy bacon to the pan and toss together. Cook for 30 seconds to warm the bacon.
- Remove pan from heat. Squeeze fresh lemon juice over the top and toss one final time.
- Serve immediately, garnished with extra black pepper or flaky sea salt if desired.
Notes
Do not overcrowd the pan to avoid steaming the green beans. Pat green beans dry before cooking for better searing. Watch garlic carefully to prevent burning. Start bacon in a cold pan for even rendering. Use the rendered bacon fat for maximum flavor. For best results, serve immediately.
Nutrition
- Serving Size: 1 serving (about ⅙ o
- Calories: 175
- Sugar: 3
- Sodium: 480
- Fat: 13
- Saturated Fat: 4
- Carbohydrates: 8
- Fiber: 3
- Protein: 8
Keywords: green beans, bacon, garlic, quick side dish, 20-minute recipe, easy vegetables, holiday side, weeknight dinner



