Love this? Save it for later!
Share the inspiration with your friends
The first time I made these spicy bold quick pickled green beans, it was out of pure desperation. I had a CSA box that was practically overflowing with green beans—like, I had enough to feed a small army. And I had a fridge full of leftover pickling brine from a jar of store-bought pickles that I just couldn’t bring myself to toss. It felt wasteful. So I threw the beans in a heatproof jar, poured that old brine over them, added a few slices of fresh jalapeño and a clove of smashed garlic, and stuck them in the fridge. Honestly, I didn’t expect much. I figured they’d be okay, maybe a little sad. But the next day? I opened that jar and the smell hit me—vinegary, spicy, and bright. I grabbed one, took a bite, and it was this perfect, snappy crunch with a slow, creeping heat. I ate like six more standing over the kitchen sink. That was the day I stopped buying pickles altogether. Now I make a fresh batch every week—sometimes with a little extra chili for that real bold kick—and they never last more than a couple of days around here. These aren’t just a side dish; they’re a snack, a garnish, a little jar of happy.
Why You’ll Love This Recipe
These spicy bold quick pickled green beans are my go-to for a reason. They come together in just 20 minutes of hands-on time, and the flavor payoff is ridiculous. You get that perfect balance of tangy, salty, and spicy with every single bite. Plus, they stay crunchy for weeks in the fridge. No mushy pickles here, I promise.
- Quick & Easy : From start to finish, you’re looking at about 20 minutes of active work. The rest is just waiting for the brine to cool and the flavors to meld.
- Simple Ingredients : You likely have most of this in your pantry right now. Vinegar, salt, sugar, garlic, and some dried chili flakes. No fancy trips to a specialty store.
- Perfect for Snacking : I keep a jar in the fridge for when the afternoon munchies hit. It’s way better than chips, and it satisfies that craving for something salty and crunchy.
- Crowd-Pleaser : I brought a jar to a backyard barbecue last summer, and people were literally hovering around it. One friend asked for the recipe before she even finished her first bean.
- Unbelievably Delicious : The texture is the star here. That crisp snap when you bite into a cold, spicy bean is just next-level. It’s comfort food for your taste buds.
What really sets this recipe apart is the double-dose of heat. I use both fresh sliced jalapeños and a good pinch of red pepper flakes. The fresh jalapeño gives you that immediate, bright heat, while the dried flakes build slowly in the background. It creates a layered spiciness that keeps you coming back for one more bean. And honestly, it’s the kind of recipe that makes you feel like a kitchen wizard. You take a few simple ingredients, combine them in a jar, and a day later you have something that tastes like it came from a fancy farmer’s market stand.
What Ingredients You Will Need
This recipe uses a handful of pantry staples to create a bold, spicy brine that transforms fresh green beans into something addictive. I’ve tested this with a few different vinegars and spice levels, and the combination below is my absolute favorite. It’s all about balance—tangy, salty, sweet, and hot.
- Fresh green beans (1 pound): Look for beans that are bright green, firm, and snap when you bend them. I prefer standard green beans, but haricots verts work great too. Trim the tough stem ends off, but leave the pretty tails on if you want that classic look.
- Distilled white vinegar (1 cup): This gives you that classic clean, tangy pickle taste. I’ve tried it with apple cider vinegar, and while it’s good, the white vinegar keeps the color of the beans bright and the flavor sharp.
- Water (1 cup): Filtered water is best if you have it, but tap water works just fine. The ratio of vinegar to water here is 1:1, which gives a nice tang without being mouth-puckeringly sour.
- Kosher salt (1 tablespoon): I use Diamond Crystal kosher salt. If you’re using Morton’s or a fine sea salt, use about 2 teaspoons instead. Salt is crucial here—it draws out the moisture from the beans and keeps them crunchy.
- Granulated sugar (1 teaspoon): Just a touch to round out the acidity. You won’t taste it as sweetness, but it balances the vinegar and heat perfectly.
- Garlic cloves (3-4, smashed): Smashing the cloves releases their oils without turning the brine cloudy. I leave them whole so you get little garlic surprises in the jar.
- Fresh jalapeño (1 large, sliced into thin rings): This is where the bold spice comes from. Leave the seeds in if you like it hot, or remove them for a milder kick. I leave them in because I’m a heat fiend.
- Red pepper flakes (1/2 teaspoon): These add a slow, building warmth that the fresh jalapeño doesn’t provide. It’s a sneaky heat that lingers.
- Black peppercorns (1 teaspoon): Whole peppercorns infuse the brine with a subtle, earthy spice. Don’t skip them—they add depth.
- Mustard seeds (1 teaspoon): Yellow or brown both work. They add a tiny pop of texture and a mild, warm flavor that pairs beautifully with the vinegar.
- Optional: Fresh dill sprigs (2-3): I love adding a few sprigs of fresh dill to the jar. It gives the beans a classic dill pickle vibe that’s just so satisfying.
Equipment Needed
You don’t need a lot of fancy gear for this one, which is part of the beauty. Here’s what you’ll need:
- A large pot for boiling water to blanch the beans. Any stockpot or large saucepan will do.
- A bowl of ice water (a medium mixing bowl works perfectly) for shocking the beans after blanching.
- A sharp knife and cutting board for trimming the beans and slicing the jalapeño.
- A clean 32-ounce (1-quart) glass jar with a tight-fitting lid. I use a wide-mouth Mason jar because it’s easy to pack the beans in vertically. You can also use two smaller pint jars if that’s what you have.
- A small saucepan for making the brine.
- A measuring cup and spoons for accuracy.
- Tongs or a slotted spoon to transfer the beans from the boiling water to the ice bath.
If you don’t have a Mason jar, any heatproof glass container with a lid works. I’ve even used an old pickle jar (washed, of course) in a pinch. Just make sure it’s clean and can hold at least 4 cups of liquid.
Preparation Method
This whole process moves pretty fast, so I like to have everything measured and ready before I start. It makes the whole thing feel effortless. Here’s how it goes:
- Prep the beans. First, wash your green beans under cold running water. Then, trim off the tough stem ends. You can line them up in a bunch and cut them all at once to save time. Leave the pointy tails on—they look pretty in the jar. If your beans are really long (over 4 inches), you can cut them in half so they fit better in the jar.
- Blanch the beans. Bring a large pot of water to a rolling boil over high heat. Add a generous pinch of salt to the water—it helps season the beans from the inside out. Drop the trimmed beans into the boiling water and cook for exactly 1 minute. You want them to turn bright green and get slightly tender but still have a good snap. Set a timer, seriously. Overcooking them is the fastest way to sad, limp pickles.
- Shock the beans. While the beans are boiling, fill a medium bowl with ice and cold water. Use your tongs or a slotted spoon to quickly transfer the beans from the boiling water into the ice bath. This stops the cooking process immediately and locks in that vibrant green color. Let them sit in the ice water for at least 2 minutes, until they are completely cool to the touch.
- Drain the beans. Once the beans are cool, drain them well in a colander. Give them a gentle shake to remove excess water. You want them as dry as possible so they don’t water down the brine. Pat them dry with a clean kitchen towel if you’re feeling extra thorough.
- Pack the jar. Take your clean 32-ounce Mason jar. Start by layering in the aromatics: drop in the smashed garlic cloves, the sliced jalapeño rings, the fresh dill sprigs (if using), the black peppercorns, the mustard seeds, and the red pepper flakes. Then, pack the green beans vertically into the jar. I like to stand them up on their ends, tightly packed, because it looks gorgeous and allows the brine to circulate evenly. Pack them in there—they will shrink slightly in the brine.
- Make the brine. In a small saucepan, combine the distilled white vinegar, water, kosher salt, and granulated sugar. Place it over medium-high heat and stir occasionally. Bring the mixture to a boil, making sure the salt and sugar are fully dissolved. This should only take 2-3 minutes. Once it’s boiling, remove it from the heat immediately.
- Pour the brine. Carefully pour the hot brine over the green beans in the jar, making sure all the beans are completely submerged. Leave about 1/2 inch of headspace at the top of the jar. If you need a little more brine, you can top it off with a splash of plain hot water, but the 1:1 ratio is usually perfect.
- Cool and seal. Let the jar sit on the counter, uncovered, until it comes to room temperature. This usually takes about 30-45 minutes. You’ll see the color of the beans deepen slightly as they absorb the brine. Once cool, screw on the lid tightly and pop the jar in the refrigerator.
That’s it. The hardest part is waiting. These beans are technically ready to eat after about 2 hours, but they really hit their stride after 24 hours. The flavors meld, the heat settles in, and the texture stays perfectly snappy.
Cooking Tips & Techniques
I’ve made a lot of pickled things over the years, and I’ve definitely learned a few things the hard way. Here are my best tips for getting these beans perfect every single time.
Don’t skip the blanching step. I know it’s tempting to just pour hot brine over raw beans and call it a day, but blanching is non-negotiable. It softens the beans just enough so the brine can penetrate, but the ice bath keeps them from turning into mush. Raw beans in brine will stay too tough and woody. Blanched beans? They’re like little flavor sponges with a crunch.
Use a wide-mouth jar. I cannot stress this enough. Trying to cram green beans into a narrow-neck bottle is a recipe for frustration. A wide-mouth Mason jar lets you pack the beans in vertically, which looks beautiful and ensures even pickling. I learned this after a very messy attempt with a wine bottle that ended with beans all over my floor.
Taste your brine before you pour it. Before you take the brine off the heat, dip a clean spoon in and taste it. It should be salty and tangy, with a hint of sweetness. If it tastes flat, add a pinch more salt. If it’s too sharp, add a tiny pinch of sugar. You can adjust it right then, but you can’t fix it once it’s in the jar.
Patience is a virtue. I know I said they’re ready after 2 hours, but trust me on this—wait 24 hours. The first time I made these, I cracked the jar open after 4 hours and they were good. But the next day? They were incredible. The heat had mellowed into something warm and complex, and the garlic had infused every single bean. Let them sit overnight, and you’ll be rewarded.
Keep them cold. These are refrigerator pickles, not shelf-stable canned pickles. They need to stay in the fridge at all times. If you leave them out on the counter for a party, they’ll start to soften and lose their crunch. I always keep a small bowl of ice underneath the jar if I’m serving them at a gathering.
Variations & Adaptations
This recipe is super flexible. I’ve played around with it a lot, and each version brings something different to the table.
Milder version. If you’re not a spice fan (or you’re serving these to kids), you can easily dial back the heat. Use just the jalapeño with the seeds and membranes removed, and skip the red pepper flakes entirely. You’ll still get a hint of warmth from the peppercorns and mustard seeds, but it won’t be overwhelming. I made this version for a family picnic and even my spice-averse aunt went back for seconds.
Asian-inspired twist. Swap the dill for a few slices of fresh ginger and a star anise pod. Replace the mustard seeds with a teaspoon of Szechuan peppercorns. The brine stays the same, but the flavor profile shifts to something warm, floral, and slightly numbing. It’s incredible on a charcuterie board with some sweet and spicy honey chipotle chicken rice bowls for a real flavor contrast.
Sweet and hot. Double the sugar to 2 teaspoons and add a tablespoon of honey to the brine. Keep the jalapeño and red pepper flakes. The sweetness balances the heat in a way that’s almost addictive. I made a batch like this for a holiday party and they disappeared before the cheese platter did.
Garlic lovers’ version. I am a garlic fiend, so sometimes I’ll double the garlic cloves and even throw in a few slices of pickled garlic from a jar. It turns the brine into something almost savory. These are amazing chopped up and tossed into a fresh grilled chicken salad with easy blueberry vinaigrette for a crunchy, tangy kick.
Quick refrigerator version. If you’re in a huge rush, you can skip the blanching step entirely. Just pour the hot brine over raw, trimmed beans. They’ll be crunchier and take a bit longer to absorb the flavor (about 3-4 days), but they’ll still be delicious. I’ve done this when I was racing against a wilting bag of beans, and it worked out great.
Serving & Storage Suggestions
These spicy bold quick pickled green beans are incredibly versatile. I serve them cold, straight from the fridge, as a snack or side dish. They’re fantastic alongside a sandwich—try them on a best easy turkey cranberry brie sandwich for a tangy, spicy crunch that cuts through the richness. They also make a killer garnish for bloody marys or micheladas. Just stick a bean in the glass instead of a celery stalk.
For storage, keep the jar tightly sealed in the refrigerator at all times. These beans will stay crisp and flavorful for up to 3-4 weeks. The brine will continue to develop over time, so the flavor will deepen as the weeks go on. I’ve kept a jar for almost two months before, and while the texture softened slightly, they were still perfectly edible and delicious.
If you want to re-crisp them after a couple of weeks, you can drain the brine, refresh it with a new batch of hot brine (same recipe), and let them cool again. It breathes new life into them. I do this when I have a jar that’s been hanging around a little too long.
One thing I love is how the flavors change. In the first week, the heat is bright and forward. By week two, it mellows out and the garlic and dill become more prominent. By week three, everything has married together into this complex, savory, spicy pickle that’s perfect on its own or chopped into a salad.
These beans also work beautifully as a side for grilled meats or fish. I’ve served them alongside some zesty lemon dill grilled salmon and the contrast between the rich, buttery salmon and the bright, spicy beans was a total win.
Nutritional Information & Benefits
Here’s the approximate nutritional breakdown for a serving of about 4-5 pickled green beans (roughly 1/4 cup, without the brine):
- Calories: 15-20
- Carbohydrates: 3-4g
- Fiber: 1-2g
- Sugar: 1-2g
- Sodium: 200-300mg (varies with salt)
- Vitamin C: 10% of daily value
- Vitamin K: 15% of daily value
These pickles are naturally low in calories and fat-free, making them a fantastic guilt-free snack. Green beans are a great source of fiber, which supports digestive health, and they’re packed with vitamin K, which is important for bone health. The vinegar in the brine may also help with blood sugar regulation by slowing down the absorption of carbohydrates from other foods you eat alongside them.
This recipe is naturally gluten-free, dairy-free, and vegan. The only potential allergen concern is the mustard seeds for anyone with a mustard allergy, but that’s rare. If you’re watching your sodium intake, you can reduce the salt to 2 teaspoons, but the beans won’t stay as crunchy for as long.
I love that these pickles let me enjoy a healthy vegetable in a way that feels like a treat. It’s a snack that doesn’t come with any guilt, and that’s a win in my book.
Conclusion
These spicy bold quick pickled green beans have become a staple in my kitchen for a reason. They’re easy, they’re fast, and they deliver a flavor punch that’s way bigger than the effort you put in. Whether you’re snacking on them straight from the jar, adding them to a sandwich, or serving them as a side at your next barbecue, they always deliver that perfect crunch and that slow, satisfying heat.
I love how this recipe lets you play around with the spice level and the aromatics. Make it your own—double the garlic, add some fresh ginger, or throw in a habanero if you’re feeling brave. The base recipe is solid, but the variations are where the real fun begins. I’ve made this for friends, for parties, and just for myself on a lazy Sunday afternoon, and it never gets old.
I’d love to hear how yours turn out. Did you add extra heat? Did you try the Asian-inspired twist? Drop a comment below and tell me about your version. And if you loved these beans, share the recipe with a friend who needs a little crunch in their life. Happy pickling, friends!
FAQs
Can I use frozen green beans for this recipe?
I wouldn’t recommend it. Frozen green beans have already been blanched and frozen, which changes their texture significantly. They’ll turn out mushy and limp once you add the brine. Fresh green beans are really the way to go here for that perfect snap.
How long do these pickled green beans last in the fridge?
They’ll stay crisp and flavorful for about 3 to 4 weeks when stored in an airtight jar in the refrigerator. The texture will gradually soften over time, but they’re still perfectly good to eat for up to two months. Just keep them cold and make sure the beans are always submerged in the brine.
Can I reuse the brine for another batch?
You can, but the second batch won’t be as flavorful. The brine absorbs a lot of the moisture and flavor from the first batch of beans, so it will be a bit diluted. I usually make a fresh batch of brine for new beans. If you do reuse it, add a little extra vinegar and salt to boost the flavor.
Why did my pickled green beans turn out soft?
This usually happens for one of two reasons: you either over-blanched the beans (more than 1 minute in boiling water) or you didn’t shock them properly in the ice bath. The ice bath stops the cooking process and locks in the crunch. Also, make sure your brine has enough salt—salt helps maintain the firm texture of the beans.
Can I can these pickled green beans for shelf-stable storage?
This recipe is specifically designed for refrigerator pickles, not water-bath canning. The vinegar-to-water ratio and processing times are different for safe canning. If you want shelf-stable pickled green beans, you’ll need to follow a tested canning recipe from a trusted source like the USDA or Ball Canning. This quick version is meant to be kept cold and eaten within a few weeks.
Pin This Recipe!
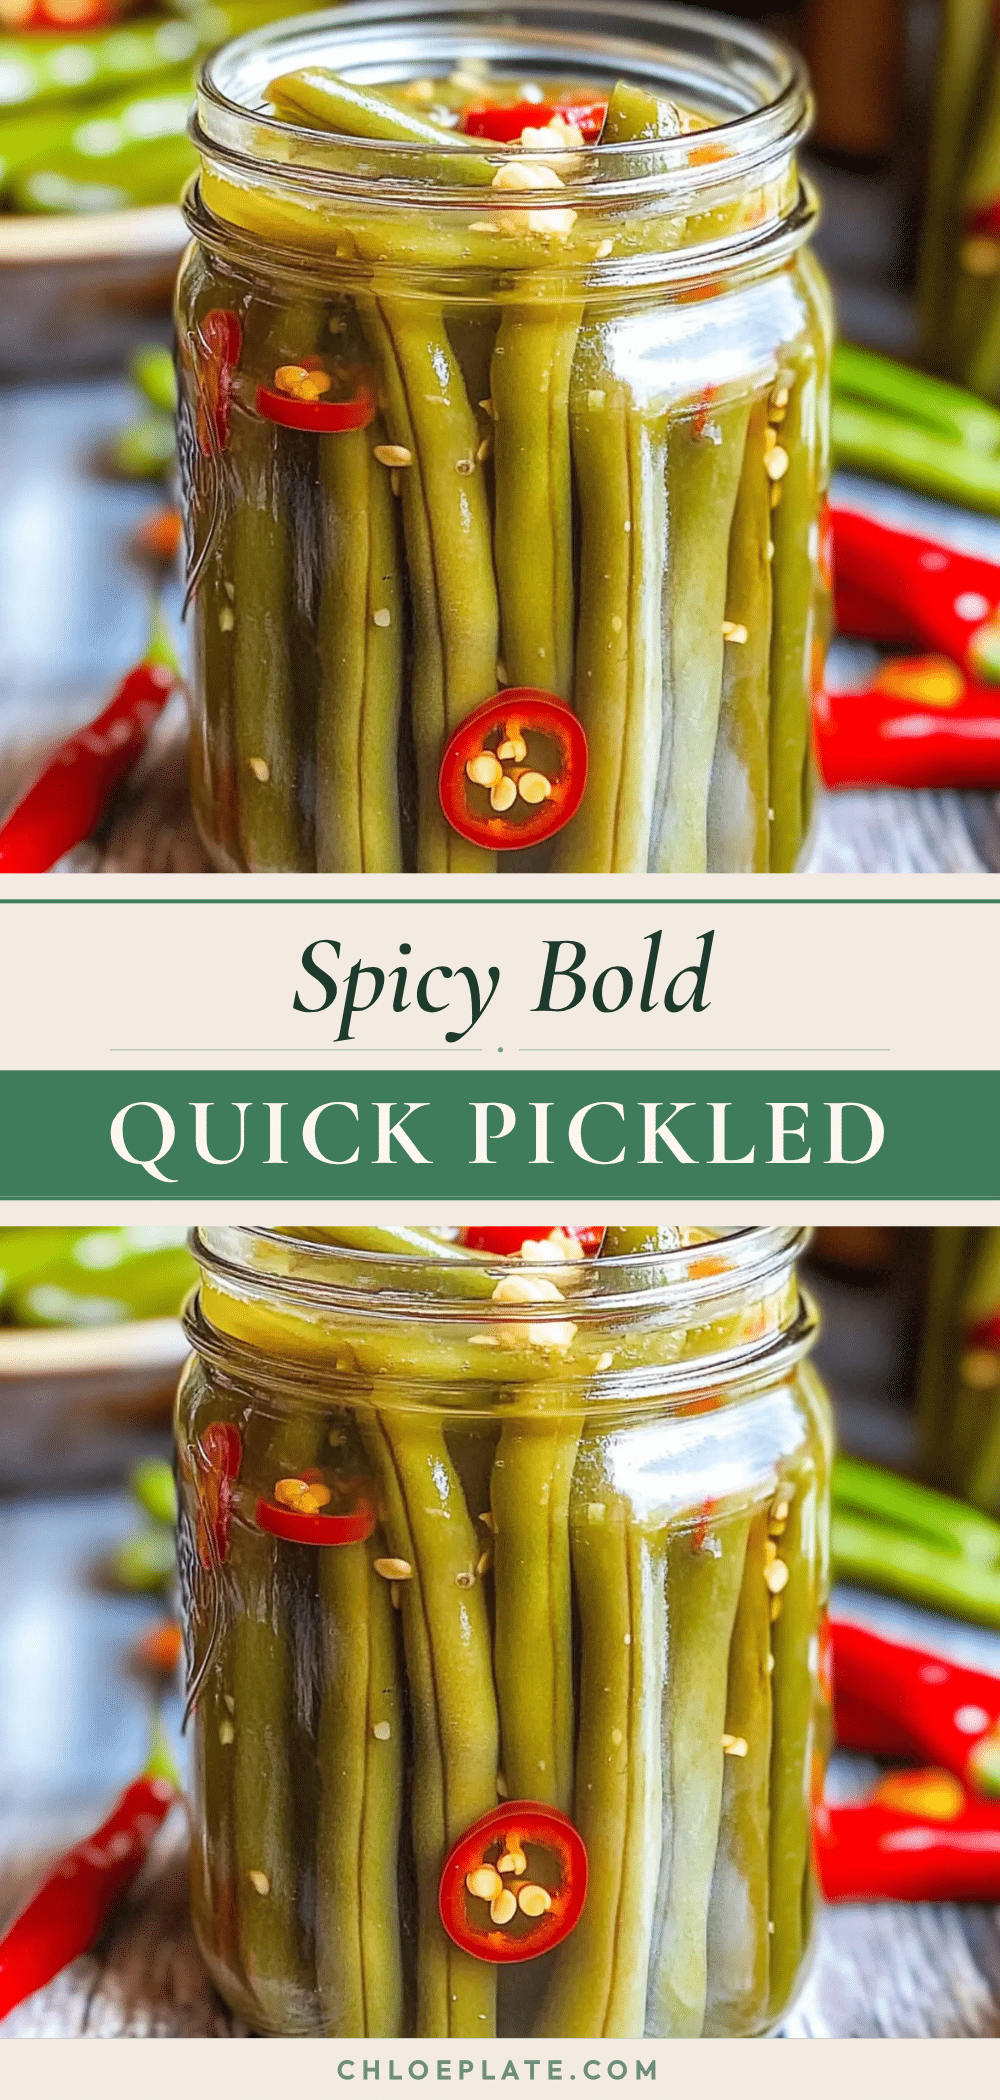
Spicy Bold Quick Pickled Green Beans in 20 Minutes
These spicy bold quick pickled green beans come together in just 20 minutes of hands-on time, delivering a perfect balance of tangy, salty, and spicy with every bite. They stay crunchy for weeks in the fridge and make an addictive snack, garnish, or side dish.
- Prep Time: 15 minutes
- Cook Time: 5 minutes
- Total Time: 20 minutes (plus cooling and refrigeration time)
- Yield: 4 servings 1x
- Category: Side Dish, Snack
- Cuisine: American
Ingredients
- 1 pound fresh green beans, trimmed
- 1 cup distilled white vinegar
- 1 cup water
- 1 tablespoon kosher salt (use 2 teaspoons if using Morton’s or fine sea salt)
- 1 teaspoon granulated sugar
- 3–4 garlic cloves, smashed
- 1 large fresh jalapeño, sliced into thin rings
- 1/2 teaspoon red pepper flakes
- 1 teaspoon black peppercorns
- 1 teaspoon mustard seeds (yellow or brown)
- 2–3 fresh dill sprigs (optional)
Instructions
- Wash green beans under cold running water. Trim off the tough stem ends; leave the pointy tails on. If beans are over 4 inches long, cut them in half to fit better in the jar.
- Bring a large pot of water to a rolling boil over high heat. Add a generous pinch of salt. Drop the trimmed beans into the boiling water and cook for exactly 1 minute until bright green and slightly tender but still snappy.
- While beans boil, fill a medium bowl with ice and cold water. Using tongs or a slotted spoon, transfer the beans from the boiling water into the ice bath to stop the cooking process. Let sit for at least 2 minutes until completely cool.
- Drain the beans well in a colander, shaking off excess water. Pat dry with a clean kitchen towel if desired.
- In a clean 32-ounce (1-quart) wide-mouth glass jar, layer the smashed garlic cloves, sliced jalapeño rings, fresh dill sprigs (if using), black peppercorns, mustard seeds, and red pepper flakes. Pack the green beans vertically into the jar, tightly packed.
- In a small saucepan, combine distilled white vinegar, water, kosher salt, and granulated sugar. Bring to a boil over medium-high heat, stirring occasionally, until salt and sugar are fully dissolved (2-3 minutes). Remove from heat immediately.
- Carefully pour the hot brine over the green beans in the jar, ensuring all beans are completely submerged. Leave about 1/2 inch of headspace at the top.
- Let the jar sit on the counter, uncovered, until it comes to room temperature (about 30-45 minutes). Once cool, screw on the lid tightly and refrigerate.
- Beans are ready to eat after 2 hours but are best after 24 hours when flavors have melded.
Notes
Don’t skip the blanching step—it ensures the beans absorb the brine while staying crunchy. Use a wide-mouth jar for easy packing. Taste the brine before pouring and adjust salt or sugar if needed. For best flavor, wait 24 hours before eating. These are refrigerator pickles and must be kept cold at all times. They will stay crisp and flavorful for 3-4 weeks. To re-crisp after a couple of weeks, drain the brine, refresh with new hot brine, and cool again.
Nutrition
- Serving Size: About 4-5 pickled gr
- Calories: 1520
- Sugar: 12
- Sodium: 200300
- Carbohydrates: 34
- Fiber: 12
Keywords: pickled green beans, spicy pickles, quick pickles, refrigerator pickles, green bean recipe, easy pickling, jalapeño pickles



