Love this? Save it for later!
Share the inspiration with your friends
The first time I made these coconut lime scones, it was a total accident. I had a carton of heavy cream about to expire, a lime rolling around the fruit bowl, and a half-empty bag of shredded coconut staring at me from the pantry. Honestly, I wasn’t trying to create anything special. I just wanted to use up what I had before grocery day. But then I bit into one while it was still warm, and I actually stopped mid-chew. The flaky edges, the soft center, the way the lime just cuts through the richness—it was like a little tropical vacation in my kitchen. And it came from leftovers. That’s when I knew I had to make these again on purpose.
I’ve made them at least five times since that first batch. Each time, I tweaked something small—a little more zest, a little less sugar, a different glaze technique. And each time, they got better. These scones are not the dry, crumbly kind you sometimes get at coffee shops. They’re tender, buttery, and honestly, they stay moist for days. The coconut adds a chewy texture, and the lime gives it this bright pop that makes you feel like you’re eating breakfast on a patio somewhere warm.
What I love most is how unpretentious they are. You don’t need a mixer. You don’t need fancy ingredients. You just need a bowl, your hands, and maybe a little patience while they bake. If you’ve ever been intimidated by scones, let this be the recipe that changes your mind. These coconut lime scones are forgiving, foolproof, and genuinely hard to mess up.
Why You’ll Love This Recipe
I’ve tested this recipe more times than I care to admit. I’ve made them with full-fat coconut milk, with buttermilk, with heavy cream. I’ve baked them on parchment, on silicone mats, and straight on a greased pan. And after all that trial and error, I can tell you with total confidence—this version wins. Here’s why you’ll love it too:
- Quick & Easy: From start to oven in about 15 minutes. No chilling, no rolling, no fuss. Just mix, shape, slice, and bake.
- Simple Ingredients: You probably already have flour, butter, sugar, and cream. The coconut and lime are the only “extras,” and they’re easy to find.
- Perfect for Brunch or Breakfast: These scones feel fancy enough for a holiday morning but easy enough for a random Tuesday. They pair beautifully with coffee, tea, or even a mimosa.
- Crowd-Pleaser: I brought a batch to a friend’s brunch and they disappeared before the eggs were even done. Kids love them, adults love them, and people who “don’t like coconut” have been converted.
- Unbelievably Delicious: The combination of toasted coconut and fresh lime zest is honestly addictive. The texture is flaky on the outside, soft on the inside, and the glaze adds just the right amount of sweetness.
What makes these different from other scone recipes is the technique. Instead of cutting cold butter into the flour (which, let’s face it, can be messy and annoying), I freeze the butter and grate it directly into the dry ingredients. It sounds weird, but it works perfectly. The grated butter distributes evenly, creating those flaky layers without any guesswork. Plus, the coconut milk adds richness without making the dough heavy. These are the best coconut lime scones I’ve ever had, and I’m not exaggerating.
What Ingredients You Will Need
This recipe uses simple, wholesome ingredients to deliver big flavor and that perfect flaky texture. Most of these are pantry staples, and the few that aren’t are worth the trip to the store.
- All-purpose flour: 2 cups (250g). This gives the scones structure without making them tough. Don’t substitute with whole wheat unless you’re okay with denser scones.
- Granulated sugar: 1/3 cup (65g). Just enough sweetness to balance the tart lime. I’ve tried with coconut sugar too, and it works but makes them darker.
- Baking powder: 1 tablespoon. Make sure it’s fresh. Old baking powder is the #1 reason scones don’t rise properly.
- Salt: 1/2 teaspoon. Don’t skip this. It enhances the coconut and lime flavors.
- Unsalted butter: 1/2 cup (113g), frozen. This is the secret to flaky scones. Freeze it for at least 30 minutes before grating.
- Shredded coconut: 1/2 cup (40g), unsweetened. I prefer unsweetened because it lets the lime shine. If you only have sweetened, reduce the sugar by 2 tablespoons.
- Lime zest: 2 tablespoons. That’s about 2-3 limes. Zest them before juicing—it’s much easier.
- Heavy cream: 1/2 cup (120ml). Plus 2 tablespoons for brushing. The fat in the cream makes the scones tender. You can substitute with full-fat coconut milk for a dairy-free version.
- Large egg: 1. This helps bind the dough and adds richness.
- Vanilla extract: 1 teaspoon. A small addition, but it rounds out the flavors beautifully.
For the Lime Glaze:
- Powdered sugar: 1 cup (120g). Sifted to avoid lumps.
- Fresh lime juice: 2-3 tablespoons. Start with 2 and add more if needed for a drizzly consistency.
- Lime zest: 1 teaspoon, for garnish.
- Toasted coconut: 2 tablespoons, for topping. Toast it in a dry pan over medium heat for 2-3 minutes until golden. Watch it closely—it burns fast.
I recommend using King Arthur Flour for the best texture, and Lundberg organic shredded coconut if you can find it. For the limes, go with organic if possible since you’re using the zest. The flavor is noticeably brighter.
Equipment Needed
You don’t need a lot of fancy gear for these coconut lime scones, which is part of what makes them so approachable. Here’s what you’ll need:
- Box grater: For grating the frozen butter. A cheese grater works too. This is my favorite trick—no pastry cutter required.
- Large mixing bowl: For combining dry ingredients.
- Whisk: To mix flour, sugar, baking powder, and salt evenly.
- Bench scraper or sharp knife: For cutting the scone dough into wedges. A bench scraper is easier on your countertop.
- Baking sheet: Line it with parchment paper for easy cleanup.
- Pastry brush: For brushing cream on top before baking. A silicone one works great.
- Cooling rack: Essential for letting the glaze set properly.
If you don’t have a box grater, you can cut the frozen butter into tiny cubes with a knife. It takes a little longer but works just as well. I’ve also used a food processor with the shredding attachment, and that’s honestly a game-changer if you make scones often. Budget tip: a basic box grater costs about $10 and lasts forever. Don’t overthink the equipment—just use what you have.
Preparation Method
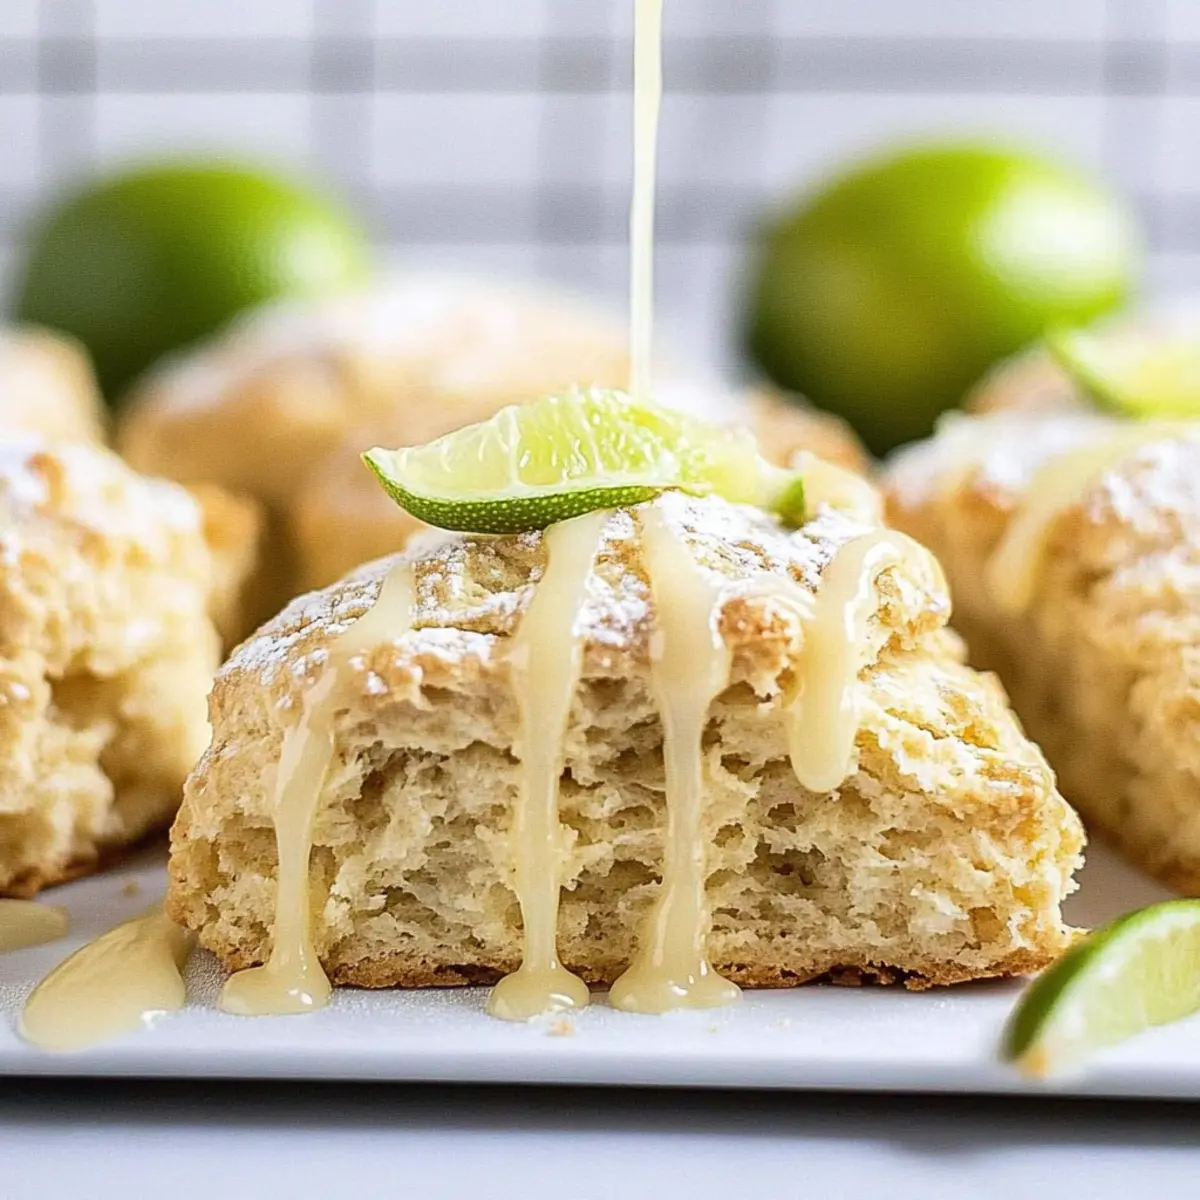
Let’s get to it. This method is simple, but I’ll walk you through every step so you feel confident. The key is to work quickly and keep everything cold.
- Preheat and prep. Preheat your oven to 400°F (200°C). Line a baking sheet with parchment paper. Grate your frozen butter using the large holes of a box grater and place it back in the freezer while you prepare the dry ingredients.
- Mix dry ingredients. In a large bowl, whisk together 2 cups all-purpose flour, 1/3 cup granulated sugar, 1 tablespoon baking powder, and 1/2 teaspoon salt. Make sure the baking powder is evenly distributed—clumps can cause uneven rising.
- Add the butter. Take the grated butter out of the freezer and add it to the flour mixture. Use your fingers or a fork to toss the butter pieces until they’re coated in flour. You want them distributed evenly, not fully incorporated. The mixture should look shaggy with visible butter bits. This is what creates flaky layers.
- Add coconut and zest. Stir in 1/2 cup shredded coconut and 2 tablespoons lime zest. Toss gently to combine. The zest will smell incredible at this point—enjoy it.
- Combine wet ingredients. In a small bowl or measuring cup, whisk together 1/2 cup heavy cream, 1 large egg, and 1 teaspoon vanilla extract. Pour this into the dry mixture all at once. Stir with a fork or spatula just until the dough comes together. It will look a little dry in spots—that’s okay. Overmixing makes scones tough.
- Shape the dough. Turn the dough out onto a lightly floured surface. Gently bring it together with your hands, patting it into a circle about 3/4-inch thick. Don’t knead it—just pat it into shape. If it’s too sticky, dust your hands with a little flour.
- Cut the scones. Use a bench scraper or sharp knife to cut the circle into 8 wedges, like a pizza. Place them on the prepared baking sheet, spacing them about 2 inches apart. They won’t spread much, but they need a little room.
- Brush and bake. Brush the tops of the scones with the remaining 2 tablespoons of heavy cream. This helps them turn golden and adds a little extra richness. Bake for 14-16 minutes, until the edges are lightly golden and the tops are firm to the touch. The kitchen will smell like toasted coconut and lime—pure magic.
- Cool slightly. Let the scones cool on the baking sheet for 5 minutes, then transfer them to a cooling rack. They need to cool for at least 10 minutes before glazing, or the glaze will melt right off.
- Make the glaze. While the scones cool, whisk together 1 cup sifted powdered sugar and 2 tablespoons fresh lime juice. Add an extra tablespoon of juice if you want a thinner glaze. It should be thick but pourable. Stir in a pinch of zest if you’re feeling fancy.
- Glaze and garnish. Drizzle the glaze over the cooled scones. Sprinkle with toasted coconut and a little extra lime zest. Let the glaze set for about 10 minutes before serving.
A quick note: if your dough feels too dry and won’t come together, add a teaspoon of cream at a time until it holds. But if it’s sticky, resist the urge to add more flour—just flour your hands and work surface lightly. Trust the process.
Cooking Tips & Techniques
I’ve made plenty of scone mistakes so you don’t have to. Here are the things I learned the hard way:
Keep everything cold. This is the number one rule of scone-making. Cold butter creates steam pockets as it melts in the oven, which gives you those flaky layers. If your butter softens, pop the dough in the freezer for 10 minutes before baking. I’ve done this many times and it saves the batch every time.
Don’t twist the cutter. If you’re cutting round scones instead of wedges, press the cutter straight down and lift it straight up. Twisting seals the edges and prevents the scones from rising properly. For wedge-shaped scones, a sharp, clean cut is all you need.
Watch the bake time. Ovens vary. I start checking at 13 minutes. The scones should be pale gold on the edges, not brown. Overbaked scones are dry, and no amount of glaze can fix that. If your oven runs hot, reduce the temperature to 375°F (190°C) and bake a minute or two longer.
Toast the coconut. This step is non-negotiable for me. Raw coconut on top of the glaze looks pretty, but toasted coconut adds a nutty depth that takes these scones from good to unforgettable. Toast it in a dry skillet over medium heat, stirring constantly, until it smells amazing and turns golden. It takes about 3 minutes.
Use a microplane for zest. A microplane gives you fine, fluffy zest that blends seamlessly into the dough. A box grater will give you bigger pieces that can be chewy. If you only have a box grater, chop the zest finely with a knife.
I once forgot to add the coconut to the dough and only realized after they were in the oven. I crumbled some toasted coconut on top with the glaze, and honestly, it was still delicious. So don’t stress if you make a mistake—these scones are forgiving.
Variations & Adaptations
One of the best things about this recipe is how easy it is to tweak. Here are some variations I’ve tried and loved:
- Dairy-Free Version: Substitute the heavy cream with full-fat canned coconut milk. Use a dairy-free butter stick (I like Miyoko’s) frozen and grated. The coconut flavor gets even stronger, which is a win in my book.
- Gluten-Free Option: Use a 1:1 gluten-free flour blend that contains xanthan gum. I’ve tested this with King Arthur Measure for Measure, and the texture was surprisingly close to the original. Add an extra tablespoon of cream since gluten-free flours tend to be thirstier.
- Lemon Coconut Scones: Swap the lime zest and juice for lemon. The flavor is brighter and slightly less floral. I make these in spring and they’re always a hit.
- Add White Chocolate: Fold in 1/3 cup of white chocolate chips along with the coconut. The sweetness pairs beautifully with the lime. Just be careful not to overmix—you don’t want the chocolate to melt into the dough.
- Spiced Version: Add 1/2 teaspoon of ground cardamom or ginger to the dry ingredients. It adds a warm, aromatic note that complements the tropical flavors.
I’ve also made these as drop scones when I’m in a hurry. Just scoop the dough onto the baking sheet with a cookie scoop and bake for 12-14 minutes. They won’t be as pretty, but they taste exactly the same. If you’re looking for another easy breakfast treat, try my easy lemon lavender cookies—they have a similar bright, floral vibe.
Serving & Storage Suggestions
These coconut lime scones are best served warm, with the glaze still slightly soft. I love them with a cup of strong black tea or a creamy latte. They also pair beautifully with fresh fruit—try them alongside a fresh strawberry spinach salad for a light brunch spread.
Storage: Keep leftover scones in an airtight container at room temperature for up to 3 days. The glaze might soften a little, but they’ll still taste great. If you stack them, place a piece of parchment between layers to prevent sticking.
Freezing: These freeze beautifully. Freeze the unglazed scones on a baking sheet until solid, then transfer them to a freezer bag. They’ll keep for up to 3 months. To reheat, pop them in a 300°F (150°C) oven for 10 minutes, then glaze while warm. I’ve also frozen the glaze separately in a small zip-top bag—just thaw and drizzle.
Reheating: A 10-second zap in the microwave works in a pinch, but the oven gives you that fresh-baked texture back. If you’re reheating glazed scones, the microwave is actually better because the oven can make the glaze sticky.
One thing I’ve noticed: the coconut flavor deepens overnight. Day-old scones taste even more coconut-forward, which is a fun surprise. So don’t feel like you have to eat them all in one sitting (though I won’t judge if you do).
Nutritional Information & Benefits
Here’s the approximate nutritional breakdown for one scone (with glaze):
- Calories: 320
- Fat: 18g
- Carbohydrates: 38g
- Protein: 4g
- Fiber: 2g
- Sugar: 18g
These numbers are estimates and will vary based on your specific ingredients. The coconut adds healthy medium-chain triglycerides (MCTs), which are a quick source of energy. Lime zest is packed with antioxidants and vitamin C, which supports immune health. And while these aren’t exactly health food, they’re made with real ingredients—no preservatives, no artificial flavors, no weird additives.
If you’re watching your sugar intake, you can reduce the glaze or skip it entirely. The scones are still delicious on their own, especially with a little butter and a sprinkle of flaky salt. For a lower-carb option, try using almond flour and a sugar substitute, though the texture will be denser.
I personally love that these scones feel indulgent without being over-the-top. They’re a treat, for sure, but they’re made in my own kitchen with ingredients I trust. That counts for something, right?
Conclusion
These coconut lime scones are the kind of recipe that makes you look forward to weekend mornings. They’re bright, buttery, and just sweet enough—with a texture that’s flaky and tender in all the right ways. Whether you’re serving them for a special brunch or just treating yourself on a quiet Tuesday, they never disappoint.
I’d love to hear how yours turn out. Did you add white chocolate? Try the lemon version? Forget the coconut like I did and improvise? Drop a comment below and let me know. And if you share them on social media, tag me—I always love seeing your baking wins.
If you enjoyed this recipe, you might also love my easy homemade jalapeño salt for adding a little kick to your next meal, or the creamy crockpot Tuscan chicken for a cozy dinner that practically makes itself. Happy baking, friends!
Frequently Asked Questions
Can I use sweetened shredded coconut?
Yes, but reduce the sugar in the dough by 2 tablespoons to balance the sweetness. The scones will be slightly sweeter and a little less chewy, but they’ll still taste great.
Why did my scones turn out dry?
Dry scones usually come from overmixing the dough or overbaking. Mix just until the ingredients come together, and start checking for doneness at 13 minutes. Also, make sure your butter is properly distributed—if it melts into the flour, you lose the steam pockets that keep scones tender.
Can I make the dough ahead of time?
Absolutely. Shape the scones, place them on a parchment-lined baking sheet, and refrigerate for up to 24 hours. You can even freeze them for up to 3 months. Bake straight from frozen, adding 2-3 minutes to the bake time.
Can I use bottled lime juice?
I don’t recommend it. Fresh lime juice has a bright, clean flavor that bottled juice just can’t replicate. Plus, you need the zest for the dough and garnish, so you’ll need fresh limes anyway.
How do I toast coconut without burning it?
Use a dry skillet over medium heat and stir constantly. It only takes 2-3 minutes. The moment it starts turning golden, remove it from the heat—it will continue to toast from the residual heat. Watch it like a hawk; burnt coconut happens fast and tastes bitter.
Pin This Recipe!

Coconut Lime Scones: Easy Tropical Flaky Treat
These tender, buttery scones are packed with toasted coconut and bright lime zest, with a flaky texture and a sweet lime glaze. They’re quick to make, forgiving, and perfect for brunch or breakfast.
- Prep Time: 15 minutes
- Cook Time: 16 minutes
- Total Time: 31 minutes
- Yield: 8 servings 1x
- Category: Breakfast
- Cuisine: American
Ingredients
- 2 cups (250g) all-purpose flour
- 1/3 cup (65g) granulated sugar
- 1 tablespoon baking powder
- 1/2 teaspoon salt
- 1/2 cup (113g) unsalted butter, frozen
- 1/2 cup (40g) unsweetened shredded coconut
- 2 tablespoons lime zest
- 1/2 cup (120ml) heavy cream, plus 2 tablespoons for brushing
- 1 large egg
- 1 teaspoon vanilla extract
- 1 cup (120g) powdered sugar, sifted
- 2–3 tablespoons fresh lime juice
- 1 teaspoon lime zest (for garnish)
- 2 tablespoons toasted coconut (for topping)
Instructions
- Preheat oven to 400°F (200°C). Line a baking sheet with parchment paper. Grate frozen butter using the large holes of a box grater and place back in the freezer.
- In a large bowl, whisk together flour, sugar, baking powder, and salt.
- Add grated butter to flour mixture and toss with fingers or a fork until coated and shaggy with visible butter bits.
- Stir in shredded coconut and lime zest.
- In a small bowl, whisk together 1/2 cup heavy cream, egg, and vanilla. Pour into dry mixture and stir just until dough comes together (it will look a little dry).
- Turn dough onto a lightly floured surface. Gently pat into a 3/4-inch thick circle. Do not knead.
- Cut circle into 8 wedges and place on prepared baking sheet, spacing 2 inches apart.
- Brush tops with remaining 2 tablespoons heavy cream. Bake for 14-16 minutes until edges are lightly golden and tops are firm.
- Cool on baking sheet for 5 minutes, then transfer to a cooling rack. Cool at least 10 minutes before glazing.
- Whisk together sifted powdered sugar and 2 tablespoons lime juice until thick but pourable. Add more juice if needed.
- Drizzle glaze over cooled scones. Sprinkle with toasted coconut and extra lime zest. Let glaze set for 10 minutes before serving.
Notes
Keep everything cold for flaky layers. Do not overmix. For dairy-free, use full-fat coconut milk and dairy-free butter. For gluten-free, use a 1:1 gluten-free flour blend. Scones can be frozen unglazed for up to 3 months.
Nutrition
- Serving Size: 1 scone
- Calories: 320
- Sugar: 18
- Sodium: 220
- Fat: 18
- Saturated Fat: 11
- Carbohydrates: 38
- Fiber: 2
- Protein: 4
Keywords: coconut lime scones, tropical scones, easy scone recipe, flaky scones, brunch recipe



