Love this? Save it for later!
Share the inspiration with your friends
I was staring at a half-empty bag of baby carrots, a single zucchini that had been rolling around the crisper drawer for way too long, and a red onion I honestly bought for a recipe I never made. It was one of those weeknights where the main dish was ready—some simple grilled chicken—and the side dish was… nothing. I needed something fast, something that didn’t require a trip to the store, and something that would actually taste good. That’s when I grabbed the balsamic vinegar and basically dared myself to make something out of nothing. I tossed everything onto a sheet pan, drizzled it with olive oil and that tangy vinegar, and hoped for the best. Twenty minutes later, I was standing over the pan in the kitchen, eating vegetables straight off the tray like I hadn’t been fed in days. The edges were caramelized, the balsamic had turned into this sticky, sweet-tart glaze that clung to every piece, and honestly? I couldn’t believe I’d almost thrown those sad vegetables away. That accidental dinner side turned into a recipe I now make on purpose, all the time. These easy balsamic glazed roasted vegetables are the side dish that saves meal prep, rescues leftover veggies, and makes you actually look forward to eating your greens.
Why You’ll Love This Recipe
Let me tell you why this recipe has earned a permanent spot in my weekly rotation. It’s not just another roasted vegetable recipe—it’s the one that converts vegetable skeptics. I’ve tested this method more times than I can count, tweaking the temperature, the cut sizes, and the glaze ratio until it was absolutely foolproof.
- Quick & Easy: From cutting board to table in under 20 minutes. Seriously. This is the fastest way to get a vegetable side dish on the table that actually tastes like you tried.
- Simple Ingredients: You probably have everything in your kitchen right now. Balsamic vinegar, olive oil, salt, pepper, and whatever vegetables are hanging out in your fridge.
- Perfect for Meal Prep: These veggies reheat beautifully and taste amazing cold on salads or grain bowls. I’ve been known to make a double batch just to have them on hand all week.
- Crowd-Pleaser: I brought these to a potluck once, and someone asked for the recipe before they even finished their first serving. Kids love the sweet glaze, adults love the caramelized edges.
- Unbelievably Delicious: The balsamic vinegar reduces down into this almost candy-like coating that makes every single vegetable taste like a treat. Even my friend who “doesn’t do cooked vegetables” asked for seconds.
What makes this recipe different from all the other roasted vegetable recipes out there? It’s the glaze-to-vegetable ratio. Most recipes either drown the veggies in liquid (making them soggy) or use way too little balsamic (so it evaporates before it can do its magic). I found the sweet spot—enough balsamic to create a glossy, sticky coating without turning your vegetables into a vinegar bath. And the high heat? That’s the real secret. It caramelizes the natural sugars in the vegetables and the balsamic at the same time, creating layers of flavor that taste way more complex than the ingredient list suggests. This isn’t just a side dish—it’s the kind of recipe that makes a simple weeknight dinner feel like something special.
What Ingredients You Will Need
This recipe is incredibly flexible, which is honestly my favorite thing about it. You can use whatever vegetables you have on hand, and it will still turn out delicious. Here’s what I typically reach for:
For the Vegetables
- 1 medium zucchini, cut into 1-inch chunks (don’t cut them too small or they’ll get mushy)
- 1 cup baby carrots (or 2 large carrots, peeled and cut into 1-inch pieces)
- 1 red bell pepper, cut into 1-inch pieces (orange or yellow works great too)
- 1 red onion, cut into 1-inch wedges (keep the layers intact so they don’t fall apart)
- 1 cup broccoli florets (make sure they’re roughly the same size for even cooking)
- 1 cup cherry tomatoes (optional, but they burst and create the most amazing little pools of sweet tomato juice)
For the Balsamic Glaze
- 3 tablespoons balsamic vinegar (I prefer a good quality one—not the super cheap stuff, but you don’t need the expensive aged kind either. I like the Colavita brand for everyday cooking)
- 2 tablespoons olive oil (extra virgin is fine, but regular olive oil works too)
- 1 tablespoon honey or maple syrup (this balances the acidity of the balsamic and helps create that sticky glaze)
- 2 cloves garlic, minced (fresh is best, but 1/2 teaspoon of garlic powder works in a pinch)
- 1/2 teaspoon salt (I use kosher salt—if you’re using table salt, reduce to 1/4 teaspoon)
- 1/4 teaspoon black pepper
- 1/2 teaspoon dried oregano or Italian seasoning (optional, but it adds a nice herby note)
Ingredient Tip: For the best texture, make sure your vegetables are cut into uniform pieces. If some are bigger and some are smaller, the smaller ones will burn before the larger ones are cooked through. Also, don’t overcrowd the pan—if the vegetables are piled on top of each other, they’ll steam instead of roast, and you’ll lose that beautiful caramelization. If you’re making a big batch, use two sheet pans or roast in batches.
Substitution Guidance: You can swap in almost any vegetable here. Cauliflower, asparagus, green beans, mushrooms, and sweet potatoes all work beautifully. For a low-carb option, skip the honey and use a sugar-free maple syrup substitute. And if you’re out of balsamic vinegar, you can use a mix of red wine vinegar and a tiny bit of brown sugar—it won’t be exactly the same, but it’ll still be delicious.
Equipment Needed
You don’t need any fancy equipment for this recipe, which is part of why I love it. Here’s what you’ll need:
- Large sheet pan (a half-sheet pan is perfect—if you don’t have one, any rimmed baking sheet will work)
- Parchment paper or silicone baking mat (not strictly necessary, but it makes cleanup so much easier and prevents sticking)
- Chef’s knife (a sharp one makes cutting vegetables so much less frustrating)
- Cutting board
- Small bowl (for mixing the glaze)
- Whisk or fork (for mixing the glaze)
- Measuring spoons
Budget-Friendly Tip: If you don’t have a silicone baking mat, parchment paper is cheap and works just as well. And honestly, you can skip the lining altogether—just spray the pan with non-stick spray and you’ll be fine. The vegetables might stick a tiny bit, but a good spatula will get them off without too much trouble.
Preparation Method
This recipe comes together so fast that you’ll barely have time to clean up before dinner is ready. Here’s how to do it:
- Preheat your oven to 425°F (220°C). This high heat is crucial—it’s what gives the vegetables those beautiful caramelized edges. Don’t skip the preheat! While the oven is heating up, line your sheet pan with parchment paper or a silicone mat.
- Prep all your vegetables. Wash and dry them thoroughly—wet vegetables won’t roast properly. Cut everything into roughly 1-inch pieces. For the zucchini, cut it in half lengthwise first, then into half-moons about 1 inch thick. For the broccoli, cut the florets so they’re all similar in size. The cherry tomatoes can stay whole—they’ll burst in the oven and create the most amazing little pockets of sweetness.
- Make the balsamic glaze. In a small bowl, whisk together the balsamic vinegar, olive oil, honey (or maple syrup), minced garlic, salt, pepper, and dried oregano if you’re using it. Taste it—it should be tangy, slightly sweet, and well-balanced. If it’s too sharp, add a tiny bit more honey.
- Toss the vegetables with the glaze. Place all the cut vegetables in a large bowl. Pour the glaze over them and toss gently with your hands or a spatula until everything is evenly coated. Don’t be afraid to get in there—your hands are the best tool for making sure every piece gets some glaze.
- Spread the vegetables on the sheet pan. Arrange them in a single layer, making sure they’re not touching each other too much. If they’re crowded, they’ll steam instead of roast. Give them some space—they need room to breathe! If you have too many vegetables for one pan, use two pans or roast in batches.
- Roast for 15-20 minutes. Place the pan in the preheated oven and roast for 15 minutes. At the 10-minute mark, give the pan a shake or use a spatula to flip the vegetables. This ensures even browning. The vegetables are done when they’re tender on the inside and caramelized on the edges—the zucchini should have some golden-brown spots, the broccoli should be slightly charred, and the tomatoes should be bursting.
- Optional: Broil for 1-2 minutes. If you want extra caramelization, switch the oven to broil for the last 1-2 minutes. Watch it closely—broiling can go from perfect to burnt in seconds! This step is totally optional but gives you those gorgeous, slightly blackened edges that look so professional.
- Let them rest for 2 minutes. Remove the pan from the oven and let the vegetables sit for a couple of minutes. This allows the glaze to set and become even stickier. The aroma at this point is absolutely intoxicating—sweet, tangy, and slightly smoky.
- Serve immediately. Transfer the vegetables to a serving platter or directly to plates. If you want, drizzle a little extra balsamic glaze over the top (the kind you buy in a bottle, not the raw vinegar—it’s thicker and sweeter). A sprinkle of fresh parsley or basil adds a nice fresh finish.
Sensory Cue: When the vegetables are done, the balsamic glaze should be thick and syrupy, clinging to every piece. The edges of the vegetables should be dark brown (not black!) and slightly crispy. The kitchen will smell like a fancy restaurant—sweet, tangy, and deeply savory.
Cooking Tips & Techniques
I’ve made this recipe probably fifty times at this point, and I’ve learned a few things the hard way. Here are my best tips for getting it perfect every time:
Don’t skip the high heat. I tried roasting these at 375°F once because I was cooking something else at that temperature, and the vegetables came out sad and soggy. The 425°F heat is non-negotiable—it’s what creates that caramelized exterior while keeping the inside tender. If your oven runs hot, check the vegetables at the 12-minute mark.
Cut vegetables to the same size. This is probably the most important tip I can give you. If your broccoli florets are huge and your zucchini pieces are tiny, the zucchini will burn before the broccoli is cooked. Take the extra 30 seconds to make sure everything is roughly the same size. Your future self will thank you.
Pat your vegetables dry. I know it seems like an extra step, but wet vegetables steam instead of roast. After washing them, lay them out on a clean kitchen towel or paper towels and pat them dry. This helps the glaze stick better and promotes better browning.
Use parchment paper. The balsamic glaze can get sticky and caramelize onto the pan, making cleanup a nightmare. Parchment paper or a silicone mat makes cleanup almost effortless. Trust me on this one—I’ve scrubbed enough sheet pans to know.
Don’t overcrowd the pan. This is the mistake I made the most when I first started roasting vegetables. If the vegetables are piled on top of each other, they release steam and end up boiling instead of roasting. Give them space! If you need to, use two pans. It’s worth the extra dish.
Flip halfway through. Set a timer for 10 minutes and flip the vegetables when it goes off. This ensures even browning on all sides. I use a thin metal spatula for this—it slides under the vegetables easily without breaking them apart.
My biggest failure: The first time I made these, I used way too much balsamic vinegar. I thought, “More vinegar = more flavor,” right? Wrong. The vegetables were swimming in liquid and came out of the oven soggy and overwhelmingly tangy. The glaze is meant to coat the vegetables, not drown them. Stick to the measurements in the recipe, and you’ll get that perfect sticky coating every time.
Variations & Adaptations
One of the best things about this recipe is how adaptable it is. Here are some of my favorite variations:
Seasonal Vegetable Swaps
In the spring, I use asparagus, snap peas, and radishes. In the summer, it’s all about zucchini, bell peppers, and cherry tomatoes from the farmer’s market. Fall calls for butternut squash, Brussels sprouts, and sweet potatoes (just cut them smaller so they cook in time). Winter is perfect for root vegetables like parsnips, turnips, and carrots. The balsamic glaze works beautifully with any combination.
Dietary Adaptations
Vegan: This recipe is naturally vegan if you use maple syrup instead of honey. The maple syrup adds a slightly different flavor—a little more earthy and complex—but it’s absolutely delicious.
Low-Carb/Keto: Skip the honey or maple syrup and use a sugar-free sweetener like monk fruit or erythritol. The balsamic vinegar itself has minimal carbs, so the main sugar source is the sweetener. You can also add more low-carb vegetables like cauliflower, asparagus, and mushrooms.
Gluten-Free: This recipe is naturally gluten-free, so no changes needed. Just make sure your balsamic vinegar doesn’t have any added ingredients that contain gluten (most don’t, but it’s always good to check).
Flavor Twists
Spicy Version: Add 1/4 teaspoon of red pepper flakes to the glaze for a little heat. The spicy-sweet combination is absolutely addictive.
Herb Lover’s Version: Toss the roasted vegetables with fresh herbs right before serving—basil, parsley, thyme, or rosemary all work beautifully. The fresh herbs add a brightness that contrasts with the rich, tangy glaze.
Cheesy Version: Sprinkle the vegetables with grated Parmesan or crumbled feta cheese during the last 2 minutes of roasting. The cheese melts slightly and gets a little crispy—it’s incredible.
Mediterranean Version: Add a handful of Kalamata olives and some crumbled feta after roasting. Drizzle with a little more olive oil and serve with warm pita bread. It’s like a deconstructed Greek salad, but warm and roasted.
Personal Variation I Love
My favorite way to make these is with a mix of Brussels sprouts, sweet potatoes, and red onion. I cut the sweet potatoes into small cubes (about 1/2 inch) so they cook faster, and I halve the Brussels sprouts. The sweetness of the sweet potatoes pairs perfectly with the tangy balsamic glaze, and the Brussels sprouts get these amazing crispy edges. I add a sprinkle of toasted pecans on top right before serving for a little crunch. It’s become my go-to holiday side dish, honestly.
Serving & Storage Suggestions
These roasted vegetables are incredibly versatile when it comes to serving. Here’s how I like to enjoy them:
Serving Temperature: Serve them hot out of the oven for the best texture—the edges are crispy, the glaze is sticky, and everything is perfectly tender. They’re also surprisingly good at room temperature, which makes them perfect for potlucks and picnics. I’ve even eaten them cold straight from the fridge as a snack, and they’re still delicious.
Presentation Ideas: Transfer the vegetables to a large, shallow serving platter so they’re spread out and look abundant. Drizzle with a little extra balsamic glaze (the thick, syrupy kind from a bottle) and sprinkle with fresh herbs. If you’re serving them for a dinner party, arrange them in a pattern—rows of different vegetables look really beautiful.
What to Serve With Them: These vegetables go with almost anything. I love them alongside creamy lemon dill salmon pasta for a complete meal that feels fancy but comes together in under 30 minutes. They’re also perfect with grilled chicken, steak, or fish. For a vegetarian meal, serve them over quinoa or couscous with a dollop of hummus or tzatziki. And if you’re looking for a cozy, comforting meal, try them alongside cozy hearty white pasta e fagioli soup for a soup-and-salad-style dinner that’s incredibly satisfying.
Storage Instructions: Store any leftovers in an airtight container in the refrigerator for up to 4 days. The vegetables will soften slightly as they sit, but the flavor actually gets better—the balsamic glaze continues to penetrate the vegetables, making them even more flavorful.
Reheating Methods: The best way to reheat these is in the oven or air fryer. Spread them on a sheet pan and reheat at 400°F for 5-7 minutes, or until they’re hot and the edges are crispy again. You can also reheat them in a skillet over medium-high heat for 3-4 minutes. I don’t recommend the microwave—it makes them soggy and the glaze loses its sticky texture.
Freezer Instructions: These vegetables freeze surprisingly well. Let them cool completely, then spread them on a sheet pan and freeze until solid. Transfer to a freezer-safe bag or container and freeze for up to 3 months. To reheat, spread them on a sheet pan and bake at 400°F for 10-12 minutes, or until hot and crispy. No need to thaw first.
Flavor Development: The flavors in this dish actually deepen and meld together after a day in the fridge. The vegetables absorb more of the balsamic glaze, and the garlic mellows out. I honestly sometimes make these a day ahead on purpose because I prefer the flavor on day two.
Nutritional Information & Benefits
These roasted vegetables are as good for you as they are delicious. Here’s a rough nutritional breakdown for a serving (about 1 cup of vegetables):
| Nutrient | Amount per Serving |
|---|---|
| Calories | 120-150 |
| Total Fat | 7g |
| Carbohydrates | 15g |
| Fiber | 4g |
| Sugar | 8g |
| Protein | 3g |
| Vitamin A | 120% DV |
| Vitamin C | 80% DV |
Health Benefits: This dish is packed with vitamins, minerals, and antioxidants. The balsamic vinegar contains polyphenols that support heart health and digestion. The olive oil provides healthy monounsaturated fats that help your body absorb the fat-soluble vitamins from the vegetables. And the variety of vegetables means you’re getting a wide range of nutrients—vitamin A from the carrots and bell peppers, vitamin C from the broccoli, and fiber from everything.
Dietary Considerations: This recipe is naturally gluten-free, dairy-free, and vegan (if you use maple syrup instead of honey). It’s also low in calories and high in fiber, making it a great option for weight management. The main potential allergens are the olive oil (some people are sensitive to olives) and the garlic, but these are uncommon.
My Personal Take: I love that this recipe makes vegetables feel like a treat, not a chore. It’s proof that healthy eating doesn’t have to be boring or complicated. When I’m trying to eat more vegetables, this is the recipe I turn to because it actually makes me excited about eating them. And honestly, any recipe that gets me to eat more broccoli is a winner in my book.
Conclusion
These easy balsamic glazed roasted vegetables have become my go-to side dish for pretty much everything. They’re fast enough for a busy weeknight, impressive enough for a dinner party, and flexible enough to use up whatever vegetables are languishing in your fridge. The balsamic glaze transforms simple vegetables into something special—sweet, tangy, caramelized, and utterly addictive.
What I love most about this recipe is how forgiving it is. You can swap in different vegetables, adjust the seasoning, or add your own twists, and it will still turn out delicious. It’s the kind of recipe that builds confidence in the kitchen because it’s so hard to mess up. And when you pull that sheet pan out of the oven and see those beautifully caramelized, glossy vegetables, you’ll feel like a real chef.
I’d love to hear how these turn out for you! Did you use my exact combination of vegetables, or did you create your own mix? Did you add any fun twists? Drop a comment below and let me know—I read every single one, and I love getting inspiration from your creations. And if you loved this recipe, share it with a friend who needs a new side dish in their rotation. Happy roasting!
Frequently Asked Questions
Can I use frozen vegetables for this recipe?
You can, but I don’t recommend it for the best results. Frozen vegetables contain more moisture, which means they’ll steam instead of roast and won’t get those beautiful caramelized edges. If you’re in a pinch, thaw the vegetables completely and pat them very dry before tossing with the glaze. You might also need to add 5-7 minutes to the roasting time.
How do I prevent the vegetables from getting soggy?
The two biggest culprits for soggy roasted vegetables are overcrowding the pan and not using high enough heat. Make sure your vegetables are in a single layer with space between them, and roast at 425°F. Also, pat your vegetables dry before adding the glaze—excess moisture is the enemy of caramelization.
Can I make the balsamic glaze ahead of time?
Absolutely! You can make the glaze up to a week in advance and store it in an airtight container in the refrigerator. Just give it a good whisk before using, as the olive oil might separate slightly. If the honey has crystallized, let the glaze sit at room temperature for 10 minutes or microwave it for 10-15 seconds.
What’s the best way to reheat leftovers without losing the texture?
The oven or air fryer is your best bet. Spread the vegetables on a sheet pan and reheat at 400°F for 5-7 minutes. The high heat will crisp up the edges again and restore that caramelized texture. If you’re in a hurry, you can use a skillet over medium-high heat for 3-4 minutes, stirring occasionally.
Can I add protein to make this a complete meal?
Definitely! This is one of my favorite ways to turn these vegetables into a full meal. Toss in some chickpeas or tofu before roasting for a vegetarian option. Or serve the roasted vegetables over quinoa or couscous with grilled chicken, shrimp, or salmon on top. The balsamic glaze pairs beautifully with almost any protein. I especially love these vegetables alongside easy crispy Baja fish taco bowls for a colorful, flavorful dinner that feels like a celebration.
Pin This Recipe!
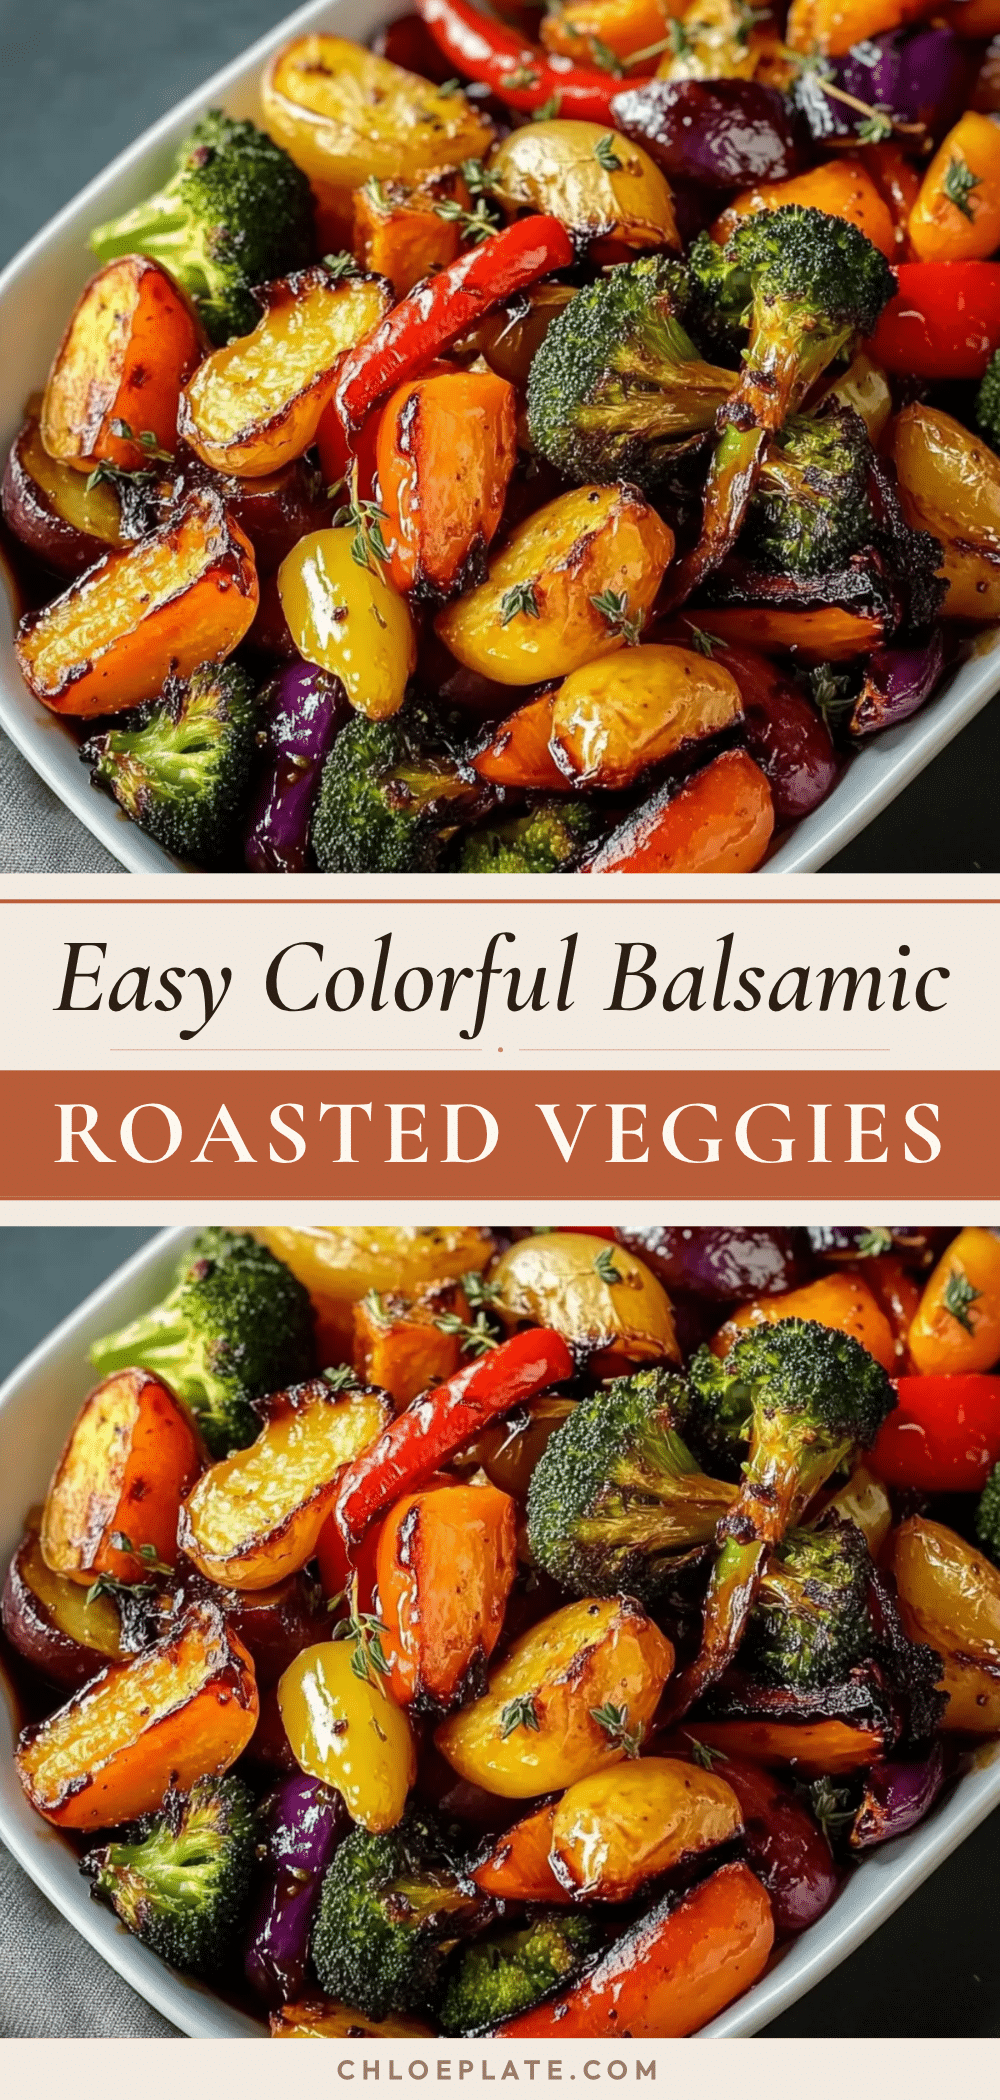
Easy Balsamic Glazed Roasted Vegetables: Best 20-Minute Side
These easy balsamic glazed roasted vegetables are the side dish that saves meal prep, rescues leftover veggies, and makes you actually look forward to eating your greens. Ready in under 20 minutes with simple ingredients.
- Prep Time: 10 minutes
- Cook Time: 20 minutes
- Total Time: 30 minutes
- Yield: 4 servings 1x
- Category: Side Dish
- Cuisine: American
Ingredients
- 1 medium zucchini, cut into 1-inch chunks
- 1 cup baby carrots (or 2 large carrots, peeled and cut into 1-inch pieces)
- 1 red bell pepper, cut into 1-inch pieces
- 1 red onion, cut into 1-inch wedges
- 1 cup broccoli florets
- 1 cup cherry tomatoes (optional)
- 3 tablespoons balsamic vinegar
- 2 tablespoons olive oil
- 1 tablespoon honey or maple syrup
- 2 cloves garlic, minced
- 1/2 teaspoon salt (kosher salt preferred; reduce to 1/4 teaspoon if using table salt)
- 1/4 teaspoon black pepper
- 1/2 teaspoon dried oregano or Italian seasoning (optional)
Instructions
- Preheat your oven to 425°F (220°C). Line a sheet pan with parchment paper or a silicone baking mat.
- Wash and dry all vegetables thoroughly. Cut zucchini into half-moons about 1 inch thick, carrots into 1-inch pieces, bell pepper into 1-inch pieces, onion into 1-inch wedges, and broccoli into similar-sized florets. Leave cherry tomatoes whole.
- In a small bowl, whisk together balsamic vinegar, olive oil, honey (or maple syrup), minced garlic, salt, pepper, and dried oregano (if using). Taste and adjust sweetness if needed.
- Place all cut vegetables in a large bowl. Pour the glaze over them and toss gently with your hands or a spatula until evenly coated.
- Spread the vegetables in a single layer on the prepared sheet pan, ensuring they are not overcrowded. Use two pans if necessary.
- Roast for 15-20 minutes. At the 10-minute mark, shake the pan or flip the vegetables with a spatula for even browning. Vegetables are done when tender inside and caramelized on the edges.
- Optional: For extra caramelization, switch the oven to broil for the last 1-2 minutes, watching closely to avoid burning.
- Remove from oven and let rest for 2 minutes to allow the glaze to set.
- Serve immediately, optionally drizzling with extra balsamic glaze and garnishing with fresh parsley or basil.
Notes
For best texture, cut vegetables into uniform 1-inch pieces and pat them dry before glazing. Do not overcrowd the pan; use two pans if needed. The high heat (425°F) is crucial for caramelization. Leftovers can be stored in an airtight container in the refrigerator for up to 4 days. Reheat in the oven or air fryer at 400°F for 5-7 minutes to restore crispness.
Nutrition
- Serving Size: 1 cup
- Calories: 135
- Sugar: 8
- Sodium: 300
- Fat: 7
- Saturated Fat: 1
- Carbohydrates: 15
- Fiber: 4
- Protein: 3
Keywords: balsamic glazed roasted vegetables, easy roasted vegetables, 20-minute side dish, healthy side dish, vegetable side dish, balsamic vegetables, sheet pan vegetables



