Love this? Save it for later!
Share the inspiration with your friends
I was staring into the pantry, trying to avoid the pile of laundry, when the idea hit me. A half-empty jar of peanut butter, a bag of chocolate chips, and a serious craving for something chewy. Not cake, not cookies—something in between. I grabbed the mixing bowl without overthinking it, which is usually when the best stuff happens.
The first batch came out of the oven looking a little too pale, so I slid them back in for another three minutes. That extra time made all the difference—golden edges, soft centers, and chocolate that melted into little pools on top. My husband walked in mid-bite and asked if I was hiding them from him. I said no, but honestly? I thought about it.
These blondies have become my go-to when I need something sweet without a whole production. They come together in one bowl, no mixer required, and they’re ready in about 20 minutes. No chilling dough, no creaming butter and sugar for ages. Just stir, pour, and bake. The kind of recipe that feels like cheating but tastes like you tried.
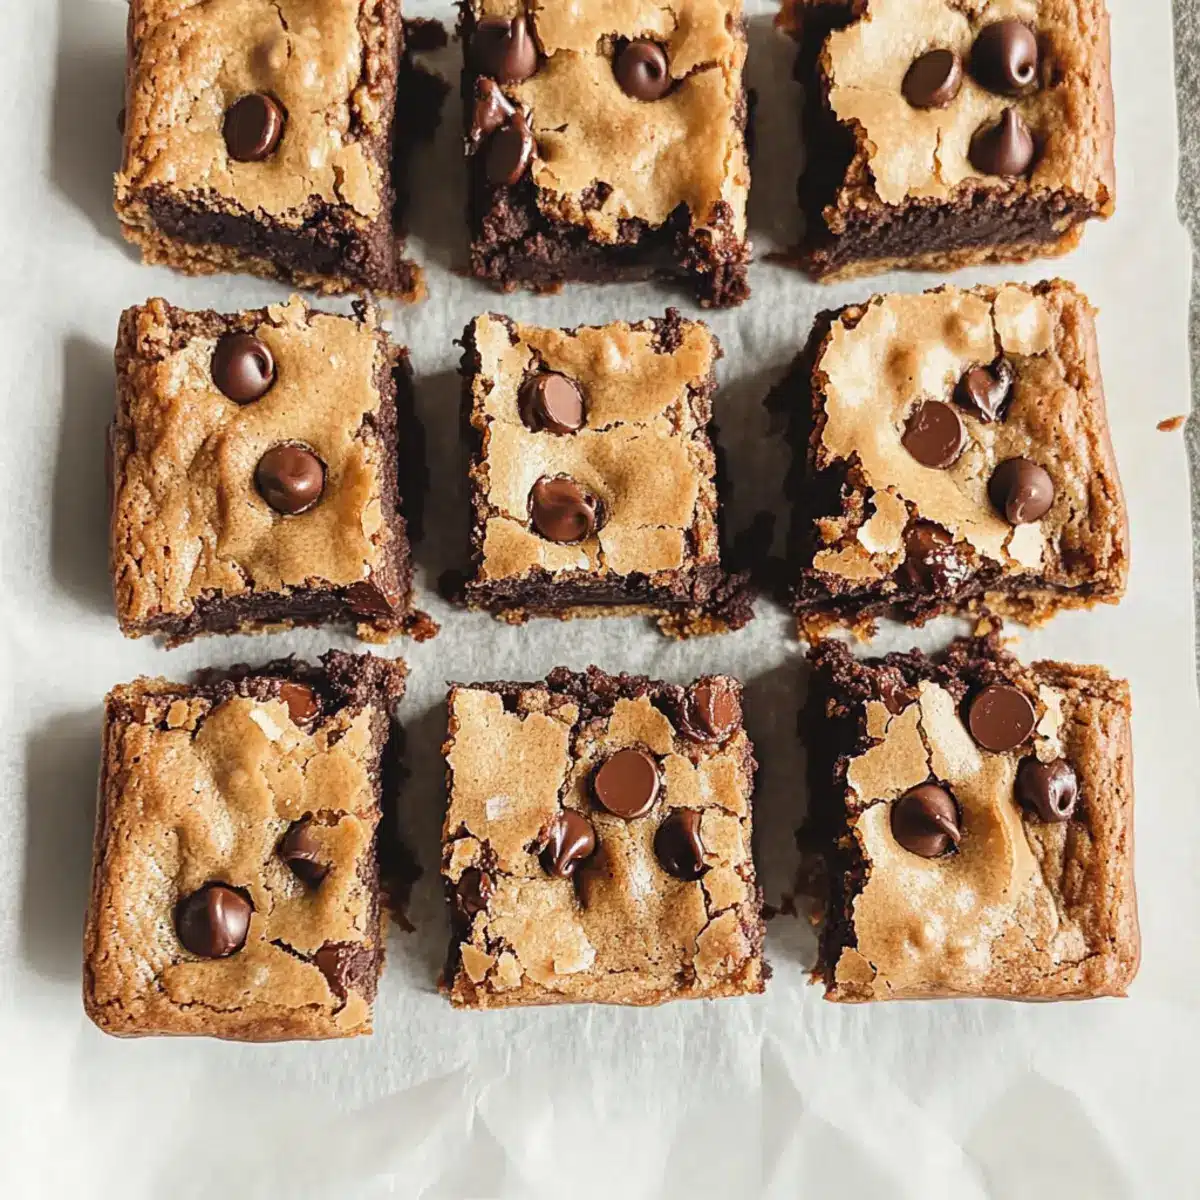
If you love the combination of peanut butter and chocolate (and really, who doesn’t), these gooey chocolate chip peanut butter blondies are about to become a regular in your kitchen. They’re rich without being heavy, sweet but balanced, and they stay soft for days—if they last that long.
Why You’ll Love This Recipe
I tested this recipe four times before I got it exactly right. The first batch was too dry. The second was too flat. The third was close, but the peanut butter flavor got lost. This version hits every note—chewy edges, fudgy centers, and that unmistakable peanut butter taste that pairs perfectly with melty chocolate chips.
- Quick & Easy: From start to finish, these blondies take about 20 minutes. No stand mixer, no complicated steps, no waiting for butter to soften.
- Simple Ingredients: You probably have everything you need right now. Peanut butter, sugar, butter, an egg, flour, and chocolate chips. That’s it.
- Perfect for Last-Minute Cravings: When you need dessert fast—like, right now—this is the recipe. Great for unexpected guests, potlucks, or a Tuesday night treat.
- Crowd-Pleaser: I’ve brought these to gatherings and watched them disappear before the brownies. People love them, and nobody guesses how simple they are.
- Unbelievably Gooey: The texture is what sets these apart. Soft, slightly underbaked centers with crispy edges. That perfect blondie texture that keeps you coming back for “just one more.”
What makes these different from other peanut butter blondies? It’s the ratio. I played with the butter-to-peanut-butter balance until the dough was just right—not too sticky, not too dry. The result is a blondie that holds its shape but stays tender in the middle. Plus, I add a handful of chocolate chips right on top before baking, so every bite has that melty chocolate moment.
These blondies are the kind of dessert that makes you close your eyes after the first bite. They’re comfort food at its simplest—no fuss, no frills, just pure peanut butter chocolate goodness.
What Ingredients You Will Need
This recipe uses simple, everyday ingredients to create something special. No fancy extracts or hard-to-find items. Just pantry staples that come together beautifully.
- Unsalted butter, melted (½ cup / 1 stick) — I use salted butter in a pinch and just skip the added salt. But unsalted gives you more control over the flavor.
- Creamy peanut butter (⅔ cup) — Go with the regular kind, not natural or oily. The stabilizers in standard peanut butter help the blondies hold their texture. I prefer Skippy or Jif for baking.
- Light brown sugar, packed (1 cup) — Brown sugar gives these blondies their chewiness and deep caramel flavor. Don’t skip it or substitute granulated sugar—the texture won’t be the same.
- Granulated sugar (¼ cup) — A little white sugar helps with spreading and gives the edges a slight crispness.
- Large egg (1, room temperature) — Cold eggs can seize the melted butter, so let yours sit out for 15 minutes first. If you forget, place the egg in a bowl of warm water for 5 minutes.
- Vanilla extract (1 teaspoon) — Pure vanilla makes a difference here. Imitation works in a pinch, but the flavor won’t be as rich.
- All-purpose flour (1 cup) — Spoon and level your flour. Scooping directly from the bag packs it down and gives you too much, making dry blondies.
- Baking soda (½ teaspoon) — Helps the blondies rise just a bit so they’re not dense bricks.
- Salt (¼ teaspoon) — Enhances the peanut butter and chocolate flavors. If using salted butter, omit this.
- Semi-sweet chocolate chips (1 cup, plus extra for topping) — I like Ghirardelli or Guittard for baking. They hold their shape better and melt more evenly than generic brands. Reserve about ¼ cup to press into the top before baking.
Substitution notes: For a dairy-free version, use vegan butter or coconut oil (solid, not melted). For gluten-free, swap the all-purpose flour with a 1:1 gluten-free baking blend. I’ve tried both, and they work well—just don’t overmix the batter.
Equipment Needed
You don’t need much for these blondies, which is part of their charm. Here’s what you’ll need:
- 8×8-inch baking pan — Glass, metal, or ceramic all work. I prefer metal because it gives slightly crispier edges. If using glass, reduce the oven temperature by 25°F.
- Mixing bowl — One medium bowl is all you need. No separating wet and dry ingredients here.
- Whisk or wooden spoon — A whisk works great for smoothing out the peanut butter and sugar mixture. A wooden spoon is fine too.
- Rubber spatula — For scraping every last bit of batter into the pan. Don’t waste a single drop.
- Parchment paper — This is optional but highly recommended. It makes lifting the blondies out of the pan so much easier. Leave overhang on two sides for handles.
- Measuring cups and spoons — Accurate measurements matter in baking. Use dry measuring cups for the flour and sugar, liquid measuring cups for the melted butter.
If you don’t have an 8×8 pan, a 9×9 will work too. Just check them a few minutes early since they’ll bake faster in a larger pan. And if you’re using a dark nonstick pan, reduce the oven temperature by 25°F to prevent over-browning.
Preparation Method
Preheat your oven to 350°F (175°C). Line your 8×8 baking pan with parchment paper, leaving some overhang on two opposite sides. This will make lifting the blondies out later a breeze.
Step 1: Melt the butter
Place ½ cup (1 stick) unsalted butter in a microwave-safe bowl and heat in 20-second bursts until just melted. You want it liquid but not hot—if it’s too warm, it can cook the egg later. Let it cool for a minute or two while you gather the other ingredients.
Step 2: Mix the wet ingredients
To the melted butter, add ⅔ cup creamy peanut butter and stir until smooth. The mixture will look a little thick and glossy—that’s perfect. Add 1 cup packed light brown sugar and ¼ cup granulated sugar. Whisk vigorously for about 30 seconds until the sugars are mostly dissolved and the mixture looks like thick caramel. You’ll see it get slightly lighter in color.
Step 3: Add the egg and vanilla
Crack in 1 large room-temperature egg and add 1 teaspoon vanilla extract. Whisk until fully combined. The batter will look smooth and shiny at this point. If it looks separated or greasy, your butter was too hot—but don’t panic, it will still bake up fine.
Step 4: Add the dry ingredients
Sprinkle 1 cup all-purpose flour, ½ teaspoon baking soda, and ¼ teaspoon salt over the wet mixture. Stir gently with a rubber spatula or wooden spoon until just combined. A few streaks of flour are okay—overmixing will make the blondies tough. Fold in 1 cup semi-sweet chocolate chips, reserving about ¼ cup for the top.
Step 5: Transfer to the pan
Scrape the batter into your prepared pan and spread it evenly. It will be thick and slightly sticky—that’s normal. Use the back of a spoon or a slightly wet spatula to smooth the top. Press the reserved chocolate chips into the surface, spacing them evenly.
Step 6: Bake
Bake for 18-22 minutes. Start checking at 18 minutes—the edges should be golden brown and set, but the center will still look soft and slightly underdone. A toothpick inserted near the center should come out with a few moist crumbs, not clean. Overbaking is the biggest mistake here. These blondies continue to set as they cool, so pulling them early is better than leaving them in too long.
Step 7: Cool and serve
Let the blondies cool in the pan on a wire rack for at least 15 minutes before lifting them out using the parchment paper overhang. For clean cuts, cool completely before slicing. Use a sharp knife and wipe it clean between cuts for neat edges. I like to cut them into 9 large squares or 16 smaller ones depending on the crowd.
Cooking Tips & Techniques
I learned a few things the hard way while testing these blondies. Here’s what I wish I’d known from the start.
Don’t overbake. This is the number one tip. Blondies should look slightly underdone when you pull them out of the oven. The residual heat in the pan finishes the cooking process. If you wait until the center is fully set, you’ll end up with dry, cakey blondies instead of gooey ones. Trust the jiggle.
Room temperature ingredients matter. I know it’s tempting to use a cold egg straight from the fridge, but it can seize the melted butter and create a lumpy batter. Let your egg sit out for 15-20 minutes, or place it in a bowl of warm water for 5 minutes. Small step, big difference.
Measure your flour correctly. Scooping flour directly from the bag compacts it, and you can end up with up to 25% more flour than the recipe calls for. Instead, spoon the flour into your measuring cup and level it off with a knife. This simple trick prevents dry blondies.
Let them cool. I know it’s hard to wait, but cutting into warm blondies will make them fall apart. The texture firms up as they cool, giving you that perfect chewy-gooey balance. If you absolutely must have a warm bite (and I get it), wait at least 15 minutes.
Line your pan well. Parchment paper with overhang is non-negotiable here. Without it, you’ll be scraping blondie bits out of the corners. Leave two long strips hanging over opposite sides, and you can lift the whole slab out cleanly.
Variations & Adaptations
These blondies are incredibly adaptable. Here are some ways to change them up depending on your mood or what you have on hand.
Peanut Butter Swirl Blondies: After spreading the batter in the pan, drop spoonfuls of extra peanut butter on top and swirl it through with a knife. You’ll get ribbons of peanut butter running through each bite. I tried this with crunchy peanut butter once, and the little bits of peanut added nice texture.
Double Chocolate Version: Swap ¼ cup of the flour for unsweetened cocoa powder and use dark chocolate chips. The chocolate and peanut butter combo becomes even more decadent. My kids preferred these over the original—they said it tasted like a candy bar.
Nut-Free Option: Substitute the peanut butter with sunflower seed butter (like SunButter). The color will be slightly greenish after baking (that’s normal—it’s a reaction between the sunflower seeds and baking soda), but the taste is still delicious. Add an extra tablespoon of sugar since sunflower butter is less sweet.
Add-In Ideas: Fold in ½ cup of chopped peanuts, pretzel pieces, or toffee bits for crunch. White chocolate chips or butterscotch chips work beautifully too. I made a batch with salted pretzels and white chocolate, and it was dangerously good.
For a Healthier Twist: Use natural peanut butter (just peanuts and salt) and reduce the brown sugar to ¾ cup. The texture will be slightly less tender, but they’re still satisfying. You can also swap half the flour for whole wheat pastry flour.
Serving & Storage Suggestions
These blondies are perfect at room temperature, but they’re also amazing warm with a scoop of vanilla ice cream. The contrast between warm, gooey blondie and cold, creamy ice cream is hard to beat. Drizzle some warm peanut butter or chocolate sauce on top if you’re feeling fancy.
For a simple presentation, dust the blondies with a little powdered sugar just before serving. Or press a few flaky sea salt flakes on top right after baking—the salt enhances the sweetness and makes the chocolate pop.
Storage: Keep leftover blondies in an airtight container at room temperature for up to 4 days. Place a sheet of parchment paper between layers to prevent sticking. They actually get even softer and more fudgy on day two, so don’t be afraid to make them ahead.
Freezing: These blondies freeze beautifully. Wrap individual squares tightly in plastic wrap, then place them in a freezer-safe bag. They’ll keep for up to 3 months. To thaw, leave them at room temperature for about 30 minutes, or microwave for 15 seconds for that just-baked warmth.
Reheating: For a quick warm-up, pop a blondie in the microwave for 10-15 seconds. If you’re reheating a whole pan, cover it with foil and warm in a 300°F oven for 5-7 minutes.
One thing I love about these blondies: the flavors meld together overnight. If you can resist eating them all the first day, you’ll be rewarded with even better texture and taste the next morning. Not that I’ve ever tested that theory more than once or twice.
Nutritional Information & Benefits
Here’s the estimated nutritional breakdown for one blondie (based on 9 servings):
- Calories: 385
- Fat: 21g
- Saturated Fat: 9g
- Carbohydrates: 45g
- Sugar: 32g
- Fiber: 3g
- Protein: 8g
- Sodium: 210mg
These blondies aren’t health food, but they do offer some nutritional perks. Peanut butter provides protein and healthy monounsaturated fats that help keep you full. Dark chocolate chips contain antioxidants called flavonoids, which are linked to heart health. And the brown sugar gives you quick energy—perfect for an afternoon pick-me-up.
If you’re watching your sugar intake, you can reduce the brown sugar to ¾ cup without drastically changing the texture. For a lower-carb option, try using a sugar substitute like monk fruit sweetener, though the texture will be slightly different.
These blondies are vegetarian and can easily be made gluten-free or dairy-free with the substitutions mentioned earlier. They do contain peanuts and wheat, so they’re not suitable for those with allergies to those ingredients.
Conclusion
These gooey chocolate chip peanut butter blondies are everything I want in a dessert—simple to make, incredibly satisfying, and always a hit. They’ve become my emergency dessert for potlucks, my go-to for late-night cravings, and the recipe I share when someone asks for something easy and impressive.
The best part? You don’t need to be a baker to pull these off. One bowl, a few pantry staples, and 20 minutes is all it takes. Whether you’re making them for a party, a bake sale, or just because it’s Tuesday, these blondies deliver every time.
I’d love to hear how yours turn out. Did you add any mix-ins? Try a different nut butter? Leave a comment below and let me know—I read every single one. And if you share a photo on social media, tag me so I can see your beautiful blondies!
Go ahead, preheat that oven. Your new favorite dessert is waiting.
Frequently Asked Questions
Can I use natural peanut butter in this recipe?
You can, but the texture will be different. Natural peanut butter has more oil, which can make the blondies greasy and less tender. If you use it, stir it well first and expect slightly flatter blondies. For best results, stick with regular creamy peanut butter like Skippy or Jif.
Why did my blondies turn out dry?
The most common reason is overbaking. Blondies should look slightly underdone when you pull them out of the oven. Another culprit is overmeasuring the flour. Remember to spoon and level, not scoop directly from the bag. If your oven runs hot, try reducing the temperature by 25°F.
Can I make these ahead of time?
Absolutely. These blondies actually taste better the next day after the flavors have melded. Bake them up to 2 days ahead and store them in an airtight container at room temperature. You can also freeze them for up to 3 months—just wrap each square individually.
How do I get clean cuts when slicing?
Let the blondies cool completely before cutting. Use a sharp knife and wipe it clean with a damp paper towel between each cut. For extra clean edges, chill the blondies in the fridge for 30 minutes before slicing. This firms them up and prevents the chocolate from smearing.
Can I double this recipe?
Yes! Double all the ingredients and bake in a 9×13-inch pan. The baking time will be similar—start checking at 20 minutes. The edges will be slightly thinner, so keep an eye on them to prevent overbaking. You might need to add 2-3 extra minutes depending on your oven.
If you loved these blondies, you might also enjoy my seven layer cookie bars for another easy, crowd-pleasing dessert. And if you’re in the mood for something fruity, these peach cobbler pound cake are always a hit. For a savory option to balance out all the sweets, try my green beans with bacon and garlic—the perfect side dish for any meal.
Pin This Recipe!
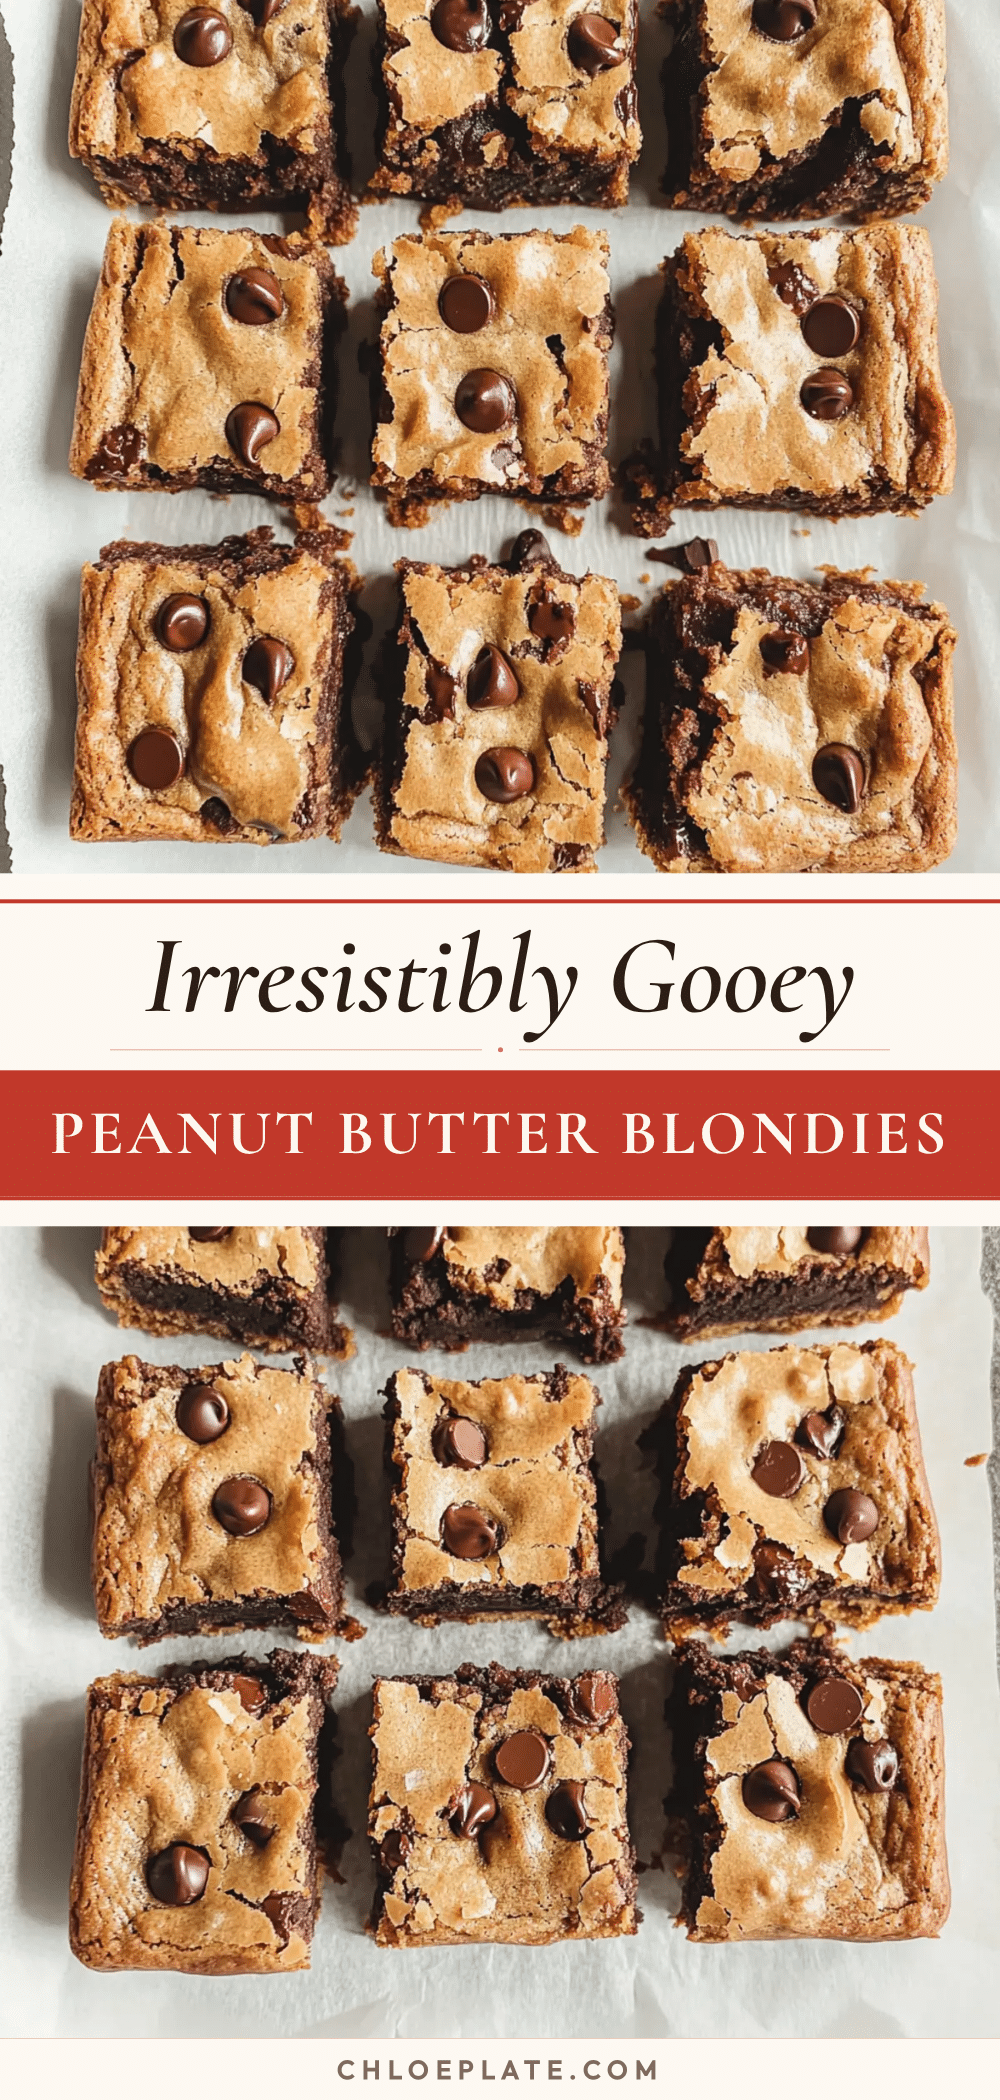
Gooey Chocolate Chip Peanut Butter Blondies: Easy 20-Min Recipe
These gooey chocolate chip peanut butter blondies are quick, easy, and made in one bowl without a mixer. Ready in about 20 minutes, they feature chewy edges, fudgy centers, and melty chocolate chips.
- Prep Time: 5 minutes
- Cook Time: 20 minutes
- Total Time: 25 minutes
- Yield: 9 servings 1x
- Category: Dessert
- Cuisine: American
Ingredients
- ½ cup (1 stick) unsalted butter, melted
- ⅔ cup creamy peanut butter (e.g., Skippy or Jif)
- 1 cup light brown sugar, packed
- ¼ cup granulated sugar
- 1 large egg, room temperature
- 1 teaspoon vanilla extract
- 1 cup all-purpose flour, spooned and leveled
- ½ teaspoon baking soda
- ¼ teaspoon salt
- 1 cup semi-sweet chocolate chips, plus extra for topping
Instructions
- Preheat oven to 350°F (175°C). Line an 8×8-inch baking pan with parchment paper, leaving overhang on two opposite sides.
- Melt ½ cup unsalted butter in a microwave-safe bowl in 20-second bursts until just melted. Let cool for 1-2 minutes.
- Add ⅔ cup creamy peanut butter to the melted butter and stir until smooth. Add 1 cup packed light brown sugar and ¼ cup granulated sugar. Whisk vigorously for about 30 seconds until the mixture looks like thick caramel and slightly lighter in color.
- Add 1 large room-temperature egg and 1 teaspoon vanilla extract. Whisk until fully combined and smooth.
- Sprinkle 1 cup all-purpose flour, ½ teaspoon baking soda, and ¼ teaspoon salt over the wet mixture. Stir gently with a rubber spatula or wooden spoon until just combined (a few streaks of flour are okay). Fold in 1 cup semi-sweet chocolate chips, reserving about ¼ cup for topping.
- Scrape the batter into the prepared pan and spread evenly. Press the reserved chocolate chips into the surface.
- Bake for 18-22 minutes, starting to check at 18 minutes. The edges should be golden brown and set, but the center should still look soft and slightly underdone. A toothpick inserted near the center should come out with a few moist crumbs.
- Let the blondies cool in the pan on a wire rack for at least 15 minutes before lifting out using the parchment overhang. Cool completely before slicing for clean cuts. Cut into 9 large squares or 16 smaller ones.
Notes
Don’t overbake; blondies should look slightly underdone when removed from the oven. Use room temperature egg to prevent seizing the melted butter. Measure flour by spooning and leveling to avoid dry blondies. Let cool completely before slicing for clean cuts. For dairy-free, use vegan butter or coconut oil. For gluten-free, use a 1:1 gluten-free baking blend.
Nutrition
- Serving Size: 1 blondie (based on
- Calories: 385
- Sugar: 32
- Sodium: 210
- Fat: 21
- Saturated Fat: 9
- Carbohydrates: 45
- Fiber: 3
- Protein: 8
Keywords: blondies, peanut butter, chocolate chip, easy dessert, one bowl, quick recipe, gooey



