Love this? Save it for later!
Share the inspiration with your friends
I was staring into the pantry, three days past my planned grocery run, and the peanut butter jar had exactly two tablespoons left. Not enough for a sandwich. Not enough for satay. But enough, I figured, to maybe salvage a cookie craving that had been gnawing at me since lunch. I grabbed the butter, the sugar, an egg, and crossed my fingers. What came out of the oven was a total accident—crackled on top, impossibly soft in the middle, and so deeply peanut-buttery that I ate three before they even cooled. Honestly, I didn’t mean to create the best soft chewy peanut butter cookies. It just sort of happened on a Tuesday night when I needed something sweet and refused to go back to the store.
The thing is, I’ve made a lot of peanut butter cookies in my life. The crumbly ones that fall apart when you look at them. The dry ones that taste more like flour than peanut butter. The ones with the perfect crisscross fork marks that somehow still taste flat. This batch was different. They had that slight resistance when you bite in, then they give way to a tender, almost fudgy center. The edges were just barely golden, and the whole kitchen smelled like a bakery that specializes in nostalgia. My husband walked in, grabbed one, and said, “These are it. Don’t change a thing.”
So I didn’t. I made them again the next week, and the week after that, tweaking the bake time by a minute here and a minute there until they were absolutely foolproof. Now they’re the only peanut butter cookie recipe I use, and I’m pretty sure they’ll become yours too. They come together in one bowl, no mixer required, and they use ingredients you probably already have. If you’ve been hunting for that perfect balance of soft, chewy, and packed with peanut flavor, this is it. No gimmicks. Just really good cookies.
Why You’ll Love This Recipe
I’ve tested this recipe more times than I care to admit, and every single batch delivered the same result: cookies that stay soft for days without turning into hockey pucks. The secret isn’t some fancy ingredient—it’s the ratio of brown sugar to white sugar and a technique that keeps the dough from spreading too thin. Here’s why these cookies stand out from the dozens of other peanut butter cookie recipes out there.
- One Bowl, No Mixer: You don’t need a stand mixer or even a hand mixer. Just a bowl and a sturdy spatula. Less cleanup, more cookies.
- Perfect Texture Every Time: These cookies are soft in the center with slightly crisp edges. They stay chewy for up to a week—if they last that long.
- Simple Pantry Ingredients: Butter, sugar, peanut butter, an egg, flour, baking soda, salt. That’s it. No cream of tartar, no corn syrup, no weird add-ins.
- Crowd-Pleasing Flavor: The peanut butter flavor is front and center, not buried under extra sugar or vanilla. It’s rich, salty-sweet, and deeply satisfying.
- Freezer-Friendly Dough: You can scoop the dough into balls, freeze them, and bake cookies fresh anytime you want. Perfect for unexpected guests or late-night cravings.
What really makes these cookies different is the texture. Most peanut butter cookies are either too crumbly or too cakey. These hit that sweet spot where they feel substantial but melt in your mouth. I’ve brought them to potlucks, given them as neighbor gifts, and packed them in lunchboxes. Every single time, someone asks for the recipe. And honestly, that’s the best compliment a cookie can get.
What Ingredients You Will Need
This recipe uses simple, everyday ingredients to create cookies that taste anything but basic. Each component plays a specific role in achieving that soft, chewy texture and rich peanut flavor. Here’s what you’ll need and why each ingredient matters.
- 1/2 cup (113g) unsalted butter, softened: Butter gives the cookies richness and helps them spread just enough. Make sure it’s softened to room temperature, not melted. Melted butter will make the cookies greasy and flat. I use unsalted so I can control the salt level. If you only have salted butter, reduce the added salt to 1/4 teaspoon.
- 1/2 cup (100g) granulated sugar: White sugar adds sweetness and helps the cookies spread. It also contributes to those beautiful crackled tops as the cookies bake.
- 1/2 cup (100g) packed light brown sugar: Brown sugar is the key to chewiness. It contains molasses, which adds moisture and a subtle caramel flavor. Don’t skip it. Dark brown sugar works too, but the cookies will be slightly darker and richer.
- 1 large egg, room temperature: The egg binds everything together and adds structure. A room-temperature egg incorporates more easily into the butter mixture, creating a smoother dough. If you forget to take it out ahead of time, place the egg in a bowl of warm water for 5 minutes.
- 1 teaspoon vanilla extract: Vanilla rounds out the flavors and makes the peanut butter taste even nuttier. Use pure vanilla extract if you have it, but imitation works fine here too.
- 1 cup (256g) creamy peanut butter: This is the star ingredient. Use a standard peanut butter like Jif or Skippy—not natural peanut butter that separates. Natural peanut butter has too much oil and will cause the cookies to spread into thin, greasy discs. I’ve tested this with both, and the difference is dramatic. Stick with the processed stuff for the best texture.
- 1 1/4 cups (156g) all-purpose flour: Flour provides structure. Measure it correctly by spooning it into your measuring cup and leveling it off with a knife. Scooping directly from the bag can pack in too much flour, leading to dry cookies.
- 1 teaspoon baking soda: Baking soda helps the cookies rise and spread. It also encourages browning, which adds flavor. Make sure it’s fresh—old baking soda won’t give you the same lift.
- 1/2 teaspoon salt: Salt balances the sweetness and enhances the peanut flavor. Don’t skip it, even if your peanut butter is salted.
Equipment Needed
You don’t need fancy equipment to make these cookies, which is part of what makes this recipe so great. Here’s what you’ll need.
- Large mixing bowl: Any medium-to-large bowl will work. I prefer a glass or ceramic bowl because they don’t retain heat, but metal is fine too.
- Wooden spoon or sturdy spatula: Since we’re not using a mixer, a good spatula is your best friend. I use a silicone spatula because it’s flexible and scrapes the bowl clean.
- Measuring cups and spoons: Accurate measurements are crucial for baking. Use dry measuring cups for the flour and sugar, and liquid measuring cups for nothing here—everything is dry or measured by spoon.
- Baking sheet: A standard half-sheet pan works perfectly. Line it with parchment paper or a silicone baking mat for easy cleanup and even baking.
- Cookie scoop: A 1.5-tablespoon cookie scoop ensures uniform cookies that bake evenly. If you don’t have one, you can use two spoons to portion the dough.
- Cooling rack: Letting the cookies cool on a wire rack prevents the bottoms from steaming and getting soggy. If you don’t have one, you can slide the parchment paper off the baking sheet onto the counter after a few minutes.
If you’re new to baking, don’t stress about having the perfect tools. I made these cookies for years with a fork and a metal mixing bowl. The most important thing is the parchment paper—it really does make a difference in how evenly the cookies bake.
Preparation Method
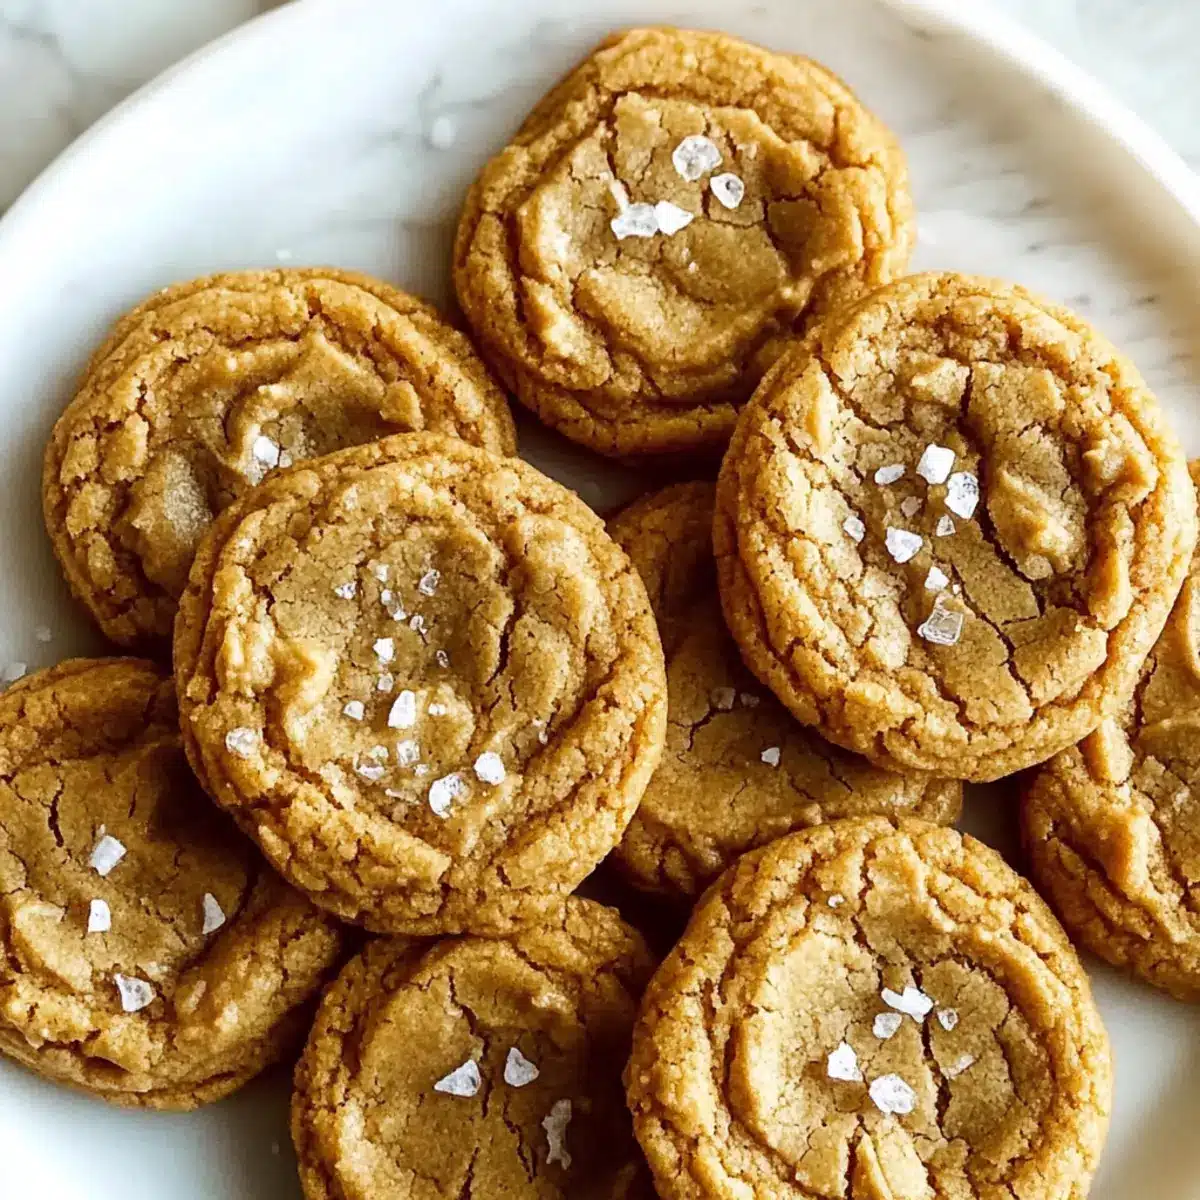
This recipe comes together in about 20 minutes of active time. Follow these steps carefully, and you’ll have perfect cookies every time.
- Preheat your oven to 350°F (175°C). Line two baking sheets with parchment paper or silicone baking mats. This is important—parchment paper prevents sticking and helps the cookies bake evenly without burning on the bottom.
- Cream the butter and sugars together. In a large mixing bowl, combine 1/2 cup softened unsalted butter, 1/2 cup granulated sugar, and 1/2 cup packed light brown sugar. Beat with a wooden spoon or spatula until smooth and well combined, about 2 minutes. You’re looking for a cohesive, creamy mixture with no lumps of butter. Don’t overmix—just get it smooth.
- Add the egg and vanilla. Crack 1 large egg into the butter-sugar mixture and add 1 teaspoon vanilla extract. Stir until the egg is fully incorporated and the mixture looks glossy. It might look slightly separated at first, but keep stirring—it will come together.
- Mix in the peanut butter. Add 1 cup creamy peanut butter and stir until completely combined. The dough will start to look thick and fragrant. Scrape the bottom and sides of the bowl with your spatula to make sure everything is evenly mixed.
- Whisk the dry ingredients together. In a separate small bowl, whisk together 1 1/4 cups all-purpose flour, 1 teaspoon baking soda, and 1/2 teaspoon salt. Whisking aerates the flour and distributes the baking soda and salt evenly.
- Combine the wet and dry ingredients. Add the flour mixture to the peanut butter mixture. Stir gently with your spatula until just combined. A few streaks of flour are okay—overmixing at this stage will make the cookies tough. Stop as soon as you don’t see any more dry flour.
- Chill the dough (optional but recommended). If you have time, cover the bowl and refrigerate the dough for 30 minutes. Chilling firms up the butter, which prevents the cookies from spreading too much in the oven. The cookies will be thicker and chewier. If you’re in a hurry, you can skip this step, but the cookies will spread a bit more.
- Scoop the dough. Use a 1.5-tablespoon cookie scoop to portion the dough into balls. Roll each ball between your palms until smooth. Place them on the prepared baking sheets, spacing them about 2 inches apart. You should get about 24 cookies.
- Create the classic crisscross pattern. Dip a fork in granulated sugar (this prevents sticking) and press it gently into each dough ball, first in one direction, then perpendicular. Press until the cookie is about 1/2-inch thick. The dough will crack slightly around the edges—that’s exactly what you want.
- Bake for 10-12 minutes. Bake one sheet at a time in the center of the oven. The cookies are done when the edges are lightly golden and the centers look slightly puffed and soft. They will look underbaked in the middle—that’s good. They’ll continue to set on the hot baking sheet as they cool.
- Cool on the baking sheet. Let the cookies rest on the baking sheet for 5 minutes. This allows them to firm up without overbaking. After 5 minutes, transfer them to a wire rack to cool completely. If you move them too soon, they’ll fall apart.
Cooking Tips & Techniques
I’ve made enough batches of these cookies to learn a few tricks that make a real difference. Here are the most important ones.
Don’t overbake. This is the number one mistake people make with peanut butter cookies. They look underdone when you pull them out, but trust the process. The residual heat from the baking sheet finishes the cooking. If you wait until the centers look fully set, you’ll end up with dry, crumbly cookies. Pull them when the edges are golden and the centers are still soft and puffy.
Use room temperature ingredients. Cold butter doesn’t cream properly with sugar, and cold egg can seize the butter mixture. Let your butter and egg sit on the counter for about 30 minutes before you start. If you’re in a rush, cut the butter into small cubes—they’ll soften faster.
Measure flour correctly. This is a common pitfall. Scooping your measuring cup directly into the flour bag can pack in up to 25% more flour than you need. Instead, fluff the flour with a spoon, then spoon it into your measuring cup and level it off with a knife. Your cookies will thank you.
Chill the dough if you want thicker cookies. I know, waiting is hard. But 30 minutes in the fridge makes a noticeable difference. The cookies spread less, bake up taller, and have a more pronounced chewy texture. If you bake the dough straight from mixing, the cookies will be thinner and slightly crispier around the edges—still delicious, just different.
Rotate your baking sheet halfway through. Ovens have hot spots. Halfway through the bake time, rotate the sheet 180 degrees. This ensures even browning and prevents some cookies from burning while others are still pale.
Use a sugar-dipped fork for the crisscross. Dip the fork tines in granulated sugar before pressing each cookie. This prevents the dough from sticking to the fork and gives the tops a subtle sparkle. Re-dip after every 2-3 cookies for clean impressions.
Variations & Adaptations
Once you’ve mastered the basic recipe, feel free to play around. Here are some of my favorite variations.
- Chocolate Peanut Butter Cookies: Add 1/2 cup semi-sweet chocolate chips to the dough after mixing in the flour. The chocolate chunks add pockets of melted goodness that pair perfectly with the peanut butter. You can also press a chocolate kiss into the center of each warm cookie for a classic peanut blossom look.
- Gluten-Free Version: Substitute the all-purpose flour with a 1:1 gluten-free baking flour blend that contains xanthan gum. I’ve used Bob’s Red Mill 1-to-1 Baking Flour with great results. The cookies will be slightly more tender, but the peanut butter flavor still shines. If you enjoy experimenting with gluten-free baking, you might also like our homemade soft pretzel recipe for another chewy treat.
- Crunchy Peanut Butter Option: Use crunchy peanut butter instead of creamy for added texture. The little bits of peanut give each bite a satisfying crunch. If you do this, you might want to reduce the added salt to 1/4 teaspoon, since crunchy peanut butter is often saltier.
- Spiced Peanut Butter Cookies: Add 1/2 teaspoon cinnamon and 1/4 teaspoon nutmeg to the dry ingredients. The warm spices complement the peanut butter beautifully, especially during fall and winter. This variation reminds me of the flavors in our spiced molasses gingerbread muffins.
- Vegan Adaptation: Substitute the butter with 1/2 cup coconut oil (solid, not melted) and the egg with a flax egg (1 tablespoon ground flaxseed mixed with 3 tablespoons water, let sit for 5 minutes). Use a vegan-friendly peanut butter. The cookies will be slightly more delicate, so handle them gently when transferring to the cooling rack.
I’ve tried all of these variations, and my personal favorite is the chocolate chip version. There’s something about the combination of salty peanut butter and sweet melted chocolate that I just can’t resist. Try them all and see which one becomes your go-to.
Serving & Storage Suggestions
These cookies are best served slightly warm, when the centers are still soft and the edges have a gentle crunch. Let them cool on the baking sheet for 5 minutes, then transfer to a wire rack. If you can wait another 10 minutes, they’ll be perfectly set but still tender. Serve them with a cold glass of milk, a scoop of vanilla ice cream, or just on their own—they’re plenty satisfying.
For storage, place completely cooled cookies in an airtight container at room temperature. They’ll stay soft and chewy for up to 5 days. To keep them extra soft, add a slice of bread to the container—the cookies will absorb the moisture from the bread, keeping them tender. Replace the bread slice every couple of days if the cookies last that long.
You can also freeze the baked cookies. Arrange them in a single layer on a baking sheet and freeze until solid, then transfer to a freezer-safe bag or container. They’ll keep for up to 3 months. Thaw at room temperature for about 15 minutes, or pop them in the microwave for 10-15 seconds for that fresh-from-the-oven warmth.
The dough itself freezes beautifully. Scoop the dough into balls, place them on a parchment-lined baking sheet, and freeze until solid. Transfer the frozen dough balls to a freezer bag. When you’re ready to bake, place the frozen dough balls on a prepared baking sheet and add 2-3 minutes to the bake time. No need to thaw first. This is my favorite trick for having fresh cookies on demand—just like our baklava cinnamon rolls that are perfect for make-ahead baking.
These cookies actually taste even better the next day. The flavors meld together, and the texture becomes even more uniform. If you can resist eating them all on day one, you’re in for a treat on day two.
Nutritional Information & Benefits
Each cookie (based on 24 cookies per batch) contains approximately 155 calories, 9g fat, 17g carbohydrates, 4g protein, and 10g sugar. These values are estimates and will vary based on the specific ingredients you use.
Peanut butter is a good source of plant-based protein and healthy monounsaturated fats. It also contains vitamin E, magnesium, and potassium. While these cookies are definitely a treat, they offer a bit more nutritional value than your average sugar cookie. The protein and fat from the peanut butter help keep you fuller longer, which is why one or two cookies can feel satisfying rather than sending you on a sugar rollercoaster.
For those with dietary concerns, these cookies are vegetarian and can be made gluten-free or vegan with the substitutions listed above. They contain peanuts, dairy (butter), eggs, and gluten (if using regular flour), so they’re not suitable for those with allergies to these ingredients. If you’re looking for a nut-free option, you could try sunflower seed butter, but the texture will be different—sunflower seed butter can react with baking soda and turn green. It’s safe to eat, just not as pretty.
I believe in balance, and these cookies are a perfect example. They’re made with real ingredients, they bring joy, and they don’t pretend to be health food. Sometimes a cookie is just a cookie, and that’s exactly what it should be.
Conclusion
These soft chewy peanut butter cookies are the kind of recipe you’ll come back to again and again. They’re simple enough for a beginner baker but good enough to impress anyone. The texture is spot-on—tender, rich, and satisfying—and the flavor is pure peanut butter bliss. No fancy techniques, no hard-to-find ingredients, just honest, delicious cookies that taste like they came from a bakery.
I love that this recipe is forgiving. You can chill the dough or skip it. You can make them smaller or larger. You can add chocolate chips or leave them plain. However you make them, they’ll be wonderful. That’s the sign of a great recipe—it works no matter what.
I’d love to hear how these turn out for you. Did you add chocolate chips? Did you make them gluten-free? Did they disappear as fast as mine always do? Drop a comment below and let me know. And if you’re looking for more sweet treats, check out our cosmic brownie cookies for another cookie that’s sure to become a favorite. Happy baking, friends!
Frequently Asked Questions
Can I use natural peanut butter in this recipe?
I don’t recommend it. Natural peanut butter has too much oil, which causes the cookies to spread into thin, greasy discs. Stick with a standard peanut butter like Jif or Skippy for the best texture. If you only have natural peanut butter, you can try stirring it well and removing 1-2 tablespoons of oil, but the results won’t be as reliable.
Why are my cookies dry and crumbly?
This usually happens for one of two reasons: too much flour or overbaking. Make sure you’re measuring your flour correctly by spooning it into the cup and leveling it off. And pull the cookies out when the edges are golden but the centers still look soft—they’ll continue to set as they cool.
Can I make these cookies without a mixer?
Absolutely. In fact, I prefer making them by hand. A wooden spoon or sturdy spatula works perfectly. Just make sure your butter is properly softened so it creams easily with the sugar. If you’re having trouble, you can use a fork to mash the butter and sugar together before switching to the spatula.
How do I get the perfect crisscross pattern?
Dip a fork in granulated sugar before pressing each cookie. The sugar prevents the dough from sticking to the fork and gives the tops a pretty sparkle. Press gently but firmly, first in one direction, then perpendicular. Re-dip the fork in sugar after every 2-3 cookies for clean impressions.
Can I double this recipe?
Yes, this recipe doubles beautifully. Just make sure you have enough space in your oven to bake in batches, or bake one sheet at a time to ensure even baking. If you double the recipe, you might want to chill the dough for 30 minutes to keep the cookies from spreading too much while you’re scooping and baking.
Pin This Recipe!
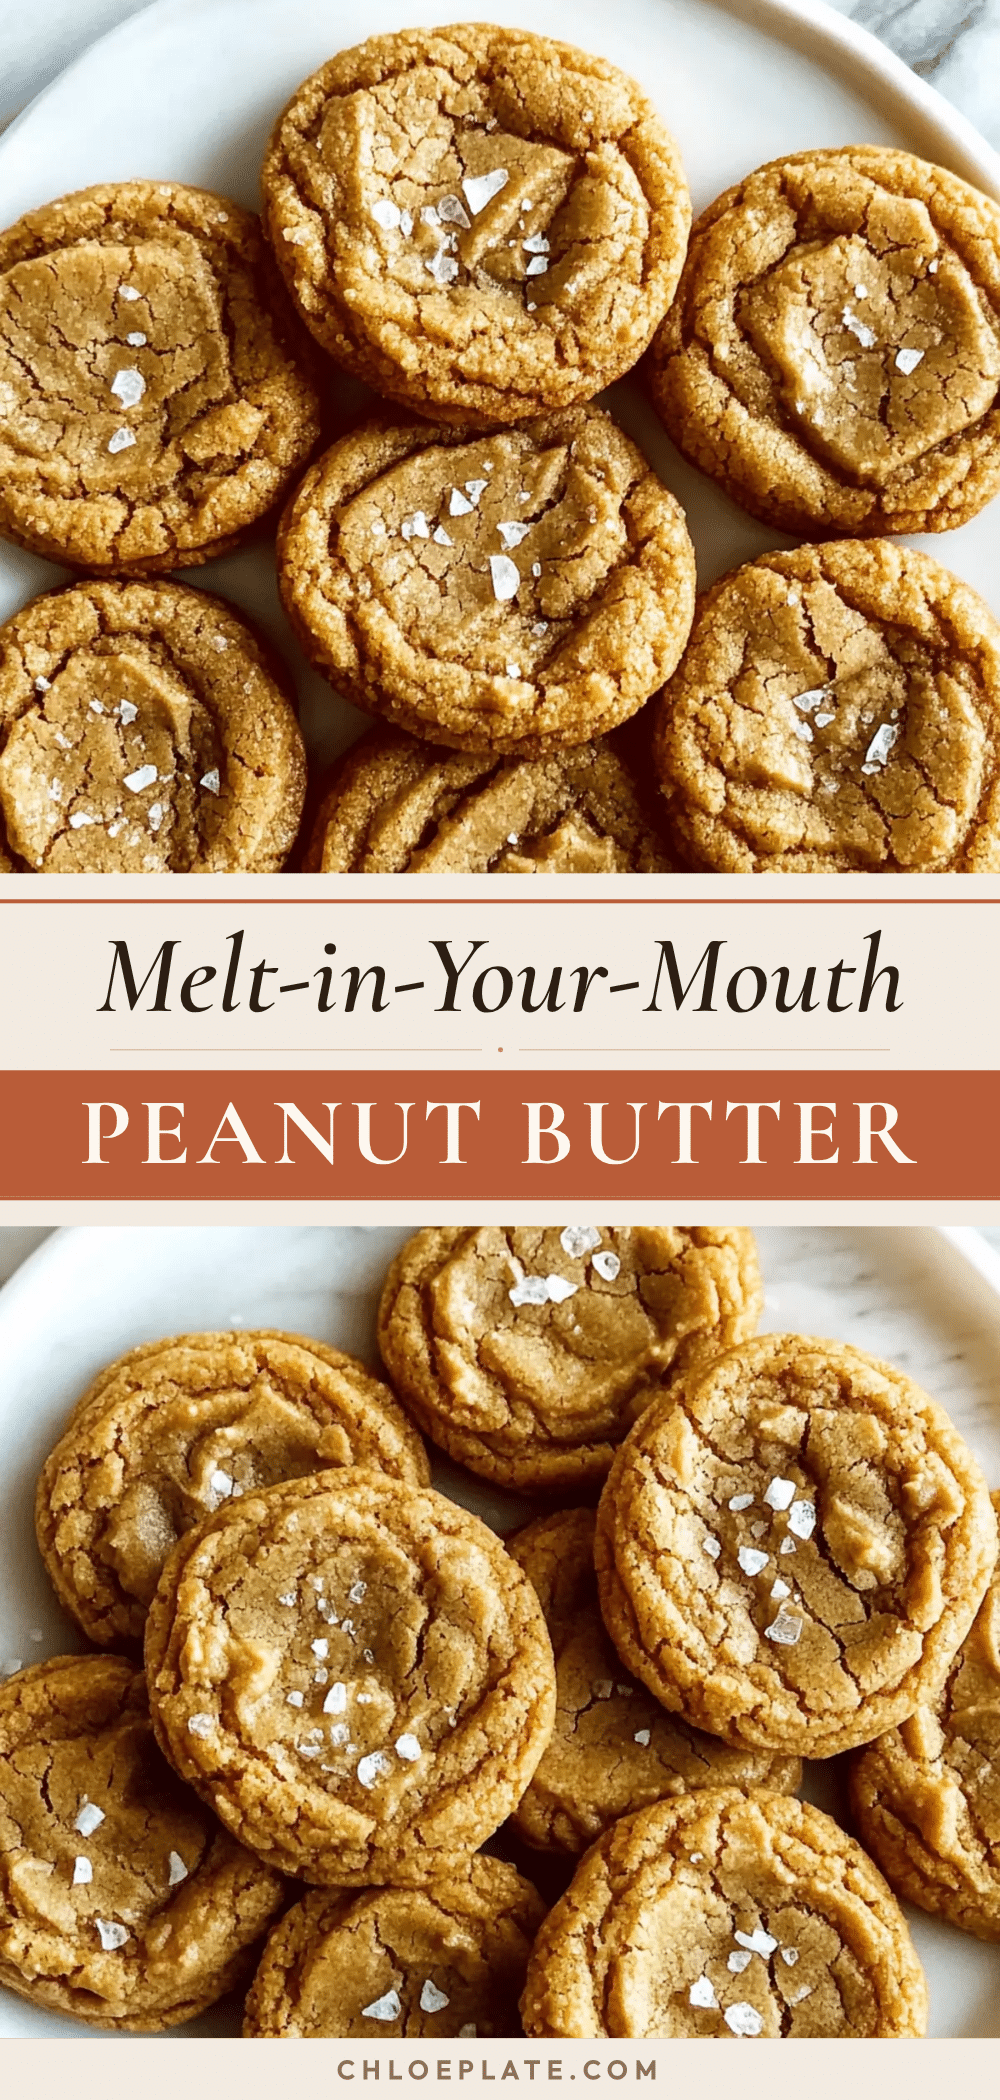
Best Soft Chewy Peanut Butter Cookies (Easy Recipe)
These soft chewy peanut butter cookies are made in one bowl with no mixer, using simple pantry ingredients. They have a perfect texture—crackled on top, impossibly soft in the middle, and deeply peanut-buttery.
- Prep Time: 20 minutes
- Cook Time: 10-12 minutes
- Total Time: 30 minutes (plus optional 30 minutes chilling)
- Yield: 24 cookies 1x
- Category: Dessert
- Cuisine: American
Ingredients
- 1/2 cup (113g) unsalted butter, softened
- 1/2 cup (100g) granulated sugar
- 1/2 cup (100g) packed light brown sugar
- 1 large egg, room temperature
- 1 teaspoon vanilla extract
- 1 cup (256g) creamy peanut butter (like Jif or Skippy)
- 1 1/4 cups (156g) all-purpose flour
- 1 teaspoon baking soda
- 1/2 teaspoon salt
Instructions
- Preheat your oven to 350°F (175°C). Line two baking sheets with parchment paper or silicone baking mats.
- In a large mixing bowl, combine 1/2 cup softened unsalted butter, 1/2 cup granulated sugar, and 1/2 cup packed light brown sugar. Beat with a wooden spoon or spatula until smooth and well combined, about 2 minutes.
- Add 1 large egg and 1 teaspoon vanilla extract. Stir until fully incorporated and glossy.
- Add 1 cup creamy peanut butter and stir until completely combined.
- In a separate small bowl, whisk together 1 1/4 cups all-purpose flour, 1 teaspoon baking soda, and 1/2 teaspoon salt.
- Add the flour mixture to the peanut butter mixture. Stir gently until just combined. Do not overmix.
- Chill the dough for 30 minutes if time allows (optional but recommended for thicker cookies).
- Scoop the dough using a 1.5-tablespoon cookie scoop. Roll into smooth balls and place on prepared baking sheets, spacing 2 inches apart.
- Dip a fork in granulated sugar and press gently into each dough ball, first in one direction, then perpendicular, to create a crisscross pattern. Press until cookie is about 1/2-inch thick.
- Bake for 10-12 minutes, until edges are lightly golden and centers look slightly puffed and soft.
- Let cookies rest on the baking sheet for 5 minutes, then transfer to a wire rack to cool completely.
Notes
For best results, use standard peanut butter like Jif or Skippy, not natural peanut butter. Chill the dough for 30 minutes for thicker cookies. Do not overbake; cookies will continue to set on the hot baking sheet.
Nutrition
- Serving Size: 1 cookie
- Calories: 155
- Sugar: 10
- Sodium: 135
- Fat: 9
- Saturated Fat: 3.5
- Carbohydrates: 17
- Fiber: 1
- Protein: 4
Keywords: peanut butter cookies, soft chewy cookies, easy cookie recipe, one bowl cookies, no mixer cookies