Love this? Save it for later!
Share the inspiration with your friends
The first time I made these dark chocolate cherry cups, I was actually trying to use up a bag of frozen cherries that had been sitting in my freezer for, honestly, way too long. It was a Tuesday night, the kind of quiet evening where you just want something sweet but don’t want to commit to a whole cake or batch of cookies. I had a block of good dark chocolate sitting on the counter from a baking project I never got around to, and the idea just hit me — why not melt it down and make little cups? I figured if it was a disaster, no one would know but me.
So I melted the chocolate, lined a mini muffin tin with paper liners, and spooned in a layer of chocolate. Into the fridge they went. Twenty minutes later, I added a cherry compote I’d thrown together on the stove — just cherries, a little sugar, and a splash of vanilla — then topped them off with more chocolate. When I bit into one after they set, I actually laughed out loud. They were better than anything I could buy at a fancy chocolate shop, and I’d made them in under an hour with three ingredients I already had.
That accidental Tuesday night turned into a full-blown obsession. I made them three times that week, tweaking the ratio of chocolate to cherry, testing different types of dark chocolate, and figuring out the best way to get that perfect snap when you bite into one. These aren’t just another dessert — they’re the kind of treat that makes you feel like you’ve discovered a secret. Rich, dark, fruity, and dangerously easy to eat in one sitting.
Why You’ll Love This Recipe
Let me tell you why these dark chocolate cherry cups have become my go-to dessert for pretty much every occasion. I’ve tested this recipe more times than I can count, and every single batch has disappeared faster than I expected.
- Incredibly Easy : You only need a handful of ingredients and about 30 minutes of active time. No baking, no complicated techniques, no fancy equipment.
- Simple Ingredients : Dark chocolate, cherries, and a little sugar are the stars. You probably have everything in your kitchen right now.
- Perfect for Gifting : These little cups look like they came from a high-end chocolatier. Package them in a pretty box and you’ve got a homemade gift that people will rave about.
- Crowd-Pleaser : I’ve brought these to dinner parties, holiday gatherings, and casual get-togethers. They’re the first thing to disappear every single time.
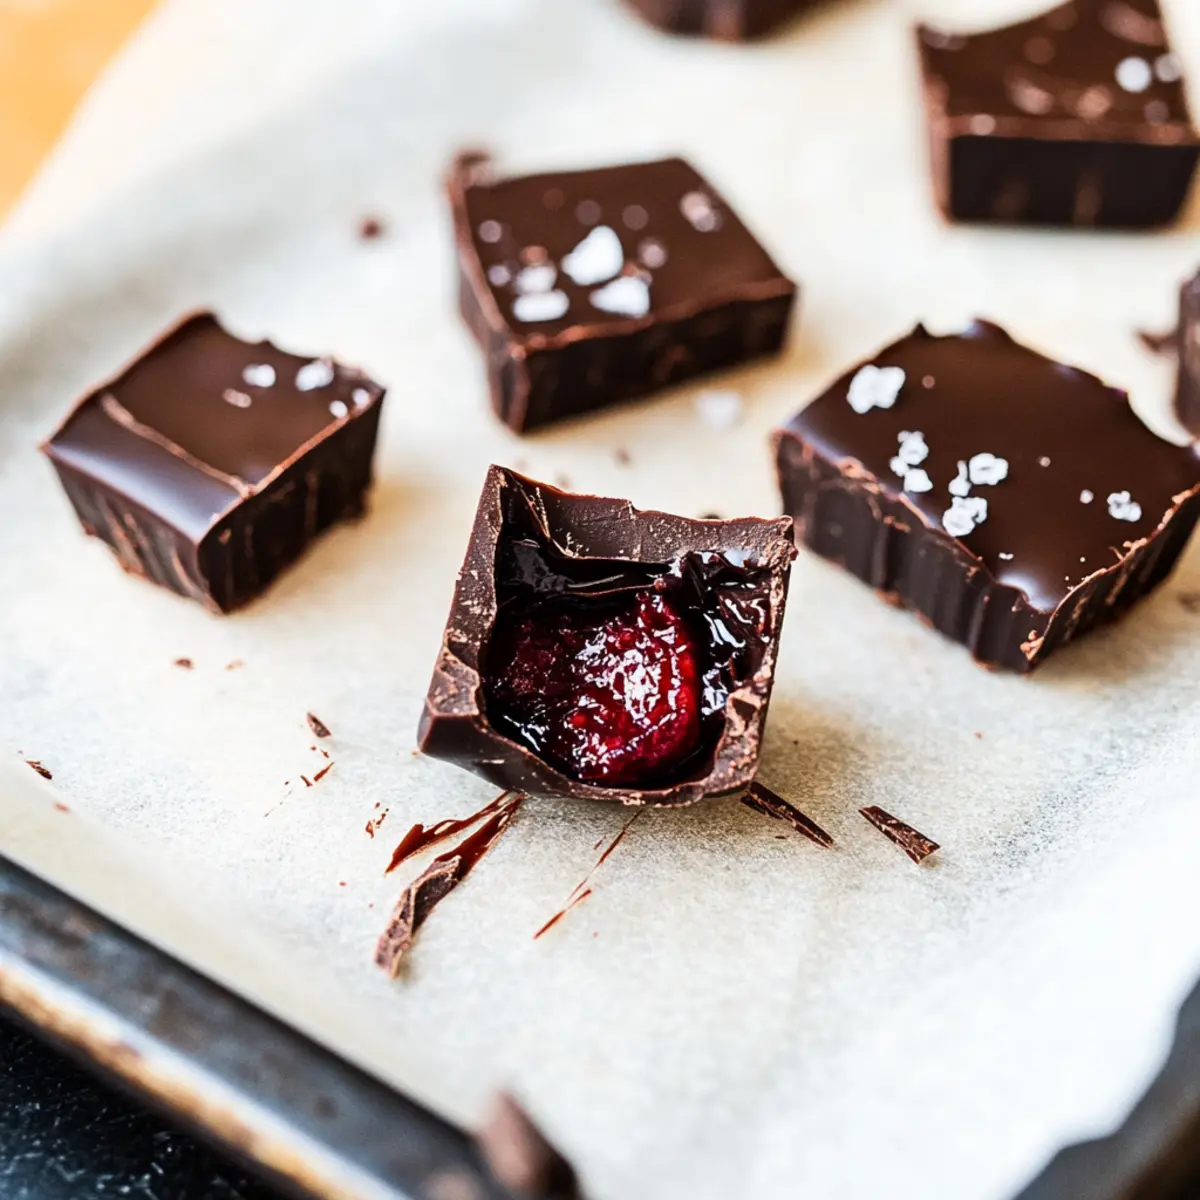
- Unbelievably Delicious : The combination of rich, bittersweet dark chocolate and sweet-tart cherry filling is pure magic. The texture is perfect — a firm chocolate shell that gives way to a soft, jammy center.
What makes these different from other chocolate cherry desserts is the technique. Instead of just plopping a cherry in melted chocolate, I cook the cherries down into a concentrated compote first. This intensifies their flavor and removes excess moisture, so your cups stay perfectly firm and don’t get soggy. It’s a small step that makes a huge difference.
Honestly, this is the kind of recipe that makes you close your eyes after the first bite. It’s comfort food in its purest form — simple, indulgent, and completely satisfying. Whether you’re making them for a special occasion or just a Tuesday night craving, these dark chocolate cherry cups deliver every time.
What Ingredients You Will Need
This recipe uses simple, wholesome ingredients to deliver bold flavor and satisfying texture without the fuss. Most of these are pantry staples, and the few fresh ingredients are easy to find at any grocery store.
For the Chocolate Shell
- Dark chocolate (200g / 7 oz) — I recommend using a high-quality dark chocolate bar with 60-70% cocoa content. Ghirardelli or Lindt work beautifully. Avoid chocolate chips if possible — they often contain stabilizers that prevent smooth melting.
- Coconut oil (1 tablespoon) — This is optional but helps thin the chocolate for easier coating and gives a beautiful shine. You can also use refined coconut oil if you don’t want any coconut flavor.
For the Cherry Filling
- Frozen or fresh cherries (1½ cups / 225g) — I’ve used both, and they work equally well. If using frozen, no need to thaw first. Fresh cherries should be pitted and halved.
- Granulated sugar (2 tablespoons) — Just enough to bring out the natural sweetness of the cherries. You can adjust based on how sweet your cherries are.
- Vanilla extract (½ teaspoon) — Adds warmth and depth to the cherry flavor. Pure vanilla extract is best, but imitation works in a pinch.
- Lemon juice (1 teaspoon) — A tiny squeeze brightens the cherries and balances the sweetness. Don’t skip it — it makes a difference.
Optional Add-Ins
- Sea salt flakes — A sprinkle on top before the chocolate sets adds a gorgeous sweet-salty contrast.
- Chopped pistachios or almonds — For texture and a beautiful presentation.
- Orange zest — A pinch of orange zest in the cherry compote pairs beautifully with dark chocolate.
Ingredient tip : If you’re looking for a dairy-free option, most high-quality dark chocolate is naturally dairy-free. Just double-check the label to be sure. And if you want to try a different fruit filling, you can absolutely swap the cherries for raspberries, strawberries, or even chopped mango — just adjust the sugar to taste.
Equipment Needed
You don’t need much for this recipe, which is part of the beauty. Here’s what I use:
- Mini muffin tin — This gives you the perfect bite-sized cups. If you don’t have one, you can use a regular muffin tin, but your cups will be larger and you’ll get fewer.
- Paper mini muffin liners — These make removal a breeze. Silicone liners also work great.
- Small saucepan — For cooking down the cherry compote.
- Heatproof bowl — For melting the chocolate. Glass or stainless steel works best.
- Double boiler or microwave — I prefer the microwave for speed, but a double boiler gives you more control if you’re nervous about burning chocolate.
- Spoon or small cookie scoop — For portioning the chocolate and filling.
- Refrigerator space — You’ll need a flat spot in your fridge for the muffin tin to set.
Budget tip : If you don’t have a mini muffin tin, you can use silicone candy molds from any craft store — they’re usually under $5 and come in fun shapes. I’ve used heart-shaped molds for Valentine’s Day before, and they turned out adorable.
Preparation Method
Let’s get to the fun part. I’ve broken this down into clear steps so you can follow along easily. Take your time with the chocolate — rushing it is the only way things can go wrong.
Step 1: Make the Cherry Compote
In a small saucepan, combine the cherries, sugar, and lemon juice. Cook over medium heat, stirring occasionally, until the cherries break down and the mixture thickens — about 8-10 minutes. You’re looking for a jam-like consistency where most of the liquid has evaporated. If you’re using frozen cherries, they’ll release more water, so give them an extra 2-3 minutes. Remove from heat, stir in the vanilla extract, and let it cool completely. This is important — if you add warm compote to the chocolate, it will melt the cups from the inside.
Step 2: Melt the Chocolate
Chop the dark chocolate into small, even pieces. Place it in a heatproof bowl with the coconut oil. Microwave in 30-second intervals at 50% power, stirring well after each interval, until smooth and fully melted. This usually takes about 1½ to 2 minutes total. Alternatively, use a double boiler: bring an inch of water to a simmer in a small pot, place the bowl on top (making sure the bottom doesn’t touch the water), and stir until melted. Be careful not to overheat — chocolate seizes up if it gets too hot, and then you have to start over.
Step 3: Line the Muffin Tin
Place paper liners in your mini muffin tin. If you’re using silicone molds, just set them on a baking sheet for stability. A mini muffin tin typically has 24 cavities, so you’ll get about 20-24 cups depending on how thick you make the chocolate layers.
Step 4: Create the First Chocolate Layer
Spoon about 1 teaspoon of melted chocolate into each liner. Use the back of the spoon to spread it up the sides, creating a small cup shape. Make sure the chocolate coats the bottom and comes about halfway up the sides. Tap the tin gently on the counter to settle the chocolate and remove air bubbles. Place the tin in the refrigerator for 15-20 minutes, or until the chocolate is firm to the touch.
Step 5: Add the Cherry Filling
Once the first chocolate layer is set, spoon about ½ teaspoon of the cooled cherry compote into each cup. Don’t overfill — you want to leave room for the top chocolate layer. If you’re adding any optional toppings like chopped nuts or orange zest, sprinkle a little on top of the compote now.
Step 6: Top with Remaining Chocolate
Spoon another teaspoon of melted chocolate over the cherry filling, making sure it covers the compote completely and meets the edges of the first chocolate layer. Tap the tin again to level the tops. If you’re using sea salt flakes, sprinkle a tiny pinch on top of each cup before the chocolate sets.
Step 7: Set and Serve
Return the tin to the refrigerator for at least 30 minutes, or until the chocolate is completely firm. Once set, peel away the paper liners and serve. The cups will keep their shape beautifully — a firm chocolate shell with a soft, jammy cherry center. Sensory cue : You should hear a satisfying snap when you bite into one, followed by the soft give of the cherry filling.
Cooking Tips & Techniques
After making these dark chocolate cherry cups more times than I can count, I’ve picked up a few tricks that make a real difference. Here are the ones I swear by.
Temper your chocolate for a better snap : If you want that professional, glossy finish that doesn’t melt at room temperature, tempering is the way to go. The easiest method for home cooks is the seeding method: melt two-thirds of your chocolate, then add the remaining one-third and stir until melted. The residual heat from the melted chocolate melts the new pieces without overheating them. It takes a little practice, but the result is worth it.
Don’t skip the cooling step : I learned this the hard way. The first time I made these, I was impatient and added warm cherry compote to the chocolate. The cups turned into a melty, messy disaster. Let the compote cool completely — even pop it in the fridge for 10 minutes if you’re in a hurry.
Use a piping bag for precision : If you want perfectly even layers, transfer the melted chocolate to a small piping bag or a zip-top bag with the corner snipped off. It gives you way more control than a spoon, especially for the top layer. I use this trick every time now.
Watch for bloom : If your chocolate develops white streaks or a dull appearance after setting, that’s called bloom. It’s still safe to eat, but it happens when the chocolate gets too warm or experiences temperature fluctuations. To avoid it, make sure your chocolate is properly tempered and store the finished cups in a cool, stable environment.
Keep a spare batch of chocolate : I always melt a little extra chocolate than I think I’ll need. Running out mid-way is frustrating, and melting a second small batch can be tricky. A little extra ensures smooth sailing.
Variations & Adaptations
One of the best things about this recipe is how easy it is to customize. Here are some variations I’ve tried and loved.
Vegan Dark Chocolate Cherry Cups
Use dairy-free dark chocolate (most high-quality brands are naturally vegan) and skip the coconut oil if you prefer. The cherry compote is already plant-based, so you’re good to go. I’ve made these for vegan friends, and they couldn’t tell the difference.
Nutty Chocolate Cherry Cups
Add a layer of chopped toasted almonds, pistachios, or pecans between the cherry filling and the top chocolate layer. The crunch adds a wonderful texture contrast. I love using the crunchy candied macadamia nuts from another favorite recipe — they take these cups to a whole new level.
Spiced Cherry Cups
Add a pinch of cinnamon, cardamom, or even a tiny pinch of cayenne pepper to the cherry compote while it cooks. The warmth of the spices pairs beautifully with the dark chocolate. I tried this during the holidays, and it was a huge hit.
White Chocolate Drizzle
After the cups are set, melt a little white chocolate and drizzle it over the tops. The contrast between dark and white chocolate looks stunning and adds a touch of sweetness. It’s perfect for gifting.
Low-Sugar Option
Use sugar-free dark chocolate and swap the granulated sugar in the compote for a natural sweetener like monk fruit or stevia. The cherries themselves are naturally sweet, so you won’t miss the sugar much. I’ve made these for friends watching their sugar intake, and they were just as happy.
Serving & Storage Suggestions
These dark chocolate cherry cups are best served cold, straight from the refrigerator. The firm chocolate shell gives way to the soft cherry center, and the contrast in temperature and texture is part of what makes them so satisfying.
How to serve : Arrange them on a pretty plate or in a decorative box for gifting. They look beautiful on a dessert board alongside fresh berries, nuts, and other bite-sized treats. For a dinner party, I like to serve them with a small glass of port or a rich red wine — the flavors complement each other perfectly. If you’re feeling fancy, dust them with a little cocoa powder or powdered sugar just before serving.
Storage : Store the cups in an airtight container in the refrigerator for up to two weeks. Place them in a single layer, or separate layers with parchment paper to prevent sticking. They also freeze beautifully — just pop them in a freezer-safe container and they’ll keep for up to three months. Thaw in the refrigerator for about 30 minutes before serving.
Flavor development : Honestly, these cups taste even better the next day. The flavors meld together as they sit, and the cherry compote softens slightly, creating a more integrated filling. I always try to make them a day ahead if I’m serving them for a special occasion.
Nutritional Information & Benefits
Here’s the approximate nutritional breakdown for one dark chocolate cherry cup (based on 20 cups per batch):
| Nutrient | Amount Per Cup |
|---|---|
| Calories | 85 |
| Total Fat | 5g |
| Saturated Fat | 3g |
| Carbohydrates | 10g |
| Fiber | 2g |
| Sugar | 7g |
| Protein | 1g |
Dark chocolate is packed with antioxidants, particularly flavonoids, which are great for heart health. Cherries are rich in vitamin C, potassium, and anti-inflammatory compounds. Together, they make a treat that’s indulgent but not totally devoid of nutritional value. If you’re watching your sugar intake, you can easily reduce the sugar in the compote or use a sugar-free chocolate. These cups are naturally gluten-free and can be made dairy-free with the right chocolate choice. Just keep in mind that they do contain chocolate, which may not be suitable for those with chocolate allergies.
Conclusion
If you’ve been looking for a dessert that feels fancy but requires almost no effort, these dark chocolate cherry cups are exactly what you need. They’re the kind of treat that makes you look like a pro without any of the stress. Whether you’re making them for a holiday party, a Valentine’s Day surprise, or just because you deserve something sweet, they never disappoint.
I love how customizable they are — you can switch up the filling, add nuts or spices, or keep them simple and let the chocolate shine. Every batch I make turns out a little different, and that’s part of the fun. If you try them, let me know how they turn out! Leave a comment below or tag me in your photos — I love seeing your creations. And if you’re looking for more easy dessert inspiration, don’t miss my chocolate cherry banana bread — it’s another favorite that uses similar flavors.
Happy cooking, and enjoy every single bite!
Frequently Asked Questions
Can I use milk chocolate instead of dark chocolate?
Absolutely! Milk chocolate will make the cups sweeter and creamier. Just keep in mind that milk chocolate has a lower melting point, so the cups may be softer at room temperature. I recommend storing them in the refrigerator.
Do I have to use a mini muffin tin?
Not at all. You can use silicone candy molds in any shape, or even a regular muffin tin for larger cups. Just adjust the amount of chocolate and filling accordingly, and expect fewer, bigger cups.
Can I use dried cherries instead of fresh or frozen?
You can, but the texture will be different. Dried cherries are chewier and less juicy. If using dried cherries, rehydrate them by soaking in hot water for 10 minutes, then drain well before making the compote. You may need to add a little extra water to the pan to help them soften.
Why did my chocolate seize up?
Chocolate seizes when it comes into contact with even a tiny amount of water. Make sure your bowl and utensils are completely dry. If your chocolate does seize, you can try adding a tablespoon of vegetable oil or cocoa butter and stirring vigorously — sometimes it can be saved.
How long do these cups last?
Stored in an airtight container in the refrigerator, they’ll stay fresh for up to two weeks. They also freeze beautifully for up to three months. Just thaw in the fridge before serving for the best texture.
Pin This Recipe!
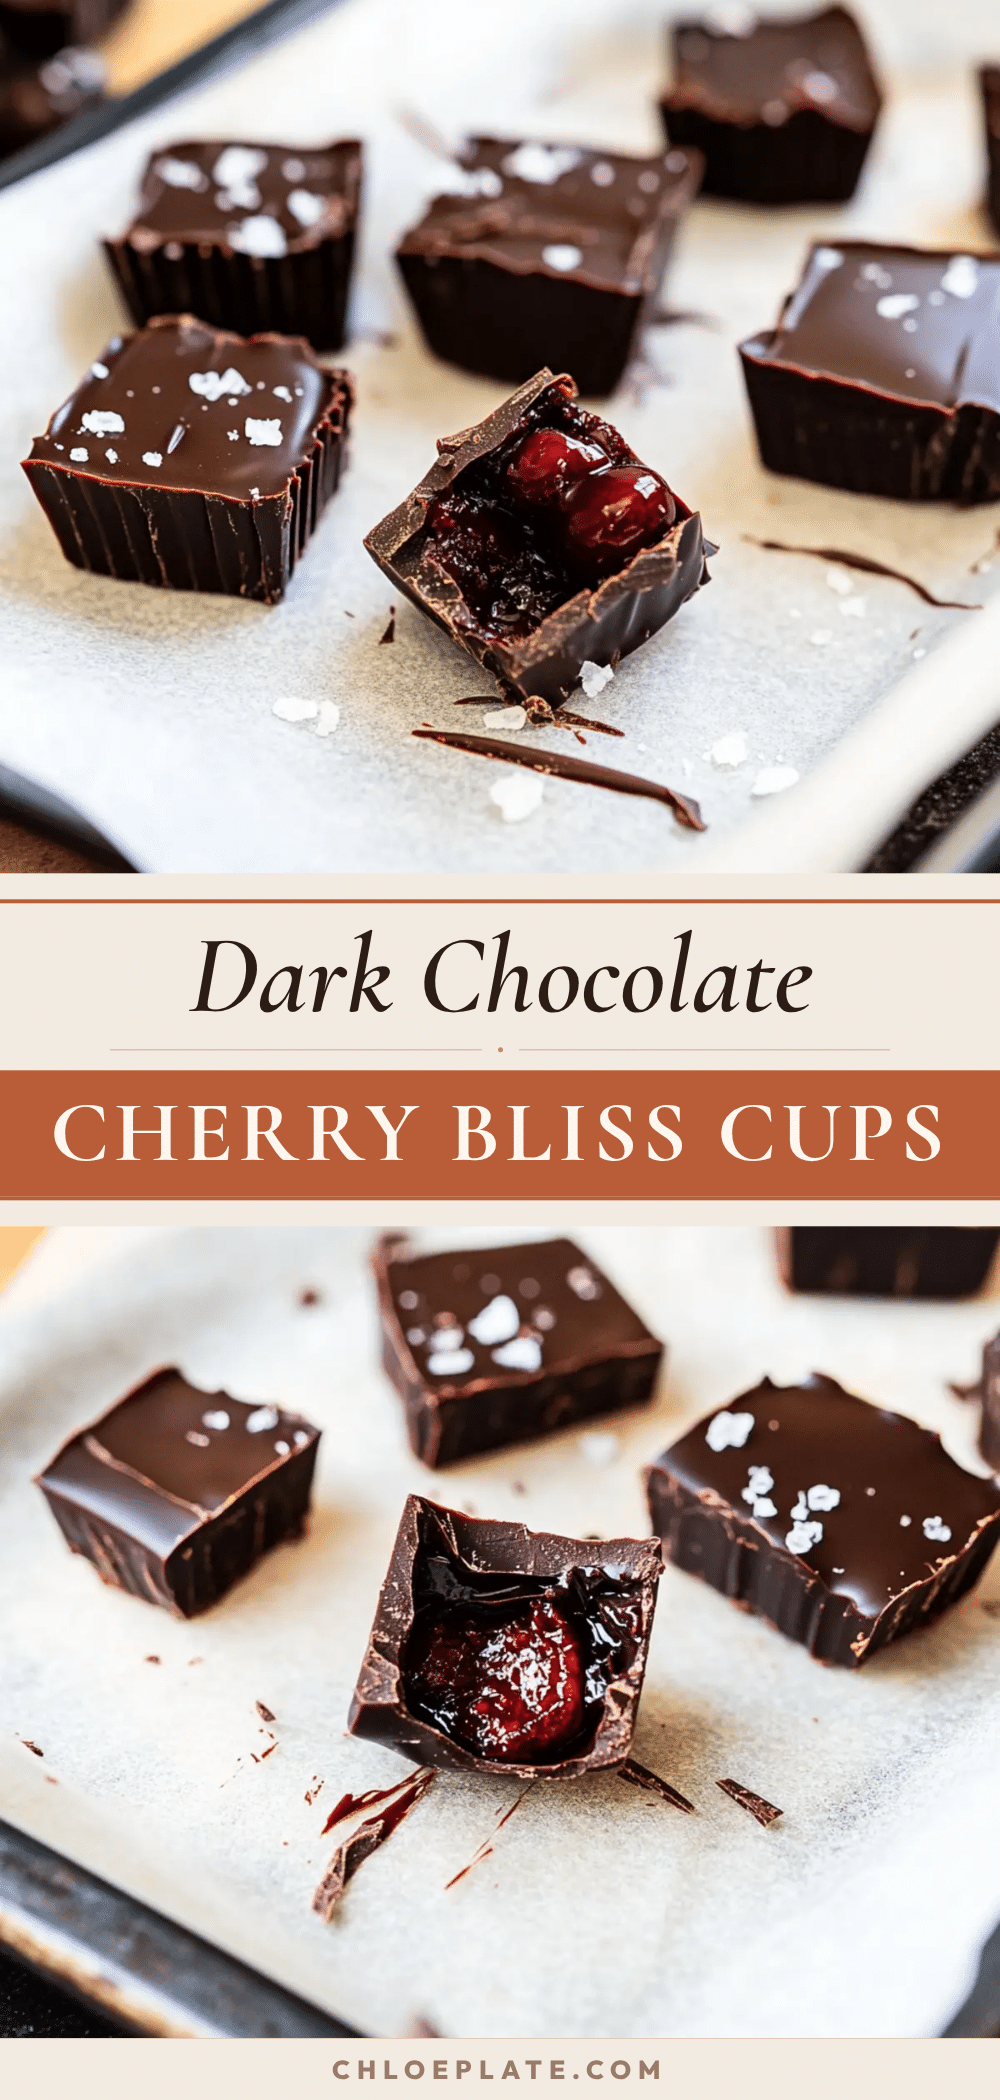
Decadent Dark Chocolate Cherry Cups – Easy Homemade Dessert
Rich, dark chocolate cups filled with a sweet-tart cherry compote. An easy, no-bake dessert that looks like it came from a fancy chocolatier but comes together in under an hour with simple ingredients.
- Prep Time: 15 minutes
- Cook Time: 10 minutes
- Total Time: 55 minutes
- Yield: 20 cups 1x
- Category: Dessert
- Cuisine: American
Ingredients
- 200g (7 oz) dark chocolate (60-70% cocoa), chopped
- 1 tablespoon coconut oil (optional, for shine)
- 1½ cups (225g) frozen or fresh cherries
- 2 tablespoons granulated sugar
- ½ teaspoon vanilla extract
- 1 teaspoon lemon juice
- Sea salt flakes (optional, for topping)
- Chopped pistachios or almonds (optional)
- Orange zest (optional)
Instructions
- Make the cherry compote: In a small saucepan, combine cherries, sugar, and lemon juice. Cook over medium heat, stirring occasionally, until cherries break down and mixture thickens to a jam-like consistency, about 8-10 minutes (add 2-3 minutes if using frozen cherries). Remove from heat, stir in vanilla extract, and let cool completely.
- Melt the chocolate: Chop dark chocolate into small, even pieces. Place in a heatproof bowl with coconut oil. Microwave in 30-second intervals at 50% power, stirring well after each, until smooth and fully melted (about 1½-2 minutes total). Alternatively, use a double boiler.
- Line a mini muffin tin with paper liners (or set silicone molds on a baking sheet).
- Create the first chocolate layer: Spoon about 1 teaspoon melted chocolate into each liner. Use the back of the spoon to spread it up the sides, forming a small cup shape. Tap the tin gently to settle chocolate and remove air bubbles. Refrigerate for 15-20 minutes until firm.
- Add the cherry filling: Spoon about ½ teaspoon cooled cherry compote into each cup. If using optional toppings (nuts, orange zest), sprinkle a little on top of the compote now.
- Top with remaining chocolate: Spoon another teaspoon melted chocolate over the filling, covering it completely and meeting the edges of the first layer. Tap the tin to level tops. If using sea salt flakes, sprinkle a tiny pinch on top before chocolate sets.
- Set and serve: Return tin to refrigerator for at least 30 minutes, until chocolate is completely firm. Peel away paper liners and serve cold.
Notes
Let the cherry compote cool completely before adding to the chocolate to prevent melting. For a professional finish, temper the chocolate using the seeding method. Store in an airtight container in the refrigerator for up to two weeks, or freeze for up to three months. These cups taste even better the next day as flavors meld.
Nutrition
- Serving Size: 1 cup
- Calories: 85
- Sugar: 7
- Fat: 5
- Saturated Fat: 3
- Carbohydrates: 10
- Fiber: 2
- Protein: 1
Keywords: dark chocolate cherry cups, easy homemade dessert, no-bake dessert, chocolate cherry cups, mini chocolate cups, cherry compote, gluten-free dessert, dairy-free dessert



