Love this? Save it for later!
Share the inspiration with your friends
I remember the exact moment these perfect candied strawberries with glossy sugar shell became my thing. It was a random Thursday afternoon, and I had a pint of strawberries sitting on the counter looking sad and underappreciated. Not quite bad, you know, but not getting any younger either. My friend had just texted me a photo of some fancy fairground fruit she’d grabbed at a farmers market, and I thought — honestly, how hard can that be?
Turns out, harder than I thought. My first batch was a sticky mess. The sugar shell cracked, the berries wept, and I stood there licking crystallized syrup off my fingers wondering where I went wrong. But I’m stubborn. I made another batch that night, then another the next morning. By the third attempt, something clicked. The gloss was there. The crunch was right. And when I bit into one, the shell shattered perfectly against my teeth while the strawberry inside stayed cool and juicy.
I brought them to a small get-together that weekend, setting them on a plate like they were nothing special. People actually stopped mid-conversation to grab one. Then another. Someone asked if I’d bought them from a fancy bakery. I just smiled and said it’s a simple trick — but honestly, it took me a few tries to get there. Now I’m sharing exactly what I learned so you can skip the sticky failures and nail that glossy, crackly shell on your first go.
Why You’ll Love This Recipe
Let’s be real — most homemade candied strawberries end up looking sad. The sugar crystallizes unevenly, the shell gets cloudy instead of glossy, or the fruit starts leaking within an hour. Not these. After testing this method multiple times (and yes, eating way too many strawberries in the process), I can confidently say this recipe delivers that professional, glossy sugar shell every time.
- Perfectly Glossy Shell: No cloudy or grainy sugar here. The technique ensures a crystal-clear, shiny coating that looks like glass.
- Crunch That Lasts: The sugar shell stays hard and crackly for hours, not minutes. You can make these ahead without stressing.
- Simple Ingredients: You only need strawberries, sugar, corn syrup, and water. That’s it. No special equipment required.
- No Candy Thermometer Needed: I’ll show you the visual cues so you don’t have to fuss with gadgets.
- Perfect for Gifting or Parties: They look stunning on a dessert board or packaged in a little box as a homemade gift.
- Naturally Gluten-Free: No weird flours or additives — just pure fruit and sugar goodness.
What makes this recipe different from all the others I tried? It’s the timing and the cooling method. Most recipes tell you to dip and walk away, but the secret lies in how you let the shell set. I figured this out after a few messy batches, and now it works every single time. These candied strawberries aren’t just a pretty treat — they’re the kind of thing that makes people think you’re way more skilled in the kitchen than you actually are.
What Ingredients You Will Need
This recipe uses simple, everyday ingredients, but each one plays a specific role in creating that glossy, crackly shell. Don’t skip the corn syrup — it’s the secret to preventing crystallization and keeping the coating smooth.
- Fresh Strawberries (1 pound / about 450g): Look for firm, ripe berries with bright red color and fresh green tops. Avoid overly soft or bruised strawberries — they’ll leak juice and ruin the sugar shell. I prefer medium-sized berries because they’re easier to dip and eat in one bite.
- Granulated Sugar (2 cups / 400g): Regular white sugar works best. Don’t use brown sugar or powdered sugar — they have different moisture content and won’t create that clear glass-like shell.
- Light Corn Syrup (1/2 cup / 120ml): This is non-negotiable. Corn syrup prevents the sugar from crystallizing and gives the shell that glossy, transparent finish. You can substitute with glucose syrup or golden syrup in a pinch.
- Water (1/2 cup / 120ml): Just regular tap water. It helps dissolve the sugar evenly before it starts cooking.
- Optional — Flavor Extract (1/2 teaspoon): A drop of vanilla extract, almond extract, or even rose water adds a subtle flavor. I love using vanilla for a classic taste, but keep it minimal so it doesn’t overpower the strawberries.
A quick note on ingredient sourcing — I’ve tested this with different brands of corn syrup, and honestly, they all work fine. Just make sure your strawberries are dry before dipping. Any moisture on the berry will make the sugar shell slide right off. I learned this the hard way after washing my berries and not drying them thoroughly enough. Pat them dry with paper towels and let them air-dry for 10 minutes before you start.
Equipment Needed
You don’t need fancy candy-making tools for these perfect candied strawberries. Here’s what you’ll need:
- Medium Heavy-Bottomed Saucepan: A 2-3 quart saucepan works perfectly. The heavy bottom distributes heat evenly and prevents hot spots that can burn the sugar.
- Wooden Spoon or Heatproof Spatula: For stirring the sugar mixture. Don’t use metal — it can scratch your pan and affect heat distribution.
- Parchment Paper or Silicone Baking Mat: For resting the dipped strawberries. Parchment is fine, but a silicone mat makes cleanup even easier.
- Baking Sheet or Large Plate: To hold the parchment and catch any drips.
- Toothpicks or Skewers: For dipping the strawberries. Skewers give you more control, but toothpicks work well for smaller berries.
- Pastry Brush (optional but helpful): For brushing down sugar crystals that form on the sides of the pan while cooking.
- Instant-Read Thermometer (optional): Not required, but helpful if you want to be precise. The sugar needs to reach 300°F (150°C) for a hard crack shell.
If you don’t have a thermometer, don’t worry. I’ll give you visual cues that work just as well. And honestly, I prefer the visual method now because it feels more intuitive. Also, a pro tip — keep a bowl of ice water nearby. If you drop a little sugar mixture into the cold water and it forms hard, brittle threads, you’re ready.
Preparation Method
Making these candied strawberries takes focus, but the steps are straightforward. Here’s exactly how I do it:
- Prepare the Strawberries: Wash your strawberries gently under cold water and pat them completely dry with paper towels. Any moisture will ruin the sugar shell. Let them sit on a paper towel-lined plate for 10 minutes to air-dry fully. Insert a toothpick or skewer into the stem end of each strawberry, about halfway in. Set them aside on a clean plate.
- Line Your Work Surface: Cover a baking sheet with parchment paper or a silicone baking mat. Make sure it’s large enough to hold all your strawberries without touching each other. Set this near your stove so you can work quickly once the sugar is ready.
- Combine Sugar, Corn Syrup, and Water: In your medium saucepan, add the granulated sugar, light corn syrup, and water. Stir gently with a wooden spoon until the sugar is mostly dissolved. Don’t stir too vigorously — you don’t want to splash sugar up the sides of the pan.
- Heat the Sugar Mixture: Place the saucepan over medium-high heat. Bring the mixture to a boil without stirring. Once it’s boiling, insert a candy thermometer if you’re using one. Let it boil undisturbed until it reaches 300°F (150°C) — the hard crack stage. This usually takes about 8-10 minutes.
- Watch for Visual Cues: If you’re not using a thermometer, look for the sugar to turn a very pale golden color — almost clear with just a hint of warmth. The bubbles will become smaller and more uniform. To test, drop a small amount of the hot sugar into a bowl of ice water. If it forms hard, brittle threads that snap cleanly, it’s ready.
- Remove from Heat and Add Flavor: Take the saucepan off the heat immediately. Let it sit for 30 seconds to cool slightly. If using flavor extract, stir it in gently — it will bubble up, so be careful.
- Dip the Strawberries: Working quickly but carefully, hold a strawberry by the toothpick and dip it into the hot sugar mixture. Tilt the pan slightly to create a deeper pool of sugar. Rotate the strawberry to coat it evenly, covering about three-quarters of the berry. Let excess sugar drip off for a few seconds back into the pan.
- Set the Strawberries: Place the dipped strawberry onto the prepared parchment paper. Gently twist the toothpick as you set it down to release it. If the toothpick sticks, you can wiggle it gently after 10 seconds. Repeat with remaining strawberries, working quickly as the sugar will start to harden.
- Let Them Cool Completely: Allow the strawberries to sit undisturbed at room temperature for at least 30 minutes. The sugar shell will harden and become glossy as it cools. Don’t touch them during this time — the shell is fragile when warm.
- Serve or Store: Once completely cool and hard, the strawberries are ready to eat. Serve them within 2-3 hours for the best texture.
A few things I’ve learned the hard way — if the sugar starts to harden in the pan while you’re still dipping, gently reheat it over low heat for a few seconds. Don’t microwave it. And if your kitchen is humid, the shell might get sticky faster. Try making these on a dry day if you can.
Cooking Tips & Techniques
Getting that perfect glossy sugar shell isn’t just about following steps — it’s about understanding what’s happening in the pan. Here are the tips that made all the difference for me.
First, humidity is your enemy. I made a batch on a rainy afternoon once, and the shells turned tacky within an hour. If your kitchen is humid, run your air conditioner or dehumidifier beforehand. Or just pick a dry day. Trust me on this.
Second, don’t stir the sugar once it starts boiling. I know it’s tempting, but stirring introduces air bubbles and can cause the sugar to crystallize. Let it boil undisturbed. If you see sugar crystals forming on the sides of the pan, brush them down with a wet pastry brush. Those stray crystals can seed the whole batch and turn it grainy.
Third, work fast but don’t rush. Once the sugar reaches 300°F, you have about 5-7 minutes of workable time before it starts to thicken. If you’re making a large batch, reheat the sugar gently between rounds. I usually make no more than 12-15 strawberries per batch of sugar.
Fourth — and this was my biggest mistake early on — don’t dip the strawberries too deep. You want to coat about three-quarters of the berry, leaving the top and leaves exposed. If you coat the whole thing, the strawberry’s natural moisture seeps out from the top and cracks the shell.
Finally, let the excess drip off properly. I used to rush this step and ended up with thick, uneven shells. Give each strawberry a good 5-7 seconds of dripping time. The shell will be thinner, more delicate, and way more elegant.
Variations & Adaptations
Once you’ve mastered the basic recipe, there’s so much you can do. Here are my favorite variations:
- Chocolate Drizzle: After the sugar shell hardens, drizzle melted dark or white chocolate over the top. The combination of crunchy sugar, juicy strawberry, and creamy chocolate is unreal.
- Sparkly Finish: While the sugar shell is still wet (within 10 seconds of dipping), sprinkle edible glitter, sanding sugar, or crushed freeze-dried strawberries over the top. It makes them look magical for parties.
- Citrus Twist: Add 1 tablespoon of lemon or orange zest to the sugar mixture before boiling. The citrus oils add a bright flavor that pairs beautifully with strawberries.
- Spiced Version: Stir in 1/4 teaspoon of cinnamon or cardamom with the flavor extract. It gives the shell a warm, cozy note perfect for fall.
- Dairy-Free & Vegan: This recipe is already dairy-free and vegan as written. Just make sure your sugar is certified vegan if that matters to you (some sugars are processed with bone char).
- Different Fruits: This technique works with other firm fruits too. Try it with seedless grapes, small apple slices, or even banana chunks (work quickly as bananas are softer).
I once made a batch with a splash of rose water and a sprinkle of crushed pistachios — they were absolutely stunning on a dessert board alongside some crunchy candied macadamia nuts. The combination of textures and flavors was exactly what a party spread needs.
Serving & Storage Suggestions
These candied strawberries are best enjoyed the same day you make them, ideally within 2-3 hours. The sugar shell stays perfectly hard and glossy during that window. After that, the strawberry’s natural moisture starts to soften the shell from the inside.
For serving, arrange them on a plate or platter with the green tops facing up. They look stunning on a dessert board alongside other treats like cozy pumpkin spice coffee cake with maple glaze or even some sweet and spicy dragon roasted nuts for a sweet-savory contrast. They also make beautiful edible gifts — just place them in a small box lined with parchment paper.
If you need to store them, place them in a single layer in an airtight container at room temperature. Don’t refrigerate them — the fridge introduces moisture that will make the shell sticky and soft. They’ll last about 4-6 hours at room temperature before the texture starts to decline. Honestly, they rarely last that long in my house.
For reheating — well, you can’t really reheat them. Once the shell softens, it’s gone. That’s why I recommend making them as close to serving time as possible. But if you have leftovers, you can always chop them up and use them as a topping for ice cream or yogurt. The broken shell pieces add a lovely crunch.
Nutritional Information & Benefits
While these are definitely a treat, strawberries bring some solid nutritional value to the table. Here’s a rough estimate per strawberry (based on medium-sized berries with the sugar shell):
- Calories: Approximately 45-55 calories per strawberry
- Carbohydrates: 11-13g (mostly from added sugar)
- Sugar: 10-12g (includes natural fruit sugars)
- Fiber: 0.5g
- Vitamin C: 15-20% of the daily value
- Fat: 0g
- Protein: 0.3g
The strawberries themselves are packed with antioxidants, particularly vitamin C and anthocyanins, which support immune health and reduce inflammation. The sugar shell adds calories, of course, but these are meant to be an occasional indulgence, not an everyday snack. If you’re watching your sugar intake, you can enjoy just one or two — the flavor is so concentrated that a little goes a long way.
This recipe is naturally gluten-free, dairy-free, and vegan. The only potential allergen concern is corn syrup for those with corn sensitivities, but you can substitute with glucose syrup or golden syrup.
Conclusion
These perfect candied strawberries with glossy sugar shell are one of those recipes that looks way more impressive than it actually is. A few simple ingredients, a little patience, and you’ve got a treat that feels like something from a fancy patisserie. I love making them for parties, gifting them in little boxes, or just treating myself on a random Tuesday.
Don’t be discouraged if your first batch isn’t perfect — my first one certainly wasn’t. The sugar crystallized, the shell cracked, and I ended up with a sticky mess. But once you get the timing right and trust the visual cues, it becomes second nature. And honestly, even the imperfect ones taste amazing.
I’d love to hear how yours turn out. Did you try any fun variations? Did they disappear as fast as mine always do? Drop a comment below and let me know. And if you’re looking for another sweet treat to round out your dessert spread, these pair beautifully with a batch of soft gingerbread bars with cream cheese frosting for a holiday-themed table. Happy dipping, friends!
Frequently Asked Questions
Why did my sugar shell turn cloudy instead of glossy?
Cloudy sugar usually means the mixture crystallized during cooking. This can happen if you stirred the sugar while it was boiling, or if sugar crystals from the sides of the pan fell back into the mixture. Next time, brush down the sides of the pan with a wet pastry brush and don’t stir once it starts boiling.
Can I use frozen strawberries for this recipe?
I don’t recommend it. Frozen strawberries release too much moisture as they thaw, which makes the sugar shell slide off or become sticky. Fresh, firm strawberries work best for that perfect glossy coating.
How do I prevent the sugar shell from cracking?
Cracking happens when the shell is too thick or when the strawberry releases moisture. Dip the strawberries quickly and let excess sugar drip off for 5-7 seconds. Also, make sure your strawberries are completely dry before dipping.
Can I make these candied strawberries a day ahead?
You can, but the texture won’t be as good. The shell will start to soften after 4-6 hours due to moisture from the strawberry. If you must make them ahead, store them in a single layer in an airtight container at room temperature and serve within 12 hours.
What can I do with leftover sugar syrup?
If you have extra sugar mixture after dipping all your strawberries, pour it onto a parchment-lined baking sheet and let it harden. Once cool, break it into pieces — you’ve just made homemade strawberry-infused hard candy! You can also use it to make zesty garlic ranch pretzels for a completely different snack experience.
Pin This Recipe!
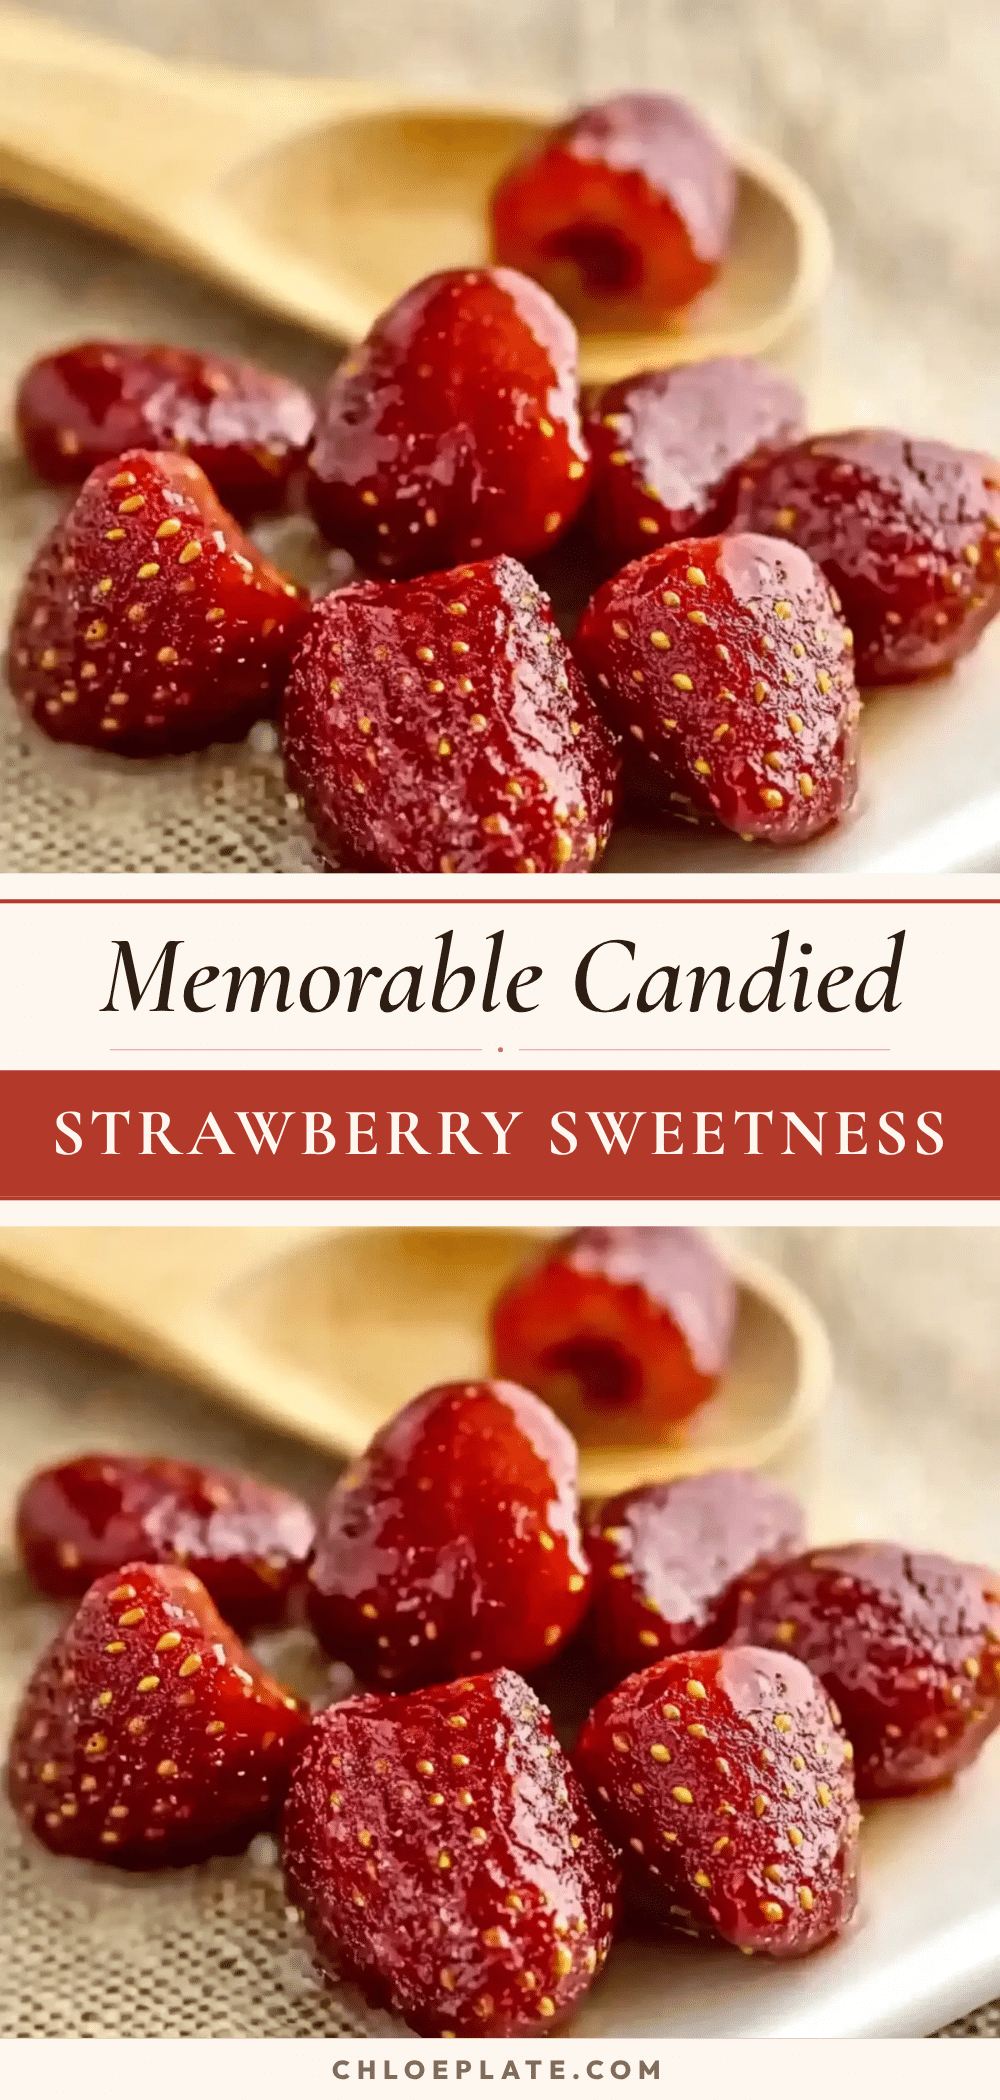
Perfect Candied Strawberries: Easy Homemade Recipe

Learn how to make perfect candied strawberries with a glossy, crackly sugar shell. This easy recipe uses simple ingredients and no candy thermometer, delivering professional results every time.
- Prep Time: 15 minutes
- Cook Time: 10 minutes
- Total Time: 55 minutes
- Yield: 12-15 strawberries 1x
- Category: Dessert
- Cuisine: American
Ingredients
- 1 pound (450g) fresh strawberries
- 2 cups (400g) granulated sugar
- 1/2 cup (120ml) light corn syrup
- 1/2 cup (120ml) water
- 1/2 teaspoon vanilla extract (optional)
Instructions
- Wash strawberries gently under cold water and pat completely dry with paper towels. Let them sit on a paper towel-lined plate for 10 minutes to air-dry fully. Insert a toothpick or skewer into the stem end of each strawberry, about halfway in. Set aside.
- Cover a baking sheet with parchment paper or a silicone baking mat. Set near the stove.
- In a medium heavy-bottomed saucepan, combine granulated sugar, light corn syrup, and water. Stir gently with a wooden spoon until sugar is mostly dissolved.
- Place saucepan over medium-high heat and bring to a boil without stirring. If using a candy thermometer, insert it now. Let boil undisturbed until it reaches 300°F (150°C) — the hard crack stage — about 8-10 minutes.
- If not using a thermometer, look for the sugar to turn a very pale golden color with smaller, more uniform bubbles. Test by dropping a small amount into ice water; if it forms hard, brittle threads that snap cleanly, it’s ready.
- Remove from heat and let sit for 30 seconds. If using flavor extract, stir it in gently (it will bubble up).
- Working quickly, hold a strawberry by the toothpick and dip into the hot sugar mixture, tilting the pan to create a deeper pool. Rotate to coat about three-quarters of the berry. Let excess drip off for 5-7 seconds.
- Place dipped strawberry onto prepared parchment. Gently twist the toothpick to release it. Repeat with remaining strawberries.
- Let strawberries cool undisturbed at room temperature for at least 30 minutes until the shell hardens and becomes glossy.
- Serve within 2-3 hours for best texture.
Notes
Humidity is the enemy; make on a dry day if possible. Don’t stir the sugar once it starts boiling. Work quickly but don’t rush; you have about 5-7 minutes of workable time. Don’t dip strawberries too deep — leave the top and leaves exposed. Let excess drip off properly for a thin, elegant shell. If sugar hardens in the pan, gently reheat over low heat.
Nutrition
- Serving Size: 1 candied strawberry
- Calories: 50
- Sugar: 11
- Sodium: 2
- Carbohydrates: 12
- Fiber: 0.5
- Protein: 0.3
Keywords: candied strawberries, glossy sugar shell, easy candy recipe, homemade candy, strawberry dessert, gluten-free dessert, vegan dessert



