Love this? Save it for later!
Share the inspiration with your friends
The first time I made this cake, I was chasing a memory. You know that scene in Matilda where Bruce Bogtrotter is forced to eat the entire chocolate cake in front of the whole school? I remember watching it as a kid and practically drooling on the carpet. It wasn’t the humiliation I was fixated on—it was the cake. That dark, glossy, impossibly fudgy mountain of chocolate that seemed to defy the laws of baking. For years, I assumed a cake that looked that good on screen could never taste that good in real life. Then I spent a whole weekend proving myself wrong.
I tried three different recipes before I landed on this one. The first was too dry. The second was rich but crumbly, falling apart the second I tried to slice it. The third—this one—was the one that made me text a photo to my sister with the caption, “We finally did it.” It’s the kind of cake that makes people go quiet after the first bite. Not in a dramatic, waiting-for-a-compliment way. Just quiet, because they’re busy actually enjoying it.
This isn’t a fussy cake. It doesn’t require a stand mixer or a culinary degree or a trip to a specialty baking store. It comes together in one bowl (plus a saucepan for the coffee), and it bakes up tall and proud with a crackly top that gives way to the most tender, moist crumb you’ve ever had. The secret? Hot coffee. It doesn’t make the cake taste like coffee—it just makes the chocolate taste like more of itself. Trust me on this.
Why You’ll Love This Recipe
Let me tell you why this cake has earned a permanent spot in my rotation. I’ve made it for birthdays, potlucks, bad days, and random Tuesdays, and it has never let me down.
- Ultra Moist & Fudgy: This is not a dry, airy chocolate cake. It’s dense and rich with a texture that almost melts on your tongue. The combination of oil, buttermilk, and hot coffee creates a crumb that stays moist for days.
- One-Bowl Batter: No creaming butter and sugar. No separating eggs. Everything goes into one bowl, you whisk it together, and you’re done. Less dishes means more time to lick the spatula.
- Simple Pantry Ingredients: You probably have most of these in your kitchen right now. Cocoa powder, flour, sugar, eggs, oil, buttermilk—nothing fancy. The only “special” ingredient is hot coffee, and that’s easy enough to make.
- Perfect for Any Occasion: Birthday parties, holiday dinners, book club, or just a quiet night in with a glass of milk. This cake fits every single scenario.
- Crowd-Pleaser Guaranteed: I’ve served this to kids who usually push their dessert around the plate, and to adults who claim they “don’t really have a sweet tooth.” Every single person has asked for the recipe.
What makes this version different from all the other chocolate cakes out there? It’s the balance. So many chocolate cakes are either too sweet or too bitter, too dense or too light. This one hits that perfect middle ground where the chocolate flavor is deep and intense, but the texture is soft and almost velvety. It’s the kind of cake that makes you close your eyes after the first bite, not because you’re trying to be dramatic, but because it genuinely catches you off guard.
What Ingredients You Will Need
This recipe uses simple, honest ingredients that work together to create something truly special. No weird additives or hard-to-find items here. Just good, solid baking staples.
For the Cake
- All-purpose flour (2 cups | 240g) – Provides structure without making the cake tough. Spoon and level it for accuracy.
- Granulated sugar (2 cups | 400g) – Adds sweetness and helps create that tender crumb.
- Unsweetened cocoa powder (¾ cup | 75g) – I prefer Dutch-processed for a deeper, smoother chocolate flavor, but natural works fine too.
- Baking powder (1½ teaspoons) – For lift and a light texture.
- Baking soda (1½ teaspoons) – Reacts with the buttermilk and coffee to help the cake rise beautifully.
- Salt (1 teaspoon) – Balances the sweetness and enhances the chocolate flavor.
- Large eggs (2, room temperature) – Binds everything together and adds richness.
- Whole milk (1 cup | 240ml) – Adds moisture. You can use 2% if that’s what you have.
- Vegetable oil (½ cup | 120ml) – Keeps the cake incredibly moist. I use canola or avocado oil for a neutral flavor.
- Buttermilk (½ cup | 120ml) – The acidity tenderizes the gluten and makes the crumb extra soft. If you don’t have buttermilk, add 1 tablespoon of lemon juice or vinegar to regular milk and let it sit for 5 minutes.
- Vanilla extract (2 teaspoons) – Rounds out the chocolate flavor beautifully.
- Hot brewed coffee (1 cup | 240ml) – This is the magic ingredient. It intensifies the chocolate without making the cake taste like coffee at all.
For the Chocolate Frosting
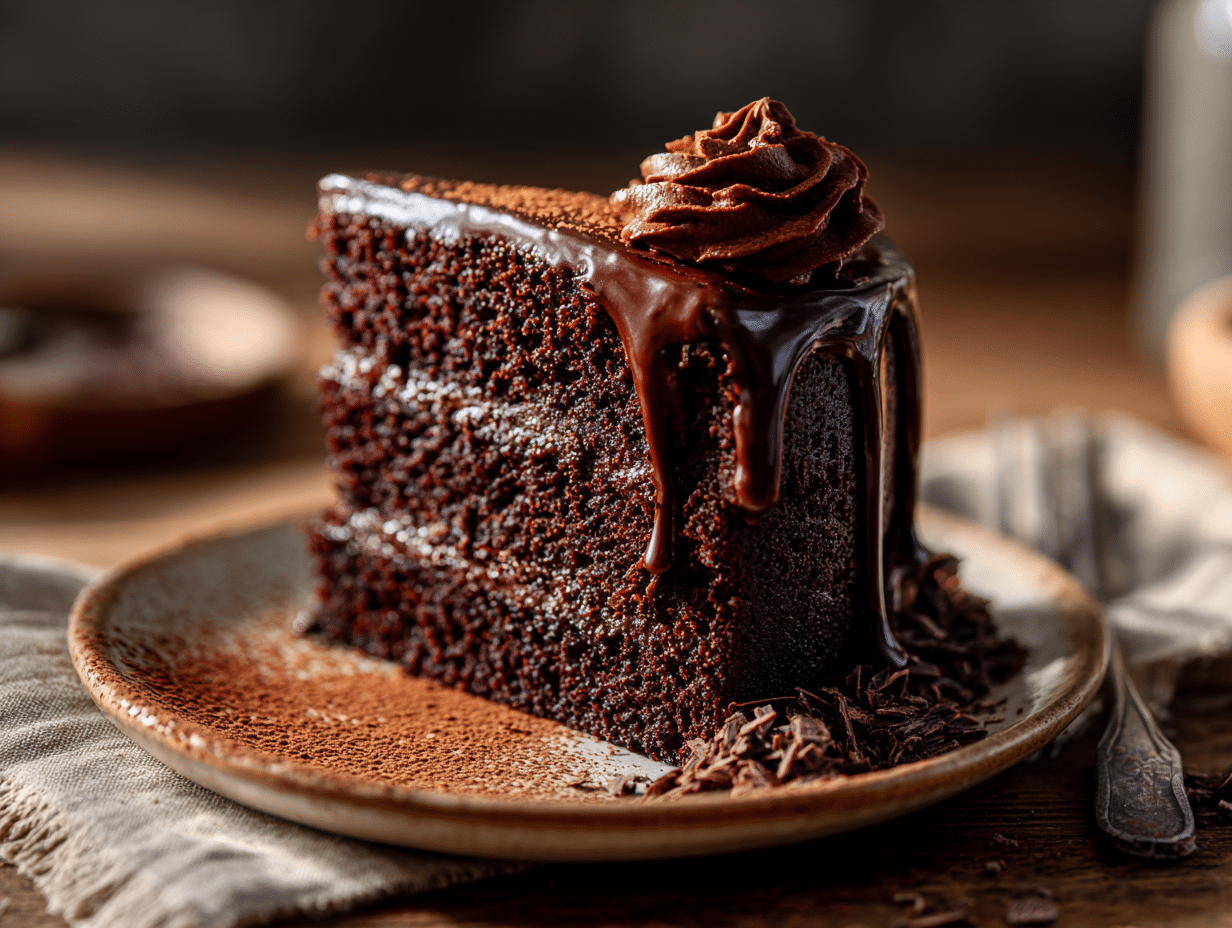
- Unsalted butter (1 cup | 2 sticks, softened) – The base of a rich, creamy frosting.
- Unsweetened cocoa powder (¾ cup | 75g) – Sift it to avoid lumps.
- Powdered sugar (3 cups | 360g) – For sweetness and structure.
- Heavy cream (¼ cup | 60ml) – Adds creaminess. You can use milk in a pinch.
- Vanilla extract (1 teaspoon) – Just a little to enhance the flavor.
- Pinch of salt – To balance the sweetness.
Equipment Needed
You don’t need a professional bakery setup for this cake. Here’s what you’ll need:
- Two 9-inch round cake pans – I like light-colored metal pans for even baking. Dark pans can cause the edges to brown too quickly.
- Parchment paper – Cut circles to line the bottom of the pans. This guarantees your cakes won’t stick.
- Large mixing bowl – For the batter. A glass or stainless steel bowl works great.
- Whisk – For combining dry ingredients and mixing the batter by hand.
- Saucepan – To heat the coffee (or just use a microwave-safe measuring cup).
- Electric hand mixer or stand mixer – For the frosting. You can do it by hand with a whisk and some elbow grease, but a mixer makes it much easier.
- Cooling rack – Essential for letting the cakes cool completely before frosting.
- Offset spatula – For smooth, even frosting. A butter knife works too, but an offset spatula is worth the few dollars it costs.
Preparation Method
Alright, let’s get to the good part. Follow these steps, and you’ll have a cake that would make Bruce Bogtrotter proud.
- Preheat and prep your pans. Preheat your oven to 350°F (175°C). Grease two 9-inch round cake pans with butter or non-stick spray, then line the bottoms with parchment paper circles. Grease the parchment too, just to be safe. Dust the pans lightly with cocoa powder instead of flour—it prevents white spots on your finished cake.
- Mix the dry ingredients. In your large mixing bowl, whisk together the flour, sugar, cocoa powder, baking powder, baking soda, and salt. Make sure there are no lumps in the cocoa powder. I like to sift the cocoa powder into the bowl to be extra sure.
- Add the wet ingredients (except coffee). Make a well in the center of the dry ingredients. Add the eggs, milk, vegetable oil, buttermilk, and vanilla extract. Whisk everything together until just combined. Don’t overmix—a few small lumps are totally fine. Overmixing will make the cake tough.
- Pour in the hot coffee. This is the step that feels a little weird the first time. Slowly pour the hot coffee into the batter while whisking gently. The batter will be very thin—almost like a milkshake. That’s exactly what you want. Don’t panic. The thin batter is what creates that ultra-moist, fudgy texture.
- Divide and bake. Pour the batter evenly into your prepared pans. Tap the pans on the counter a few times to release any air bubbles. Bake for 30 to 35 minutes, or until a toothpick inserted in the center comes out with just a few moist crumbs attached. The cakes should pull away slightly from the edges of the pans.
- Cool completely. Let the cakes cool in the pans for about 10 minutes, then run a knife around the edges and turn them out onto a cooling rack. Peel off the parchment paper and let them cool completely. I’m serious—completely. If you try to frost them while they’re still warm, you’ll end up with a melty mess.
- Make the frosting. While the cakes are cooling, make the frosting. In a large bowl, beat the softened butter with an electric mixer until smooth and creamy, about 2 minutes. Sift in the cocoa powder and beat until combined. Gradually add the powdered sugar, alternating with the heavy cream, and beat on low speed until everything is incorporated. Add the vanilla and salt, then increase the speed to medium-high and beat for 2 to 3 minutes until the frosting is light and fluffy. If it’s too thick, add a splash more cream. Too thin? Add a little more powdered sugar.
- Assemble the cake. Place one cake layer on your serving plate or cake stand. Spread about ¾ cup of frosting evenly on top. Place the second layer on top, then frost the top and sides of the entire cake. Don’t worry about making it perfect—a rustic, swoopy look is part of the charm.
Cooking Tips & Techniques
I’ve made this cake more times than I can count, and I’ve learned a few things along the way. Here are my best tips for getting it right every time.
Room temperature ingredients matter. I know it’s tempting to use cold eggs straight from the fridge, but room temperature ingredients emulsify much better, giving you a smoother, more even crumb. Take your eggs, milk, and buttermilk out of the fridge about 30 minutes before you start baking.
Don’t skip the coffee. I’ve had people tell me they don’t like coffee, so they leave it out. Please don’t. The coffee doesn’t make the cake taste like coffee—it deepens and intensifies the chocolate flavor. It’s like turning up the volume on the chocolate without adding more cocoa powder. If you absolutely can’t use coffee, substitute with hot water, but the result won’t be quite as rich.
Use a kitchen scale if you have one. Measuring flour by volume can be inconsistent. A cup of flour can weigh anywhere from 120g to 150g depending on how you scoop it. Using a scale ensures you get the exact same result every time. I’ve listed both measurements above for convenience.
Let the cake rest overnight. This is my favorite tip. After you’ve assembled the cake, let it sit at room temperature overnight (or at least for a few hours). The flavors meld together, and the texture becomes even more moist and fudgy. It’s like the cake just gets better with time.
My biggest failure with this cake? The first time I made it, I overbaked it by about 5 minutes. The edges were dry and the top cracked too much. Now I set my timer for 28 minutes and start checking. Every oven runs a little differently, so trust your senses more than the clock.
Variations & Adaptations
This cake is pretty perfect as is, but sometimes you want to shake things up. Here are a few variations I’ve tried and loved.
Gluten-Free Version: Substitute the all-purpose flour with a good quality 1:1 gluten-free baking flour blend. I’ve had great results with this swap. The texture is slightly more delicate, but still incredibly moist and fudgy.
Peppermint Chocolate Cake: Add 1 teaspoon of peppermint extract to the batter along with the vanilla. For the frosting, crush up some candy canes and sprinkle them on top. It’s a showstopper for the holidays.
Spiced Chocolate Cake: Add 1 teaspoon of cinnamon and ½ teaspoon of cayenne pepper to the dry ingredients. The warmth of the spices pairs beautifully with the deep chocolate flavor. It’s subtle but noticeable—like a Mexican hot chocolate in cake form.
Dairy-Free Adaptation: Use almond milk or oat milk in place of the whole milk, and use a dairy-free yogurt or milk mixed with lemon juice instead of buttermilk. For the frosting, use vegan butter and a dairy-free creamer. It works surprisingly well.
Layer Cake to Sheet Cake: If you don’t want to deal with layers, pour the batter into a greased 9×13-inch pan and bake for 35 to 40 minutes. Frost it right in the pan for a no-fuss dessert that’s perfect for potlucks.
Serving & Storage Suggestions
This cake is best served at room temperature. The texture is at its peak when the cake isn’t too cold, so take it out of the fridge about 30 minutes before you plan to serve it.
What to serve with it: A tall glass of cold milk is the classic pairing, and for good reason. But I also love it with a scoop of vanilla ice cream or a dollop of lightly sweetened whipped cream. If you’re feeling fancy, a drizzle of warm caramel sauce takes it over the top.
Storage: Store the cake in an airtight container at room temperature for up to 3 days. If your kitchen is warm, you can refrigerate it, but let it come to room temperature before serving. The cake actually tastes even better on day two—the flavors have more time to develop.
Freezing: This cake freezes beautifully. Wrap the unfrosted cake layers tightly in plastic wrap, then in aluminum foil, and freeze for up to 3 months. When you’re ready to use them, thaw them in the fridge overnight, then bring to room temperature before frosting. You can also freeze the frosted whole cake—just place it in the freezer unwrapped for an hour to firm up the frosting, then wrap it well and freeze.
Reheating: If you want that just-baked warmth, microwave individual slices for about 15 to 20 seconds. It softens the cake and makes the frosting slightly gooey. Dangerous? Yes. Worth it? Absolutely.
Nutritional Information & Benefits
Let’s be real—this is a celebration cake, not a health food. But that doesn’t mean it can’t have some redeeming qualities.
- Estimated per serving (1 slice, based on 12 servings): Calories: 520 | Fat: 28g | Carbs: 68g | Protein: 6g | Sugar: 48g
- Cocoa powder is rich in antioxidants called flavanols, which can help reduce inflammation and support heart health. So technically, you’re getting your antioxidants in dessert form.
- Buttermilk contains probiotics and is easier to digest than regular milk for some people.
- Dietary considerations: This recipe contains gluten, dairy, and eggs. See the variations section above for gluten-free and dairy-free adaptations.
- Potential allergens: Wheat, milk, eggs.
I’m not one to pretend dessert is a health food, but I do believe that a slice of good cake—made with love and shared with people you care about—is good for the soul. And that counts for something.
Conclusion
This Matilda chocolate cake is more than just a recipe—it’s a little piece of childhood magic that actually lives up to the memory. It’s the cake I turn to when I need a guaranteed win, whether I’m celebrating something big or just trying to make a Tuesday feel special.
I love that it’s forgiving enough for a beginner baker but impressive enough to serve at a dinner party. I love that it uses simple ingredients to create something that feels luxurious. And I love that every time I make it, someone asks for the recipe.
So go ahead and make it. Customize it however you like—add some spices, swap the frosting, turn it into cupcakes. Make it your own. And when you do, I’d love to hear about it. Leave a comment below and tell me how it turned out, or share a photo on social media and tag me. There’s nothing that makes me happier than seeing this cake bring someone else the same joy it’s brought me.
Now go preheat that oven. Your inner child is waiting.
Frequently Asked Questions
Can I make this cake without coffee?
Yes, you can substitute the hot coffee with hot water. The cake will still be delicious and moist, but the chocolate flavor won’t be quite as deep and intense. The coffee doesn’t make it taste like coffee—it just makes the chocolate taste more chocolatey.
Why is my chocolate cake dry?
The most common reason is overbaking. Start checking your cake at the 28-minute mark. If a toothpick comes out clean with just a few moist crumbs, it’s done. Also, make sure you’re measuring your flour correctly—spoon it into the measuring cup and level it off, don’t scoop directly from the bag.
Can I use this recipe to make cupcakes?
Absolutely! This batter makes about 24 cupcakes. Fill the liners about ⅔ full and bake at 350°F (175°C) for 18 to 22 minutes. The cupcakes are incredibly moist and fudgy, and they’re always a hit at parties.
How do I get clean slices when cutting the cake?
Use a long, sharp knife and run it under hot water before each cut. Wipe the blade clean between slices. This gives you those picture-perfect slices with clean edges and no smeared frosting.
Can I make this cake ahead of time?
Yes, and I actually recommend it. You can bake the cake layers a day ahead, wrap them tightly in plastic wrap, and keep them at room temperature. Assemble and frost the day you plan to serve it. The cake also tastes amazing the next day—the flavors have more time to meld together.
Pin This Recipe!
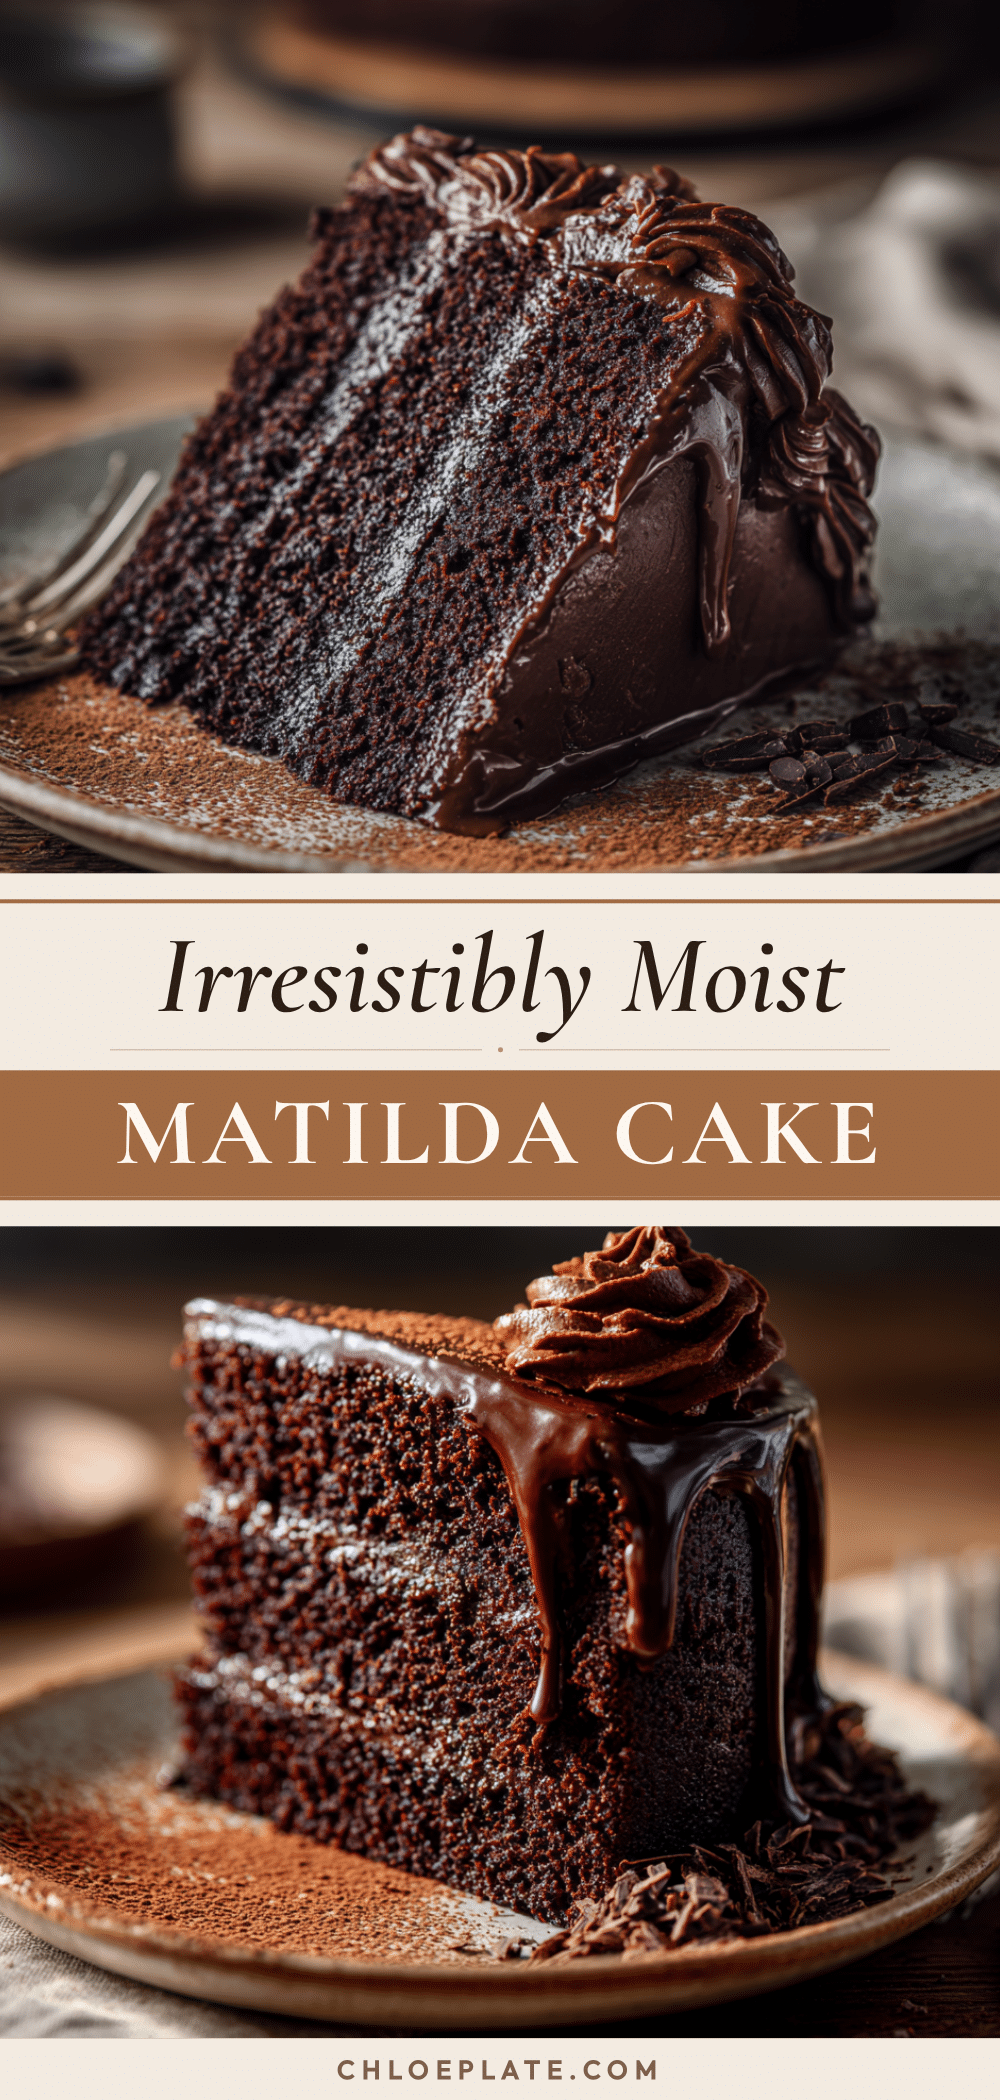
The Best Matilda Chocolate Cake: Ultra Moist & Fudgy
This ultra moist and fudgy chocolate cake is inspired by the iconic scene from Matilda. Made with hot coffee for deep chocolate flavor, it’s a one-bowl wonder that’s perfect for any occasion.
- Prep Time: 20 minutes
- Cook Time: 30 minutes
- Total Time: 50 minutes
- Yield: 12 servings 1x
- Category: Dessert
- Cuisine: American
Ingredients
- 2 cups (240g) all-purpose flour
- 2 cups (400g) granulated sugar
- 3/4 cup (75g) unsweetened cocoa powder (Dutch-processed preferred)
- 1 1/2 teaspoons baking powder
- 1 1/2 teaspoons baking soda
- 1 teaspoon salt
- 2 large eggs, room temperature
- 1 cup (240ml) whole milk
- 1/2 cup (120ml) vegetable oil (canola or avocado)
- 1/2 cup (120ml) buttermilk
- 2 teaspoons vanilla extract
- 1 cup (240ml) hot brewed coffee
- 1 cup (2 sticks, 226g) unsalted butter, softened
- 3/4 cup (75g) unsweetened cocoa powder (for frosting)
- 3 cups (360g) powdered sugar
- 1/4 cup (60ml) heavy cream
- 1 teaspoon vanilla extract (for frosting)
- Pinch of salt (for frosting)
Instructions
- Preheat oven to 350°F (175°C). Grease two 9-inch round cake pans, line bottoms with parchment paper, and dust with cocoa powder.
- In a large bowl, whisk together flour, sugar, cocoa powder, baking powder, baking soda, and salt.
- Make a well in the center and add eggs, milk, vegetable oil, buttermilk, and vanilla extract. Whisk until just combined (a few lumps are fine).
- Slowly pour in hot coffee while whisking gently until batter is thin and smooth.
- Divide batter evenly between prepared pans. Tap pans on counter to release air bubbles.
- Bake for 30-35 minutes, until a toothpick inserted in center comes out with a few moist crumbs. Cool in pans for 10 minutes, then turn out onto a wire rack to cool completely.
- For frosting: Beat softened butter until smooth. Sift in cocoa powder and beat. Gradually add powdered sugar alternating with heavy cream, beating on low. Add vanilla and salt, then beat on medium-high for 2-3 minutes until light and fluffy.
- Place one cake layer on serving plate, spread about 3/4 cup frosting on top. Add second layer and frost top and sides of entire cake.
Notes
Room temperature ingredients are important for best texture. Don’t skip the coffee—it intensifies chocolate flavor without making the cake taste like coffee. For best results, let assembled cake rest overnight at room temperature. To check doneness, start checking at 28 minutes.
Nutrition
- Serving Size: 1 slice
- Calories: 520
- Sugar: 48
- Sodium: 380
- Fat: 28
- Saturated Fat: 12
- Carbohydrates: 68
- Fiber: 3
- Protein: 6
Keywords: chocolate cake, Matilda cake, fudgy chocolate cake, moist chocolate cake, one-bowl cake, birthday cake