Love this? Save it for later!
Share the inspiration with your friends
“You really think red velvet and ice cream go together?” my friend asked, raising an eyebrow over her coffee as I unpacked the layers from the freezer. Honestly, I wasn’t sure at first either. But after that chilly, creamy first bite, all skepticism melted away. It happened one restless Sunday afternoon when I was halfway through making a simple dessert for a last-minute get-together. I didn’t have the usual frosting ingredients on hand, and well, the ice cream in the freezer was calling my name. So I experimented, layering rich red velvet cake with luscious cream cheese ice cream — and voilà, something unexpectedly magical came to life.
That afternoon, the creaminess of the ice cream softened the cake’s cocoa notes, while the tangy cream cheese flavor tied everything into a perfect harmony. The texture contrast — soft cake meeting smooth, dreamy ice cream — was unlike anything I’d made before. Since then, this creamy red velvet ice cream cake has become my go-to for celebrations and quiet nights alike. It’s the kind of dessert that feels festive without fuss, indulgent yet somehow light, and every slice invites a moment to pause and savor. The recipe stuck around not because it was planned but because it simply worked, and kept working every time I made it. There’s a quiet joy in that kind of easy confidence, especially when you can pull it together with ingredients you usually have in your kitchen.
It’s a dessert that promises a little sweet surprise, perfect for when you want to treat yourself or impress friends without staging a full bakery production. And if you’re wondering, yes — it goes down even better with a scoop of something fruity or a splash of coffee on the side, like those creamy berry yogurt popsicles I love to make when summer’s in full swing.
Why You’ll Love This Recipe
Having made this creamy red velvet ice cream cake more times than I can count, I can honestly say it ticks all the boxes for a fuss-free yet crowd-pleasing dessert. Here’s why it might just become your favorite too:
- Quick & Easy: You can assemble this cake in under 30 minutes, making it perfect for busy weeknights or those surprise dinner guests.
- Simple Ingredients: No need for specialty stores — the ingredients are straightforward, and you probably already have most of them on hand.
- Perfect for Celebrations: Whether it’s a birthday, holiday, or just an ordinary day that needs brightening, this cake feels special without the stress.
- Crowd-Pleaser: Kids, adults, picky eaters — this one gets rave reviews thanks to its creamy texture and balanced sweetness.
- Unbelievably Delicious: The tang of cream cheese ice cream paired with the subtle cocoa notes in the red velvet creates a flavor combo that’s both nostalgic and fresh.
This isn’t your typical ice cream cake. What sets it apart is the creamy layer made from homemade cream cheese ice cream that’s velvety smooth, with just the right pop of red velvet crumbs folded in for texture and color. Instead of the usual heavy frostings, this cake stays light and refreshing, which makes it ideal for warmer months or anytime you want a luscious but not overwhelming treat.
It’s a little bit like the decadent raspberry cheesecake I adore — rich yet balanced, and you can feel good sharing it around. Honestly, once you try this red velvet ice cream cake, you’ll see why it’s become a household favorite around here.
What Ingredients You Will Need
This recipe calls for wholesome, easy-to-find ingredients that come together to create a stunningly creamy and flavorful dessert. The ingredients break down into the cake base, the ice cream layer, and a simple garnish. Most are pantry staples, with options for substitutions to suit dietary needs.
- For the Red Velvet Cake Base:
- All-purpose flour, 1 ½ cups (190 g)
- Granulated sugar, 1 cup (200 g)
- Unsweetened cocoa powder, 2 tablespoons (use Dutch-processed for richer flavor)
- Baking soda, 1 teaspoon
- Salt, ½ teaspoon
- Buttermilk, 1 cup (240 ml) (or milk + 1 tablespoon vinegar as a substitute)
- Vegetable oil, ½ cup (120 ml) (I prefer a neutral oil like canola or sunflower)
- Large egg, room temperature
- Red food coloring, 2 tablespoons (gel-based for more vibrant color)
- Vanilla extract, 1 teaspoon
- White vinegar, 1 teaspoon
- For the Cream Cheese Ice Cream Layer:
- Cream cheese, softened, 8 oz (225 g) (look for full-fat for best creaminess)
- Heavy cream, 2 cups (480 ml)
- Granulated sugar, ¾ cup (150 g)
- Vanilla extract, 2 teaspoons
- Pinch of salt
- For Garnish (Optional):
- Red velvet cake crumbs (reserved from trimming cake layers)
- Whipped cream
- White chocolate shavings or curls
For a gluten-free version, you can swap the all-purpose flour with a 1:1 gluten-free baking flour blend. If dairy is a concern, try using lactose-free cream cheese and heavy cream alternatives, like coconut cream, though texture might vary. I always recommend using quality cream cheese like Philadelphia for that signature tang and smooth texture. And if you’re craving a fruity twist, sprinkle in some fresh berries on top when serving — it pairs beautifully, similar to the way I love fresh berries with my perfect olive oil cake with mascarpone frosting.
Equipment Needed
- 9-inch (23 cm) round cake pans (2) — non-stick or lined with parchment paper
- Mixing bowls (various sizes)
- Electric mixer or stand mixer — to whip the cream cheese ice cream base smoothly
- Whisk and spatula — for folding and mixing
- Measuring cups and spoons — for accurate ingredient portions
- Freezer-safe cake ring or springform pan (optional) — great for shaping and freezing the ice cream cake
- Fine mesh sieve — to sift cocoa powder and flour, avoiding lumps
- Plastic wrap or airtight container — for storing the assembled cake in the freezer
If you don’t have a stand mixer, a handheld electric mixer works just fine for whipping the ice cream base. I once tried folding the ice cream by hand when my mixer was acting up — let’s just say it was a workout and the texture wasn’t quite as smooth. For budget-friendly options, silicone spatulas and metal pans work just as well as pricier gear. Just keep an eye on freezing times to get the perfect set.
Preparation Method
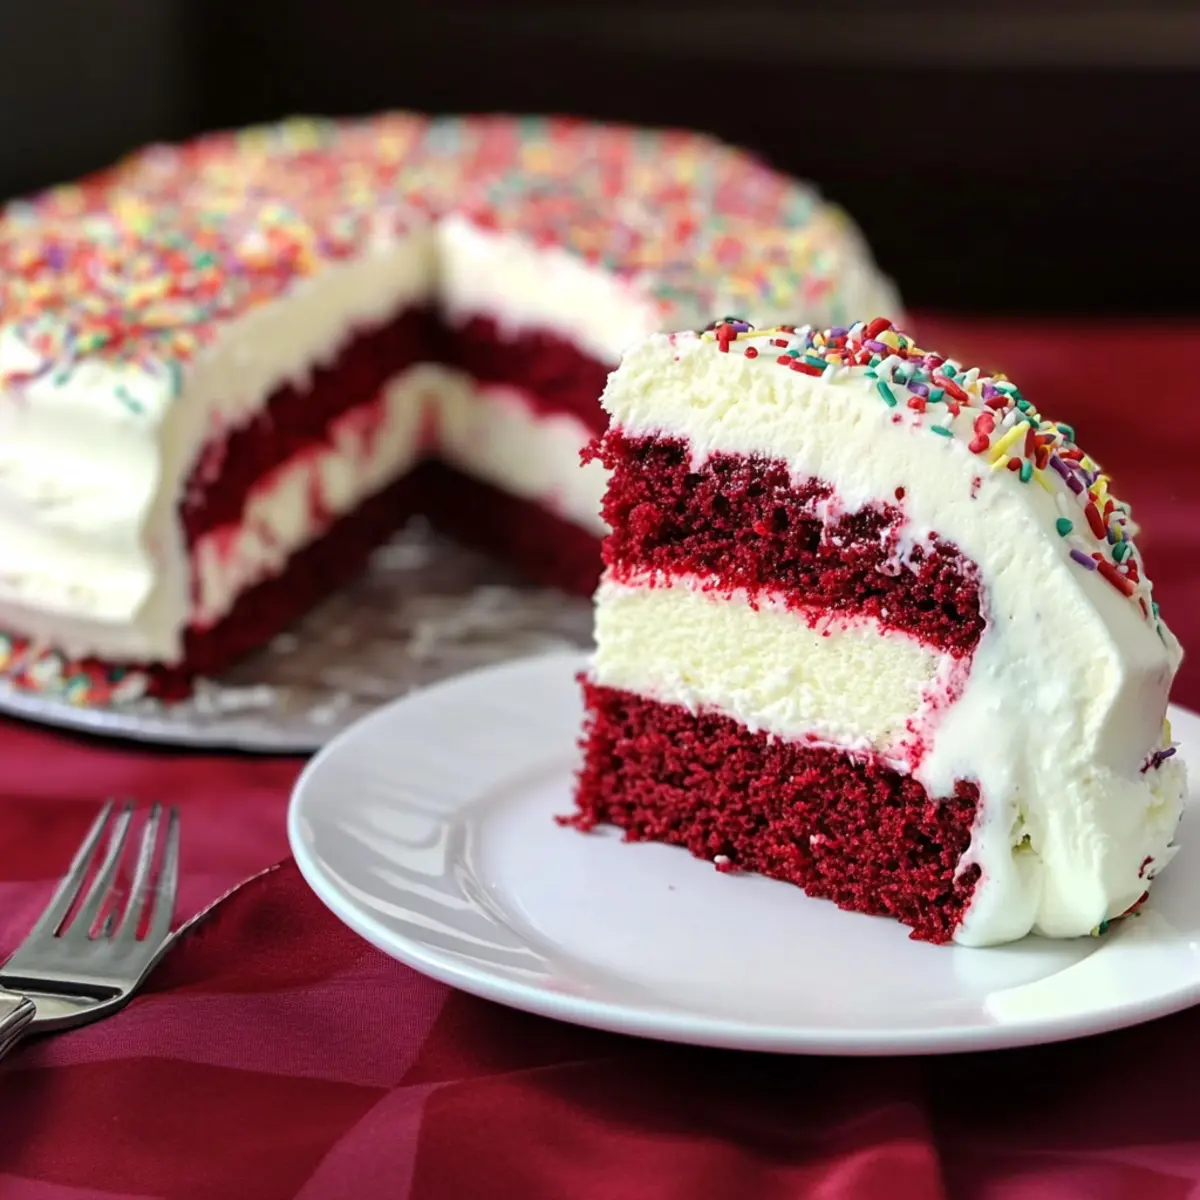
- Prepare the Red Velvet Cake: Preheat your oven to 350°F (175°C). Grease and flour two 9-inch round cake pans or line them with parchment paper. In a large bowl, sift together 1 ½ cups flour, 2 tablespoons cocoa powder, 1 teaspoon baking soda, and ½ teaspoon salt. Set aside.
- In a separate bowl, whisk 1 cup sugar and ½ cup vegetable oil until combined. Add the large egg, 1 teaspoon vanilla extract, and 2 tablespoons red food coloring. Mix well until smooth and vibrant.
- Alternate adding the dry ingredients and 1 cup buttermilk to the wet mixture, starting and ending with the dry. Stir gently, just until combined — don’t overmix or the cake could be dense.
- Stir in 1 teaspoon white vinegar last. The batter will be thin but richly colored.
- Divide the batter evenly between the two pans and bake for 25-30 minutes, or until a toothpick inserted comes out clean. Let the cakes cool completely on wire racks.
- Make the Cream Cheese Ice Cream Layer: In a large bowl, beat 8 oz softened cream cheese with ¾ cup sugar until smooth and creamy, about 3-4 minutes using a hand or stand mixer.
- Whip 2 cups heavy cream with 2 teaspoons vanilla extract and a pinch of salt until stiff peaks form.
- Gently fold the whipped cream into the cream cheese mixture until fully combined and airy. This step is crucial to keep the ice cream layer smooth and fluffy.
- Assemble the Ice Cream Cake: Trim the cooled cakes to level the tops if needed, reserving crumbs for garnish. Place one cake layer on your serving plate or springform pan base.
- Spread half of the cream cheese ice cream mixture evenly over the cake layer. Sprinkle a handful of reserved cake crumbs for texture (optional).
- Add the second cake layer on top, then spread the remaining ice cream mixture over it, smoothing the top with a spatula.
- Cover the cake with plastic wrap and freeze for at least 6 hours, preferably overnight, until firm.
- Serve: Before serving, let the cake sit at room temperature for 10-15 minutes to soften slightly. Garnish with whipped cream, red velvet crumbs, and white chocolate shavings if desired.
Pro tip: When mixing the ice cream layer, folding gently is key to avoid deflating the whipped cream. Also, don’t skip cooling the cake fully before assembling; warm cake will melt the ice cream faster, making it messy. If you want to speed up the process, freeze the cake layers separately before assembly — just wrap them tightly to prevent freezer burn.
Cooking Tips & Techniques
Here’s what I’ve learned through trial and error to get this red velvet ice cream cake just right every time:
- Use Gel Food Coloring: Liquid food coloring can thin the batter and affect texture. Gel gives vibrant color without messing with moisture.
- Don’t Overmix the Batter: Stir until ingredients just come together to keep the cake tender and light.
- Softened Cream Cheese is a Must: If cream cheese is too cold, lumps form in the ice cream layer. Let it sit out for 30 minutes or microwave in short bursts.
- Whip the Cream to Stiff Peaks: This traps air, giving your ice cream layer a fluffy, melt-in-your-mouth feel.
- Freeze Overnight: Patience is key here. The flavors meld, and the cake firms up properly.
- Use a Warm Knife to Slice: Run your knife under hot water, dry it off, then slice. It keeps edges clean and pretty.
One time, I skipped folding the whipped cream gently and ended up with a dense, heavy ice cream layer — lesson learned! Also, freezing times can vary depending on your freezer’s temperature, so plan accordingly. Multitasking tip: while the cake bakes and cools, whip up the cream cheese mixture so you’re ready to assemble right away.
Variations & Adaptations
If you want to tweak this recipe, here are some ideas that I’ve enjoyed or think you might like:
- Chocolate Lover’s Version: Add mini chocolate chips into the ice cream layer for extra texture and bursts of chocolate goodness.
- Berry Infusion: Swirl in a raspberry or strawberry coulis into the ice cream before freezing, inspired by the fresh berry popsicles I love — it adds a fresh, tangy twist.
- Dairy-Free Adaptation: Use coconut cream instead of heavy cream and a vegan cream cheese substitute to make it plant-based. The texture will be a bit different but still delicious.
- Nutty Crunch: Sprinkle chopped toasted pecans or walnuts between layers for an unexpected crunch that pairs well with the creamy and soft textures.
- Spiced Red Velvet: Add a pinch of cinnamon and nutmeg to the cake batter for a warm, cozy flavor profile.
Personally, I’ve also tried layering this cake with a thin spread of my homemade cream cheese frosting before adding the ice cream for an ultra-rich version — it’s an indulgent treat perfect for special occasions. If you’re curious about other no-bake creamy desserts, you might appreciate the simplicity of my creamy no-bake banana split dessert.
Serving & Storage Suggestions
This cake is best served slightly softened — about 10-15 minutes out of the freezer — so you can enjoy the creamy texture without it melting too fast. I like to slice it with a sharp, warm knife and serve on chilled plates to keep things cool longer.
Pair it with a fresh cup of coffee or a fruity iced tea to balance the sweetness. For an extra touch, sprinkle some fresh berries or drizzle a berry coulis over the slices. It pairs beautifully alongside lighter summer desserts like the fresh strawberry icebox cake, especially for a gathering.
To store, cover the cake tightly with plastic wrap or place it in an airtight container and keep it in the freezer for up to one week. Avoid freezer burn by wrapping well. When reheating, just let it thaw on the counter for 10-15 minutes before serving — avoid microwaving, as it can make the texture grainy.
Flavors tend to mellow and meld after a day in the freezer, so sometimes I actually prefer making it a day ahead. The tang of cream cheese and richness of the cake deepen, making each bite a little more satisfying.
Nutritional Information & Benefits
This creamy red velvet ice cream cake is a treat, but it’s made with real ingredients that offer some nutritional perks. One slice (approximately 1/10th of the cake) contains roughly:
| Calories | 320 |
|---|---|
| Fat | 20g (mostly from cream and cream cheese) |
| Carbohydrates | 30g (includes sugars) |
| Protein | 5g |
| Sugar | 22g |
Key ingredients like cream cheese provide calcium and protein, while the heavy cream adds satisfying richness. Using buttermilk in the cake adds a slight tang and tender crumb. For those watching carbs, swapping white sugar for coconut sugar or reducing sugar slightly can help balance sweetness without losing flavor.
Keep in mind this recipe contains dairy and gluten, so it’s not suitable for those with allergies unless you use the substitutions mentioned earlier. I find this cake a nice balance between indulgence and portion control — a special dessert that feels worth savoring rather than overindulging.
Conclusion
This creamy red velvet ice cream cake is a recipe that’s stuck around my kitchen because it’s both simple and unexpectedly satisfying. It’s perfect when you want a showstopping dessert that doesn’t require hours of work or complicated ingredients. The combination of moist red velvet cake and smooth cream cheese ice cream is honestly hard to beat.
Feel free to play around with flavors or textures — whether that means adding nuts, berries, or trying a dairy-free version, it’s a flexible recipe that welcomes your personal touch. I love how this cake brings a little celebration to any day, even when it’s just a quiet moment at home.
If you give it a try, I’d love to hear how you make it your own — leave a comment or share your tweaks! Here’s to many creamy, sweet slices ahead.
Frequently Asked Questions about Creamy Red Velvet Ice Cream Cake
Can I make this cake ahead of time?
Absolutely! It actually tastes better after chilling overnight, as the flavors meld and the ice cream layer firms up nicely.
What if I don’t have buttermilk for the cake?
You can easily make a substitute by adding 1 tablespoon of white vinegar or lemon juice to 1 cup of milk. Let it sit for 5 minutes before using.
Can I use store-bought ice cream instead of making the cream cheese ice cream?
You can, but I recommend using plain or vanilla cream cheese-flavored ice cream for the best flavor match. Homemade gives you the freshest, creamiest texture.
How do I prevent the cake from getting soggy?
Make sure the cake layers are completely cooled before assembling and freeze the cake promptly to keep the ice cream firm and the layers separate.
Is this recipe suitable for gluten-free diets?
Yes! Swap the all-purpose flour with a gluten-free flour blend that measures equally, and double-check your cocoa powder and other ingredients are gluten-free.
Pin This Recipe!
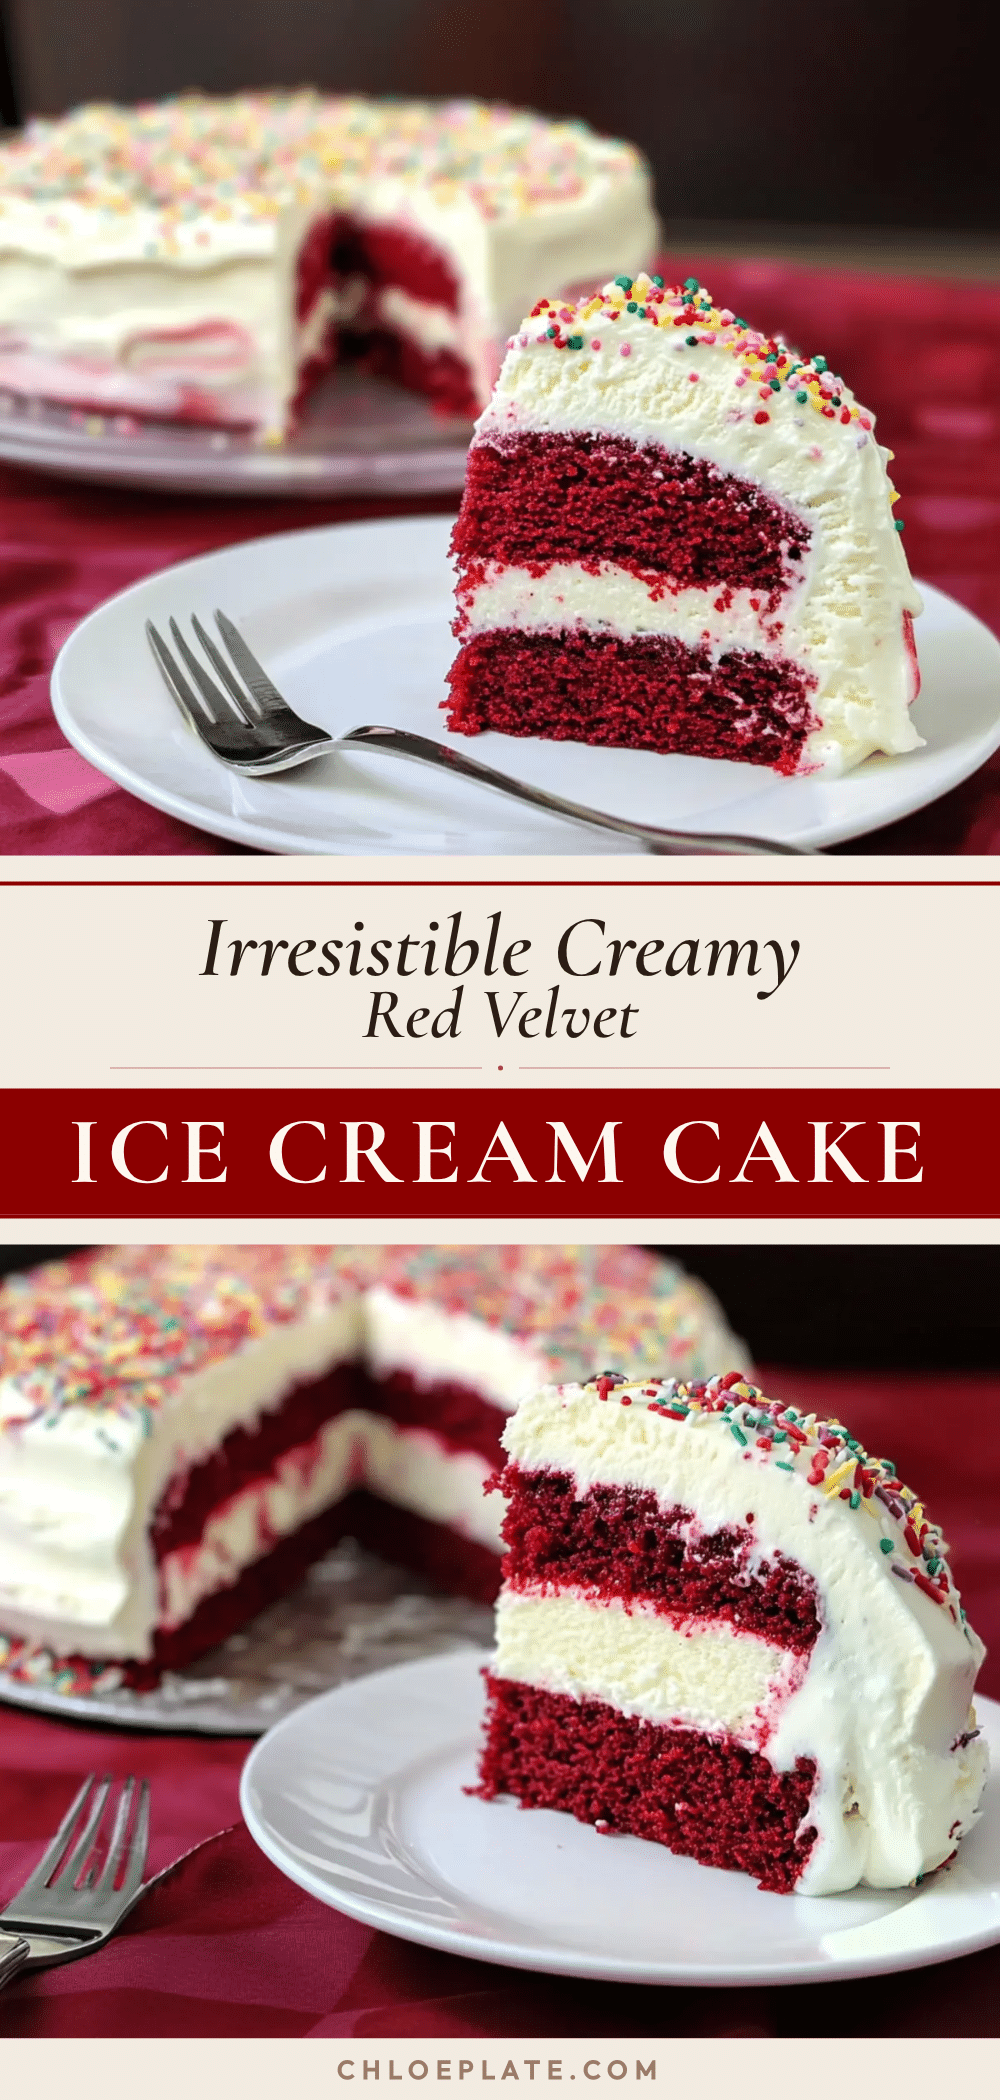
Creamy Red Velvet Ice Cream Cake
A luscious and easy-to-make dessert combining moist red velvet cake layers with a smooth, tangy cream cheese ice cream. Perfect for celebrations or a special treat any day.
- Prep Time: 20 minutes
- Cook Time: 30 minutes
- Total Time: 6 hours 50 minutes
- Yield: 10 servings 1x
- Category: Dessert
- Cuisine: American
Ingredients
- 1 ½ cups all-purpose flour (190 g)
- 1 cup granulated sugar (200 g)
- 2 tablespoons unsweetened cocoa powder (Dutch-processed recommended)
- 1 teaspoon baking soda
- ½ teaspoon salt
- 1 cup buttermilk (240 ml) or milk + 1 tablespoon vinegar as substitute
- ½ cup vegetable oil (120 ml), neutral oil like canola or sunflower
- 1 large egg, room temperature
- 2 tablespoons red food coloring (gel-based)
- 1 teaspoon vanilla extract
- 1 teaspoon white vinegar
- 8 oz cream cheese, softened (225 g), full-fat recommended
- 2 cups heavy cream (480 ml)
- ¾ cup granulated sugar (150 g)
- 2 teaspoons vanilla extract
- Pinch of salt
- Optional garnish: red velvet cake crumbs, whipped cream, white chocolate shavings or curls
Instructions
- Preheat oven to 350°F (175°C). Grease and flour two 9-inch round cake pans or line with parchment paper.
- Sift together flour, cocoa powder, baking soda, and salt in a large bowl; set aside.
- In a separate bowl, whisk sugar and vegetable oil until combined. Add egg, vanilla extract, and red food coloring; mix until smooth.
- Alternate adding dry ingredients and buttermilk to the wet mixture, starting and ending with dry. Stir gently until just combined.
- Stir in white vinegar. Batter will be thin but richly colored.
- Divide batter evenly between pans and bake 25-30 minutes or until toothpick comes out clean. Cool completely on wire racks.
- For ice cream layer: Beat softened cream cheese with sugar until smooth and creamy (3-4 minutes).
- Whip heavy cream with vanilla extract and salt until stiff peaks form.
- Gently fold whipped cream into cream cheese mixture until fully combined and airy.
- Trim cooled cakes to level tops if needed, reserving crumbs for garnish.
- Place one cake layer on serving plate or springform pan base.
- Spread half of the cream cheese ice cream mixture evenly over cake layer; sprinkle reserved crumbs if desired.
- Add second cake layer on top, spread remaining ice cream mixture evenly over it, smoothing the top.
- Cover cake with plastic wrap and freeze at least 6 hours or overnight until firm.
- Before serving, let cake sit at room temperature 10-15 minutes to soften slightly.
- Garnish with whipped cream, red velvet crumbs, and white chocolate shavings if desired.
Notes
Use gel food coloring for vibrant color without thinning batter. Do not overmix cake batter to keep it tender. Softened cream cheese is essential for smooth ice cream layer. Whip cream to stiff peaks for fluffy texture. Freeze cake overnight for best flavor and firmness. Use a warm knife to slice cleanly. For gluten-free, substitute flour with gluten-free blend. For dairy-free, use coconut cream and vegan cream cheese substitutes.
Nutrition
- Serving Size: 1 slice (1/10th of c
- Calories: 320
- Sugar: 22
- Fat: 20
- Carbohydrates: 30
- Protein: 5
Keywords: red velvet, ice cream cake, creamy dessert, homemade ice cream, easy dessert, celebration cake, cream cheese ice cream



