Love this? Save it for later!
Share the inspiration with your friends
I was elbow-deep in a flat of blackberries that were starting to look a little too sorry for themselves. You know the ones—perfect yesterday, but today they’ve gone soft and are begging for attention. I’d bought them with big plans for a fancy tart, but the day got away from me. So there I was, a little annoyed at myself, staring at three pounds of fruit that needed a purpose. I almost tossed them into a smoothie. But then I remembered my grandmother’s tiny kitchen and the way she’d boil down any fruit that was about to turn. She never measured anything, just added sugar and lemon, stirred, and waited. I grabbed my biggest pot, a wooden spoon, and decided to channel her energy. Honestly, I wasn’t expecting much—just a way to save the berries. But as that first bubble broke the surface and that sweet, jammy smell filled my kitchen, I knew I was onto something real. No pectin, no candy thermometer, no fuss. Just three ingredients and a little patience. And let me tell you, that first jar of Easy Homemade Blackberry Jam was so good, I ate it straight off the spoon. It’s become my favorite little kitchen victory, the one that makes me feel like I actually know what I’m doing.
This Easy Homemade Blackberry Jam is the kind of recipe that makes you wonder why you ever bought the store-bought stuff. It’s sweet, it’s a little tart, and it has that deep, real fruit flavor that only comes from making it yourself. And the best part? You probably already have everything you need in your kitchen.
Why You’ll Love This Recipe
I’ve made a lot of jam in my day—some that set like concrete and others that were basically fancy fruit soup. This recipe is the sweet spot. It’s the one I come back to every single time, and here’s why you’re going to love it too.
- Only 3 Ingredients: Blackberries, sugar, and lemon juice. That’s it. No weird additives or boxes of pectin required.
- Incredibly Easy: If you can stir a pot, you can make this jam. It’s that simple. No canning experience necessary, and you can have a batch ready in under an hour.
- Perfect for Beginners: This is the first jam I ever made, and it turned out perfectly. It’s forgiving and practically foolproof, which is exactly what you want when you’re learning.
- So Much Better Than Store-Bought: Once you taste this, you’ll never want to go back. The flavor is bright, fresh, and tastes like summer in a jar. It’s a total crowd-pleaser.
- Endless Uses: Slather it on toast, swirl it into yogurt, spoon it over pancakes, or use it as a filling for a simple galette. You’ll find yourself looking for excuses to eat it.
What makes this recipe different from all the others? It’s the method. We’re not using commercial pectin, which means we get a softer, more spreadable jam with a pure fruit flavor. The lemon juice does more than just brighten the taste—it helps the jam set naturally. And we cook it just long enough to get that perfect jammy consistency without turning it into a sticky mess. This is comfort food, pure and simple. It’s the kind of thing that makes a Tuesday morning feel special, and it’s the perfect project for a lazy weekend afternoon.
What Ingredients You Will Need
This recipe uses just three simple ingredients, but each one plays a crucial role in creating the perfect jam. Let’s talk about what to look for.
- 3 pounds fresh or frozen blackberries: This is the star of the show. If you’re using fresh berries, look for ones that are deep purple, plump, and fragrant. They don’t have to be perfect—slightly soft or even a little overripe is actually ideal because they’ll break down faster and have more natural sugar. If you’re using frozen blackberries, that works perfectly too. Just thaw them completely before you start, and don’t drain off the juice—that’s all flavor you want in the pot. I’ve used both, and honestly, I can’t tell the difference in the final jam. During peak summer, I love using fresh local berries. In the winter, frozen berries from the store are my go-to.
- 3 cups granulated sugar: Sugar does more than just sweeten the jam. It acts as a natural preservative and helps the jam set by interacting with the pectin in the fruit. Don’t be tempted to reduce the sugar too much, or your jam might not set properly. I’ve tried using less, and while it’s still tasty, the texture is much runnier. If you want a lower-sugar option, you can try using a no-sugar-needed pectin and follow the instructions on that package, but for this classic recipe, stick with the full amount. Regular white granulated sugar is best here—it dissolves cleanly and doesn’t add any off-flavors.
- 2 tablespoons fresh lemon juice: This is the secret weapon. The acid in the lemon juice helps activate the natural pectin in the blackberries, which helps the jam set. It also balances the sweetness and brightens the whole flavor. Always use fresh lemon juice here—the bottled stuff has a different acidity level and a slightly flat taste. I usually juice one large lemon to get the 2 tablespoons I need. If your blackberries are particularly sweet, you can even add an extra squeeze of lemon to taste.
That’s it. No pectin, no butter, no vanilla. Just pure, simple ingredients that come together to make something magical. I always recommend using a good quality sugar, like C&H or Domino, for the most consistent results. And don’t skip the lemon—it really does make a difference.
Equipment Needed
You don’t need a lot of fancy equipment to make this jam, which is one of the reasons I love it. Here’s what you’ll need:
- Large, heavy-bottomed pot or Dutch oven: A 5- to 6-quart pot is ideal. The heavy bottom helps distribute heat evenly and prevents the jam from scorching. A stainless steel or enameled cast iron pot works best. I use my trusty Le Creuset Dutch oven, and it’s perfect for the job. Avoid thin aluminum pots, as they can create hot spots that burn the jam.
- Wooden spoon or heat-resistant silicone spatula: You’ll be stirring a lot, so you want something sturdy. A long-handled wooden spoon is my preference—it’s gentle on the pot and gives you good leverage. A silicone spatula works too, just make sure it’s heat-resistant to at least 400°F.
- Jars with lids: You’ll need about 3 to 4 half-pint (8-ounce) jars. Make sure they’re clean and sterilized. You can sterilize them by running them through the dishwasher on a hot cycle, or by boiling them in a pot of water for 10 minutes. The lids should be new for the best seal, but you can reuse the bands.
- Funnel: A wide-mouth funnel makes filling the jars so much easier and less messy. It’s a small investment that pays off big time.
- Small plate or saucer: You’ll need this for the “wrinkle test” to check if your jam is set. Pop it in the freezer before you start cooking.
- Ladle: For transferring the hot jam into the jars.
- Kitchen towel or paper towels: For wiping the rims of the jars before sealing.
If you don’t have a candy thermometer, don’t worry. We’re using the wrinkle test, which is much more reliable anyway. And if you don’t have a funnel, you can carefully pour the jam from the pot using a spouted measuring cup. It’s a little messier, but it gets the job done.
Preparation Method
Making this jam is a process, but it’s a relaxing one. Put on some music, pour yourself a cup of coffee, and enjoy the slow, satisfying work of turning berries into gold. Here’s how to do it.
- Prepare your blackberries. If you’re using fresh berries, rinse them gently in a colander and pick out any stems or leaves that might have hitched a ride. If you’re using frozen berries, let them thaw completely in a colander set over a bowl. Don’t discard the juice—you’ll add it to the pot with the berries. This step takes about 5 minutes of active time, plus any thawing time if needed.
- Mash the berries. Add the berries to your large pot. Using a potato masher or the back of a wooden spoon, give them a good mash. You want a mix of whole berries and crushed ones—this gives your jam a lovely texture with some nice fruit chunks. Don’t puree them completely; you want some texture. This should take about 2 minutes.
- Add the sugar and lemon juice. Pour the 3 cups of sugar and 2 tablespoons of lemon juice over the mashed berries. Give everything a good stir to combine. At this point, the mixture will look grainy and a little watery. Don’t worry—that’s normal. Let it sit for about 10 minutes. This resting time helps draw the juice out of the berries and starts dissolving the sugar. It’s a small step that makes a big difference.
- Start cooking. Place the pot over medium heat. Stir the mixture constantly as it heats up. You want to make sure the sugar dissolves completely before it comes to a boil, or you risk it burning on the bottom. This gentle heating phase takes about 5 to 7 minutes. You’ll see the mixture go from grainy to glossy as the sugar melts.
- Bring to a rolling boil. Once the sugar is dissolved, increase the heat to medium-high and bring the mixture to a rolling boil. A rolling boil means the bubbles are breaking all over the surface and you can’t stir them down. This is the most important part of the process. Once it’s boiling, set your timer for 15 minutes. Stir occasionally, but don’t walk away—you need to keep an eye on it to make sure it doesn’t boil over.
- Skim the foam. As the jam boils, you’ll notice a pinkish foam forming on the surface. This is just air bubbles and impurities. Use a metal spoon to skim it off and discard it. This step makes your jam look clear and beautiful instead of cloudy. Skim as much as you can, but don’t stress about getting every last bubble.
- Check for doneness with the wrinkle test. After 15 minutes, it’s time to check if your jam is set. Grab that small plate you put in the freezer. Drop a small spoonful of jam onto the cold plate. Let it sit for 30 seconds. Now, push it with your finger. If the jam wrinkles and doesn’t run back together, it’s done. If it’s still runny, let it boil for another 2 to 3 minutes and test again. This is the most reliable way to check for set, and it’s what I use every single time.
- Remove from heat. Once your jam passes the wrinkle test, take the pot off the heat immediately. Let it sit for 5 minutes. This brief rest helps the fruit distribute evenly in the jars instead of all floating to the top. Give it one gentle stir to redistribute any fruit that might have settled.
- Fill the jars. Place your funnel in a sterilized jar. Using your ladle, carefully fill the jar, leaving about 1/4 inch of headspace at the top. Wipe the rim of the jar with a clean, damp paper towel to remove any sticky residue. Place the lid on the jar and screw the band on until it’s fingertip-tight—not too tight, just snug. Repeat with the remaining jars.
- Process the jars (optional but recommended). If you want your jam to be shelf-stable, you’ll need to process the jars in a boiling water bath. Place the filled jars in a large pot with a rack in the bottom, cover them with at least 1 inch of water, bring to a boil, and process for 10 minutes. Carefully remove the jars and let them cool completely. You’ll hear the satisfying “pop” of the lids sealing as they cool. If you’re planning to eat the jam within a few weeks, you can skip this step and just store the jars in the refrigerator.
And that’s it. You’ve just made your own homemade blackberry jam. The whole process, from start to finish, takes about 45 minutes to an hour. The smell in your kitchen will be absolutely incredible.
Cooking Tips & Techniques
Over the years, I’ve learned a few things that make this jam turn out perfectly every time. Here are my best tips, including some mistakes I’ve made so you don’t have to.
Don’t Walk Away During the Boil. I learned this one the hard way. The first time I made this jam, I got distracted by a phone call, and the jam boiled over. It made a huge mess on my stovetop, and I lost a good cup of jam to the burner. Stay close to the pot, and keep an eye on the foam. If it starts to rise too quickly, give it a stir or lower the heat slightly.
Use the Wrinkle Test, Not a Thermometer. I know candy thermometers are popular, but I’ve found the wrinkle test to be much more reliable. The temperature for jam to set is around 220°F, but that can vary depending on your altitude and the specific sugar content of your fruit. The wrinkle test takes all the guesswork out of it. Just remember to put your plate in the freezer at the very beginning so it’s cold when you need it.
Don’t Overcook It. It’s tempting to let the jam boil for a long time to make sure it’s set, but overcooking can lead to a jam that’s too stiff or has a slightly caramelized, burnt sugar taste. When you think it might be close, start testing. It’s better to have a slightly runny jam than a rock-hard one. And remember, the jam will continue to set as it cools.
Let the Jam Rest Before Jaring. That 5-minute rest after you take the pot off the heat is crucial. If you fill the jars immediately, all the fruit pieces will float to the top. Letting it sit for a few minutes allows the fruit to suspend evenly throughout the jam. Your jars will look much prettier for it.
Work Clean. Jam is sticky, and it gets everywhere. Keep a bowl of warm, soapy water nearby for any utensils you’re done with, and have a damp paper towel ready for wiping jar rims. A clean workspace makes the whole process so much more enjoyable.
Variations & Adaptations
One of the best things about this recipe is how easy it is to change up. Here are a few of my favorite variations.
Mixed Berry Jam: Swap out half the blackberries for raspberries, blueberries, or strawberries. Each combination will give you a different flavor profile. My personal favorite is a blackberry-raspberry blend—the raspberries add a little extra tartness that’s just lovely. You can also try a blackberry-blueberry version for a deeper, earthier flavor.
Spiced Blackberry Jam: Add a cinnamon stick and a star anise to the pot while the jam is boiling. Fish them out before you fill the jars. The warm spices add a cozy, almost holiday-like flavor that’s amazing on toast or stirred into oatmeal. A pinch of cardamom or a vanilla bean (scraped) would also be fantastic.
Low-Sugar Version: If you need to cut back on sugar, you can use a no-sugar-needed pectin and follow the instructions on the box. You’ll need to adjust the sugar amount accordingly, and the texture will be slightly different—a bit more like a gel than a traditional jam. I’ve done this before, and while it’s not quite the same, it’s still delicious.
Seedless Blackberry Jam: If you’re not a fan of the tiny seeds in blackberries, you can make a seedless version. After you mash the berries and before you add the sugar, press the mixture through a fine-mesh sieve. This takes a little extra time and patience, but the result is a smooth, elegant jam that’s perfect for a fancy brunch.
Herb-Infused Jam: Try adding a few sprigs of fresh thyme or a couple of basil leaves to the pot as the jam cooks. The herbal notes pair surprisingly well with the sweet-tart blackberries. Remove the herbs before jarring. I made a batch with thyme last summer to serve with some lemon herb cheese bites, and it was an absolute hit.
Serving & Storage Suggestions
This jam is incredibly versatile, and I love finding new ways to use it. Here are some of my favorite serving suggestions.
On Toast or Biscuits: This is the classic, and it never gets old. Spread it generously on a warm, buttered piece of sourdough toast or a flaky buttermilk biscuit. It’s the perfect breakfast.
With Yogurt or Oatmeal: Swirl a spoonful into a bowl of plain Greek yogurt or your morning oatmeal. It adds a burst of fruity sweetness without any of the artificial stuff. It’s also amazing on top of a no-bake cheesecake.
On Pancakes or Waffles: Forget maple syrup. Warm up a little jam in the microwave and drizzle it over a stack of fluffy pancakes. It’s a game-changer.
As a Glaze for Meats: This might sound unusual, but blackberry jam makes a fantastic glaze for pork or chicken. Brush it on during the last few minutes of grilling or roasting for a sweet and tangy finish. Try it on some grilled chicken—you won’t regret it.
In a Cheese Board: A small bowl of this jam is a beautiful addition to a cheese board. It pairs wonderfully with sharp cheddar, creamy brie, or tangy goat cheese. I always put a jar out when I’m entertaining.
Storage: If you’ve processed the jars in a water bath, they’ll keep in a cool, dark place for up to a year. Once opened, store the jar in the refrigerator and use it within 3 weeks. If you haven’t processed the jars, store them in the refrigerator immediately and use within 3 to 4 weeks. The flavor actually deepens and gets even better after a few days in the fridge.
Freezing: You can also freeze this jam. Just leave a little extra headspace in the jars (about 1/2 inch) and let it cool completely before freezing. It will keep for up to 6 months. Thaw it in the refrigerator overnight before using.
Nutritional Information & Benefits
While this jam is definitely a treat, it does have some redeeming qualities. Here’s a quick look at the nutritional information per 1-tablespoon serving.
- Calories: Approximately 45
- Carbohydrates: 12g
- Sugar: 11g
- Fiber: 0.5g
- Vitamin C: 3% of the Daily Value
Blackberries are a fantastic source of antioxidants, particularly anthocyanins, which give them their deep purple color. These compounds have been linked to reducing inflammation and supporting heart health. They’re also a good source of vitamin C and dietary fiber. While the sugar content is significant, it’s worth remembering that this jam is made with real, whole ingredients—no high-fructose corn syrup or artificial preservatives. It’s a more wholesome way to enjoy a little sweetness.
If you’re watching your sugar intake, use this jam as a special treat rather than a daily staple. A little bit goes a long way in terms of flavor. And honestly, I’d rather have a tablespoon of this real, homemade jam than a whole jar of the artificially sweetened stuff. It’s about quality over quantity.
Conclusion
This Easy Homemade Blackberry Jam is more than just a recipe—it’s a little act of love. It’s the kind of thing you make on a quiet Sunday afternoon and then enjoy for weeks to come. It’s perfect for gifting, for topping your morning toast, or just for eating by the spoonful when no one’s looking. I’ve been making this jam for years, and it never fails to make me happy. The process is simple, the ingredients are few, and the result is pure magic.
I hope you’ll give it a try. Don’t be afraid to make it your own—add a little spice, swap in different berries, or just enjoy it exactly as written. And when you do, I’d love to hear about it. Drop a comment below and let me know how it turned out. Did you make any fun variations? Did you give it away as gifts? Share your stories with me. I read every single comment, and I love hearing how this recipe becomes a part of your kitchen story.
Happy cooking, my friend. Grab those berries and get started. You’ve got this.
Frequently Asked Questions
Can I use frozen blackberries instead of fresh?
Absolutely! Frozen blackberries work perfectly. Just make sure to thaw them completely before you start, and don’t drain off the juice—it’s full of flavor. The jam will turn out just as delicious as if you used fresh berries.
Why didn’t my jam set?
This usually happens for one of two reasons: not enough cooking time or too much sugar. Make sure you’re boiling the jam at a full rolling boil for at least 15 minutes, and use the wrinkle test to check for doneness. If your jam is still runny, you can pour it back into the pot, add a little more lemon juice, and boil it for another 5 minutes.
Can I reduce the sugar in this recipe?
You can, but it will affect the texture and shelf life. Sugar helps the jam set and acts as a preservative. If you reduce the sugar, your jam will be runnier and won’t keep as long. For a lower-sugar option, I recommend using a no-sugar-needed pectin and following the instructions on the package.
How long does homemade jam last?
If you process the jars in a boiling water bath, they will keep in a cool, dark place for up to a year. Once opened, store the jar in the refrigerator and use it within 3 weeks. If you skip the water bath, store the jam in the refrigerator immediately and use it within 3 to 4 weeks.
Do I have to can the jam?
Not at all! If you plan to eat the jam within a few weeks, you can skip the water bath processing. Just pour the hot jam into clean jars, let it cool, and store them in the refrigerator. It’s a great option if you’re new to jam making or just want a small batch to enjoy right away.
Pin This Recipe!
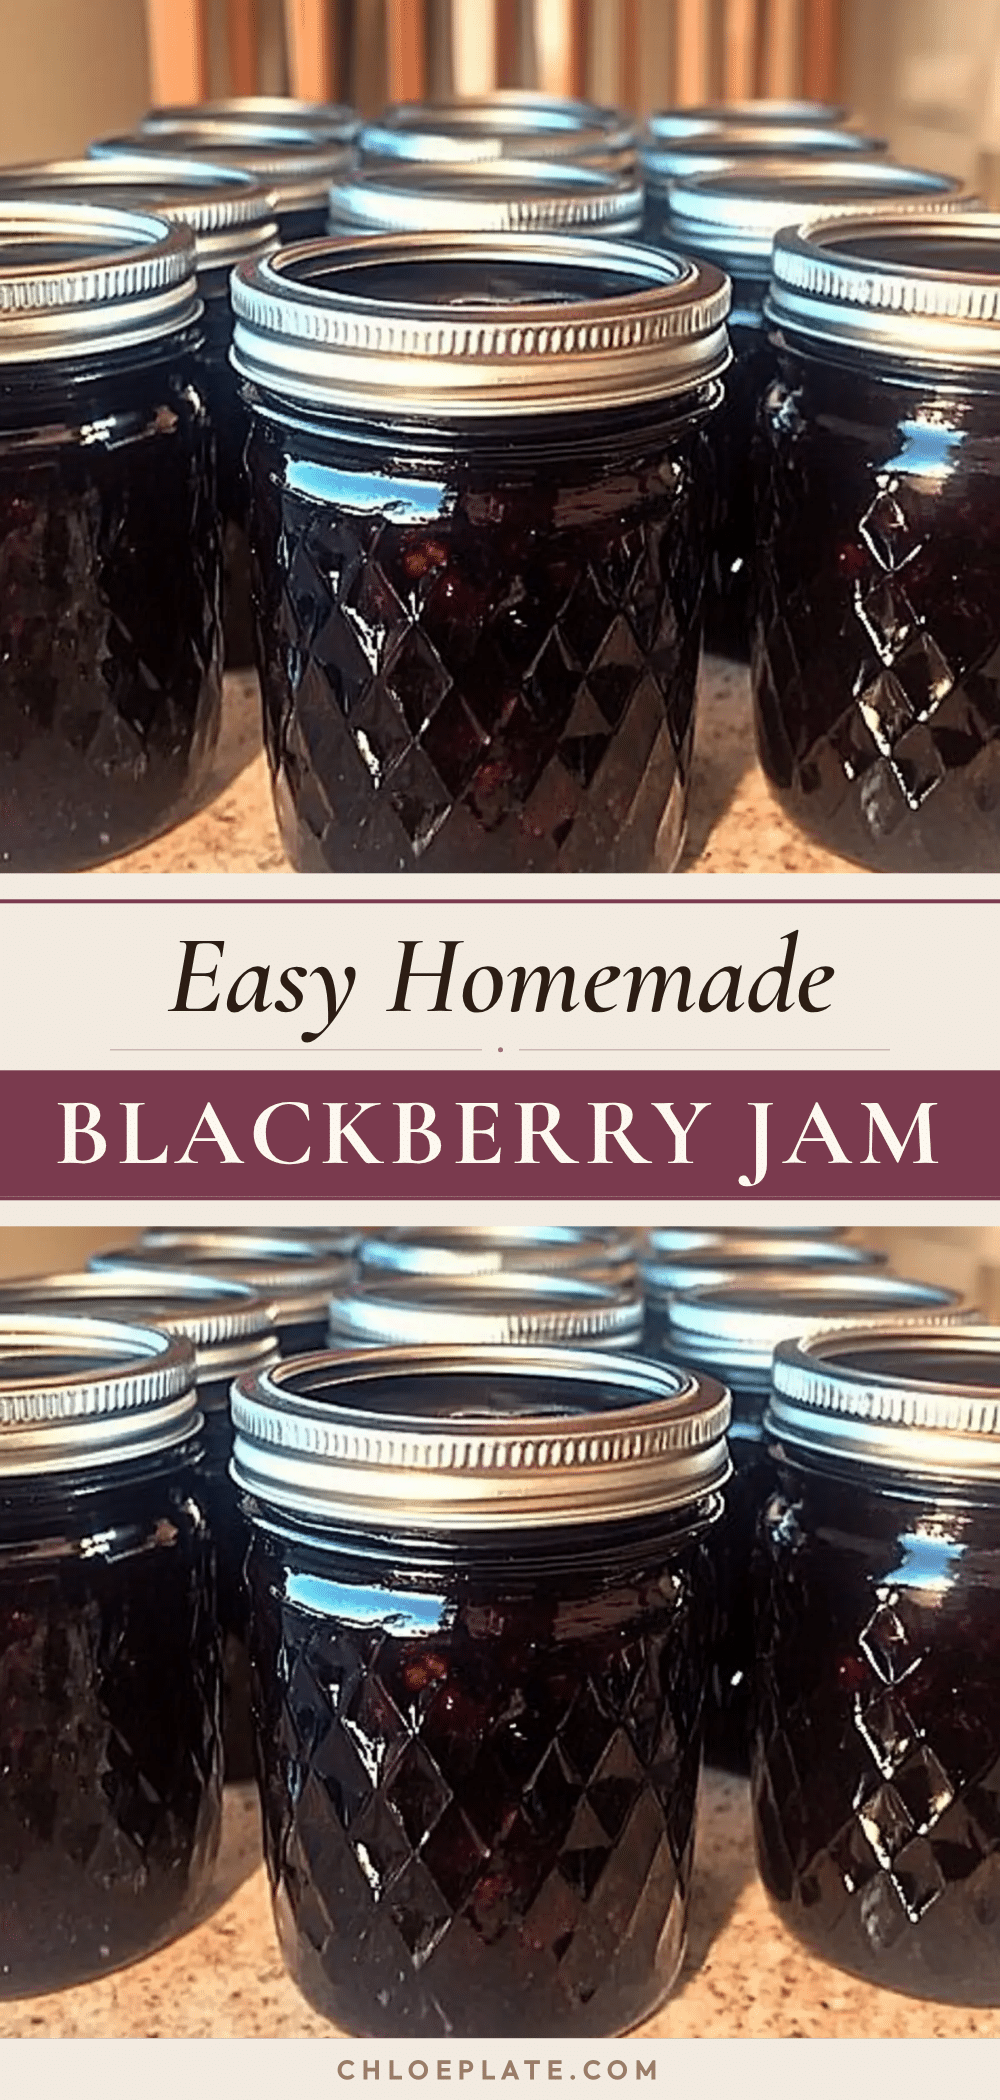
Easy 3-Ingredient Homemade Blackberry Jam Recipe
This easy homemade blackberry jam uses just three ingredients and no pectin. It’s sweet, slightly tart, and perfect for beginners, with a soft, spreadable texture and pure fruit flavor.
- Prep Time: 15 minutes
- Cook Time: 20 minutes
- Total Time: 45 minutes
- Yield: 3-4 half-pint jars (about 48-64 servings of 1 tablespoon each) 1x
- Category: Condiment
- Cuisine: American
Ingredients
- 3 pounds fresh or frozen blackberries
- 3 cups granulated sugar
- 2 tablespoons fresh lemon juice
Instructions
- Prepare your blackberries. If using fresh, rinse gently and pick out stems or leaves. If using frozen, thaw completely in a colander set over a bowl, reserving the juice.
- Mash the berries in a large pot using a potato masher or the back of a wooden spoon, leaving some chunks for texture.
- Add the sugar and lemon juice to the mashed berries. Stir to combine and let sit for 10 minutes to draw out juice and dissolve sugar.
- Place the pot over medium heat and stir constantly until the sugar dissolves completely, about 5-7 minutes.
- Increase heat to medium-high and bring to a rolling boil. Boil for 15 minutes, stirring occasionally, skimming off any foam that forms.
- Check for doneness using the wrinkle test: drop a small spoonful of jam onto a cold plate, let it sit for 30 seconds, then push it with your finger. If it wrinkles and doesn’t run back together, it’s done. If still runny, boil for another 2-3 minutes and test again.
- Remove from heat and let the jam rest for 5 minutes. Give it a gentle stir to redistribute fruit.
- Fill sterilized jars using a funnel and ladle, leaving 1/4 inch headspace. Wipe rims, place lids, and screw bands fingertip-tight.
- Optional: Process jars in a boiling water bath for 10 minutes for shelf stability. Otherwise, store in the refrigerator.
Notes
Don’t walk away during the boil to prevent boil-over. Use the wrinkle test instead of a candy thermometer for reliable doneness. Let jam rest 5 minutes before jarring to prevent fruit from floating. Work clean with a bowl of warm soapy water nearby.
Nutrition
- Serving Size: 1 tablespoon
- Calories: 45
- Sugar: 11
- Carbohydrates: 12
- Fiber: 0.5
Keywords: blackberry jam, homemade jam, easy jam recipe, no pectin jam, 3-ingredient jam, small batch jam, summer recipe, berry jam



