Love this? Save it for later!
Share the inspiration with your friends
My neighbor Linda showed up at my door last July with a cardboard box so heavy I almost dropped it. Inside were maybe twelve pounds of peaches—the freestone kind, fragrant and soft, with juice already beading on the skins. She said her tree had gone crazy and she couldn’t possibly eat them all. I thanked her, closed the door, and stared at that mountain of fruit like it was a test I hadn’t studied for.
I’d never made jam before. Honestly, the whole process felt intimidating—sterilizing jars, worrying about pectin, the fear of botulism lurking in the back of my mind. But those peaches were too good to waste. So I grabbed my biggest pot, pulled up a recipe on my phone, and figured I’d either nail it or learn something. Two hours later, I had six jars of the most ridiculous homemade peach jam sitting on my counter. It was sunset-orange, studded with tiny bits of real fruit, and tasted like summer had been condensed into spoonfuls.
That first batch disappeared fast. I gave jars to my parents, my sister, and the mailman (he deserved it). People kept texting me: Can I get more? What did you put in this? Is it hard to make? The answer to that last question surprised me. It’s not hard at all. This homemade peach jam recipe only needs five ingredients, one pot, and about thirty minutes of hands-on time. No pectin powder. No candy thermometer drama. Just ripe peaches, sugar, lemon juice, and a little patience.
Now I make it every summer without fail. It’s the kind of recipe that feels like a secret weapon—simple enough for a beginner, but impressive enough to gift. And every time I twist open a jar in the middle of January, I get to taste that July afternoon all over again.
Why You’ll Love This Recipe
I’ve tested this homemade peach jam recipe at least a dozen times across three different summers. I’ve used underripe peaches (not great), overripe peaches (surprisingly good), and even frozen peaches in a pinch (it works, but fresh is better). Through all those trials, I landed on a method that’s forgiving, consistent, and genuinely delicious. Here’s why I think you’ll love it too:
- Only 5 Ingredients : Peaches, sugar, lemon juice, butter, and a pinch of salt. That’s it. No mysterious pectin boxes or liquid pectin pouches to hunt down at the grocery store.
- No Canning Experience Needed : You don’t need a water bath canner or special equipment. This recipe works for both shelf-stable canning and simple refrigerator jam. I’ll walk you through both methods.
- Perfectly Balanced Sweetness : This jam isn’t cloying. The lemon juice brightens the peaches, and the butter (yes, butter) cuts the foam and gives the jam a silky finish. It tastes like a fresh peach in spreadable form.
- Great for Gifting : I’ve given jars of this homemade peach jam as hostess gifts, Christmas presents, and thank-you tokens. People lose their minds over it. Pair it with a batch of homemade soft pretzels for an unforgettable gift basket.
- Freezer-Friendly : Make a big batch now, stash jars in the freezer, and enjoy summer peaches all year long. It thaws beautifully with no loss of texture or flavor.
This isn’t just another jam recipe. It’s the one that makes you close your eyes after the first bite on a piece of warm toast. It’s comfort food in a jar—simple, honest, and so much better than anything you’ll buy at the store.
What Ingredients You Will Need
This homemade peach jam relies on a short list of everyday ingredients. Each one plays a specific role in creating that thick, spreadable, fruit-forward texture you’re after. Here’s what you’ll need:
For the Jam
- 3 pounds ripe peaches (about 8-10 medium peaches) – Freestone peaches are easiest because the pit comes out cleanly. Look for peaches that yield slightly to pressure and smell intensely peachy. Underripe peaches won’t break down as well and will taste flat.
- 2 cups granulated sugar – This isn’t negotiable for texture and preservation. Sugar interacts with the fruit’s natural pectin to create that jammy set. You can reduce it slightly, but the jam will be looser and less shelf-stable.
- 2 tablespoons fresh lemon juice (from about 1 lemon) – The acidity balances the sweetness and helps the pectin work. Bottled lemon juice works in a pinch, but fresh tastes noticeably brighter.
- 1 tablespoon unsalted butter – This is my secret ingredient. It reduces foaming during cooking and gives the jam a glossy, velvety finish. You won’t taste it, I promise.
- Pinch of fine sea salt – Just a small pinch. Salt deepens the fruit flavor and rounds out the sweetness.
Ingredient Tips & Substitutions
- Peach variety : Yellow peaches give the classic jam color and tangy-sweet flavor. White peaches are milder and less acidic—your jam will be paler and slightly less structured. Both work, but yellow is my go-to.
- Sweetener swap : You can replace up to half the sugar with honey or maple syrup, but the jam will be softer and may not set as firmly. It also changes the flavor profile. If you go this route, use the jam within a few weeks and keep it refrigerated.
- No lemon? : Substitute 1 tablespoon of white vinegar or apple cider vinegar. The acidity is what matters here.
- Butter alternative : You can skip the butter entirely if you don’t mind skimming foam off the top during cooking. The jam will still taste great, just slightly less glossy.
- For a lower-sugar version : Use a low-sugar pectin like Pomona’s Pectin and follow their instructions. This recipe as written relies on the sugar-to-fruit ratio for its natural set.
I personally recommend using organic peaches if you can find them. The skins go into the jam (more on that later), and conventional peach skins can hold pesticide residue. Plus, organic peaches tend to have deeper flavor. My favorite brand for consistent quality is BelleHarvest when they’re in season, but any farmers’ market peach will do beautifully.
Equipment Needed
You don’t need a fancy canning kit for this homemade peach jam. Here’s what I use every time:
- Large heavy-bottomed pot or Dutch oven (6-8 quart) – A wide surface area helps the jam cook down faster. Avoid thin pots—they scorch easily. My go-to is a 7-quart enameled cast iron Dutch oven.
- Wooden spoon or silicone spatula – For stirring. Metal spoons can react with the acid in the lemon juice and leave a metallic taste.
- Sharp knife and cutting board – For peeling and chopping peaches.
- Potato masher or fork – For mashing the cooked peaches to your desired consistency.
- Canning jars with lids (4 half-pint jars or 2 pint jars) – Make sure they’re clean and sterilized. I run mine through the dishwasher on the sanitize cycle.
- Wide-mouth funnel (optional but helpful) – Makes filling jars less messy.
- Small plate and freezer – For the wrinkle test to check if your jam is set. Pop a plate in the freezer before you start cooking.
If you’re planning to can the jam for shelf storage, you’ll also need a water bath canner or a deep pot with a rack. But honestly? I make refrigerator and freezer jam most of the time. It’s simpler, and the flavor stays brighter. If you don’t have a canning funnel, a clean measuring cup with a spout works fine—just go slowly.
Preparation Method
Making homemade peach jam is more about patience than skill. Follow these steps, and you’ll have golden, spreadable perfection.
- Prep your peaches. Bring a large pot of water to a boil. Score a small X on the bottom of each peach with a knife. Drop the peaches into the boiling water for 30-45 seconds, then transfer them to a bowl of ice water. The skins will slip right off. Peel them, halve them, remove the pits, and roughly chop the flesh into 1-inch pieces. You should have about 5-6 cups of chopped peaches.
- Mash and combine. In your large pot, add the chopped peaches and give them a few mashes with a potato masher. I like my jam with some texture—small chunks of fruit—so I don’t go overboard. Stir in the sugar, lemon juice, and salt. Let the mixture sit for 10-15 minutes. This draws out the peach juices and helps the sugar dissolve.
- Start cooking. Place the pot over medium-high heat and add the butter. Stir constantly until the butter melts and the mixture comes to a full, rolling boil (one that doesn’t stop bubbling when you stir). This takes about 5-7 minutes.
- Boil and stir. Once boiling, reduce the heat to medium and cook for 15-20 minutes, stirring frequently to prevent scorching. The jam will darken and thicken. Skim off any foam that rises to the surface (the butter helps minimize this, but some may still appear).
- Test for doneness. After 15 minutes, start checking the set. Place a small spoonful of jam on your frozen plate. Let it sit for 30 seconds, then push it with your finger. If it wrinkles and doesn’t flood back together, it’s ready. If it’s still runny, cook another 2-3 minutes and test again.
- Rest and jar. Remove the pot from heat and let the jam rest for 5 minutes. This allows the fruit to settle and prevents the fruit from floating to the top of the jars. Stir once gently, then ladle the hot jam into your sterilized jars, leaving 1/4-inch headspace at the top. Wipe the rims clean, screw on the lids, and let the jars cool completely at room temperature.
- Set and store. As the jars cool, you’ll hear the satisfying pop of the lids sealing. Don’t move them for 12-24 hours—this helps the jam set properly. Once sealed, store in a cool, dark pantry for up to a year. Refrigerate after opening.
Pro tip from my kitchen: If you’re making refrigerator jam only, skip the water bath. Just fill the jars, let them cool, and refrigerate. It keeps for about 3 weeks in the fridge. For longer storage, freeze the jars (leave extra headspace) or process them in a water bath for 10 minutes.
Cooking Tips & Techniques
I’ve burned my fair share of jam. I’ve also made batches that never set properly and ended up as peach syrup (which, honestly, isn’t the worst outcome—it’s amazing on pancakes). Here’s what I’ve learned the hard way so you don’t have to:
- Don’t walk away from the pot. Jam goes from perfect to scorched in about 30 seconds. Stir frequently, especially toward the end of cooking. The sugars caramelize fast.
- Trust the wrinkle test. Forget thermometers and timers. The frozen plate test is the most reliable way to check if your jam is set. I’ve had batches take 15 minutes and others take 25, depending on the peach variety and ripeness.
- Use ripe but not mushy peaches. Rock-hard peaches lack flavor and pectin. Overly soft, bruised peaches can make the jam taste fermented. Aim for that sweet spot—firm but giving, with that unmistakable peachy perfume.
- Don’t double the batch. I know it’s tempting, but doubling the recipe makes the cooking time much longer and increases the risk of scorching. Make two separate batches if you need more. Your patience will be rewarded.
- Skim the foam. Foam is just air bubbles and coagulated proteins. It won’t hurt you, but it creates cloudy jam and can affect the texture. A few tablespoons of butter at the start drastically reduce foaming, but if you still see foam, skim it off with a spoon.
- Let the jam rest before jarring. This 5-minute rest is non-negotiable in my kitchen. It prevents the fruit from floating to the top of the jars, giving you that beautiful, even distribution of peach pieces throughout.
One of my earliest jam failures happened when I tried to rush the cooling process. I put hot jars directly into the fridge, and the temperature shock caused one to crack. Let them cool slowly on the counter. Trust the process—it’s worth the wait.
Variations & Adaptations
This homemade peach jam recipe is a fantastic base for all kinds of creative twists. Here are some variations I’ve tried and loved:
- Spiced Peach Jam : Add 1 cinnamon stick and 1 star anise to the pot while the jam cooks. Remove them before jarring. The warm spices complement the peach sweetness beautifully. I make this version every fall.
- Peach Vanilla Bean Jam : Split one vanilla bean and scrape the seeds into the peach mixture before cooking. Drop the pod in too. The vanilla adds a floral, creamy note that makes the jam taste almost like dessert. Try it swirled into yogurt or spooned over baklava cinnamon rolls for a next-level treat.
- Low-Sugar Peach Jam : Reduce the sugar to 1 cup and add 1 tablespoon of low-sugar pectin powder. The texture will be softer and the flavor more tart. This version needs to be refrigerated and used within 2 weeks.
- Peach Raspberry Jam : Replace 1 cup of chopped peaches with 1 cup of fresh or frozen raspberries. The raspberries add a gorgeous ruby color and a tart counterpoint to the sweet peaches. This combo is my favorite for toast.
- Savory Peach Jam : Omit 1/4 cup of sugar and add 1 teaspoon of fresh thyme leaves, 1/2 teaspoon of black pepper, and a pinch of red pepper flakes. This savory version is incredible on a cheese board with sharp cheddar or spread on grilled pork chops.
- No-Peel Shortcut : If you’re short on time, skip the blanching. Just wash the peaches well, remove the pits, and chop them with the skins on. The skins add a bit of texture and a slightly more rustic appearance. I do this when I’m feeling lazy, and honestly, no one has ever noticed.
My personal favorite variation is the spiced version. I make a big batch every August and give jars as holiday gifts. The cinnamon and star anise make it feel cozy even when it’s 90 degrees outside.
Serving & Storage Suggestions
This homemade peach jam is incredibly versatile. Here’s how I love to use and store it:
- On toast or biscuits : The classic. Spread generously on warm buttered toast, peanut butter cookies, or flaky buttermilk biscuits. The jam’s natural sweetness pairs perfectly with salty butter.
- With yogurt and granola : Swirl a spoonful into plain Greek yogurt and top with crunchy granola. It’s a breakfast that feels fancy but takes 30 seconds.
- On a cheese board : Peach jam is phenomenal with soft cheeses like brie or goat cheese, and it’s equally good with sharp aged cheddar. Add some crackers and you’ve got an instant appetizer.
- As a glaze : Warm the jam slightly and brush it over grilled chicken, pork chops, or salmon during the last few minutes of cooking. It adds a gorgeous glossy finish and a sweet-savory kick.
- In baked goods : Use it as a filling for thumbprint cookies, swirl it into muffin batter, or layer it between cake rounds. I’ve used this jam in place of raspberry filling in salted caramel chocolate chip cookies with amazing results.
Storage tips: Unopened jars of properly canned jam last up to 12 months in a cool, dark pantry. Once opened, refrigerate and use within 3 weeks. For freezer jam, leave 1/2-inch headspace in the jars (jam expands as it freezes) and freeze for up to 6 months. Thaw in the refrigerator overnight. The flavor stays remarkably fresh.
I’ve noticed that the flavor of this jam actually improves after about a week in the jar. The peach flavor deepens and the sugar mellows. So if you can resist digging in right away, your patience will be rewarded.
Nutritional Information & Benefits
Here’s the approximate nutritional breakdown for a 1-tablespoon serving of this homemade peach jam:
| Nutrient | Amount per serving |
|---|---|
| Calories | 35 |
| Total Fat | 0.2g |
| Sodium | 5mg |
| Total Carbohydrates | 9g |
| Sugars | 8g |
| Vitamin C | 2% DV |
Peaches are a good source of vitamin C, which supports immune health and collagen production. They also contain antioxidants like chlorogenic acid, which may help reduce inflammation. While this jam does contain sugar (it’s jam, after all), using real fruit means you’re getting some nutritional benefit along with the sweetness. The lemon juice adds a small boost of vitamin C as well.
This recipe is naturally gluten-free, dairy-free (the butter is optional), and vegan if you skip the butter. It contains no common allergens beyond potential cross-contamination if processed in a facility that handles nuts or other allergens. Always check your ingredient labels if you have specific concerns.
I personally view jam as a small indulgence—a way to enjoy summer fruit in the dead of winter. A tablespoon on toast is a reasonable treat that brings a lot of joy for very few calories.
Conclusion
This homemade peach jam is the kind of recipe that makes you feel like a kitchen wizard, even if you’ve never canned anything in your life. It’s forgiving, flexible, and produces a result that tastes like pure sunshine. Whether you spread it on morning toast, gift it to friends, or hoard it all for yourself (no judgment here), this jam will become a summer staple in your kitchen.
I encourage you to make this recipe your own. Play with the spices, try different fruit combinations, or leave it chunky or smooth—whatever makes you happy. Cooking should feel creative, not rigid. And if your first batch doesn’t set perfectly? Call it peach syrup and pour it over ice cream. You’ll still win.
I’d love to hear how your jam turns out. Drop a comment below and tell me about your favorite way to use it, or tag me in your photos on social media. Happy canning, friends—here’s to a summer full of sweet, peachy moments!
Frequently Asked Questions
Can I use frozen peaches for this jam?
Yes, you can. Thaw the peaches completely and drain off any excess liquid before using them. Frozen peaches tend to be softer, so your jam may cook a little faster and have a slightly looser texture. It still tastes great.
Do I have to peel the peaches?
Not necessarily. The skins are edible and contain pectin, which helps the jam set. However, they can create a slightly chewy texture and a less vibrant color. I prefer peeled jam for its smooth, uniform appearance, but if you’re short on time, leave the skins on—it’s a rustic look that works beautifully.
Why did my jam turn out too runny?
Runny jam usually means it didn’t cook long enough. The jam needs to reach 220°F (104°C) or pass the wrinkle test on a frozen plate. If it’s still runny after cooling, you can re-cook it—just pour it back into the pot, bring it to a boil, and cook for another 5-10 minutes before testing again.
How long does homemade peach jam last?
Properly canned jam lasts up to 12 months in a cool, dark pantry. Refrigerator jam keeps for about 3 weeks. Frozen jam is good for 6 months. Always check for signs of spoilage (mold, off smells, or bulging lids) before eating, especially with home-canned goods.
Can I reduce the sugar in this recipe?
You can, but it will affect the texture and shelf life. Sugar is what helps the jam set and acts as a preservative. If you reduce it, your jam will be softer and need to be refrigerated and used within 1-2 weeks. For a low-sugar option, use a low-sugar pectin and follow the package instructions.
Pin This Recipe!
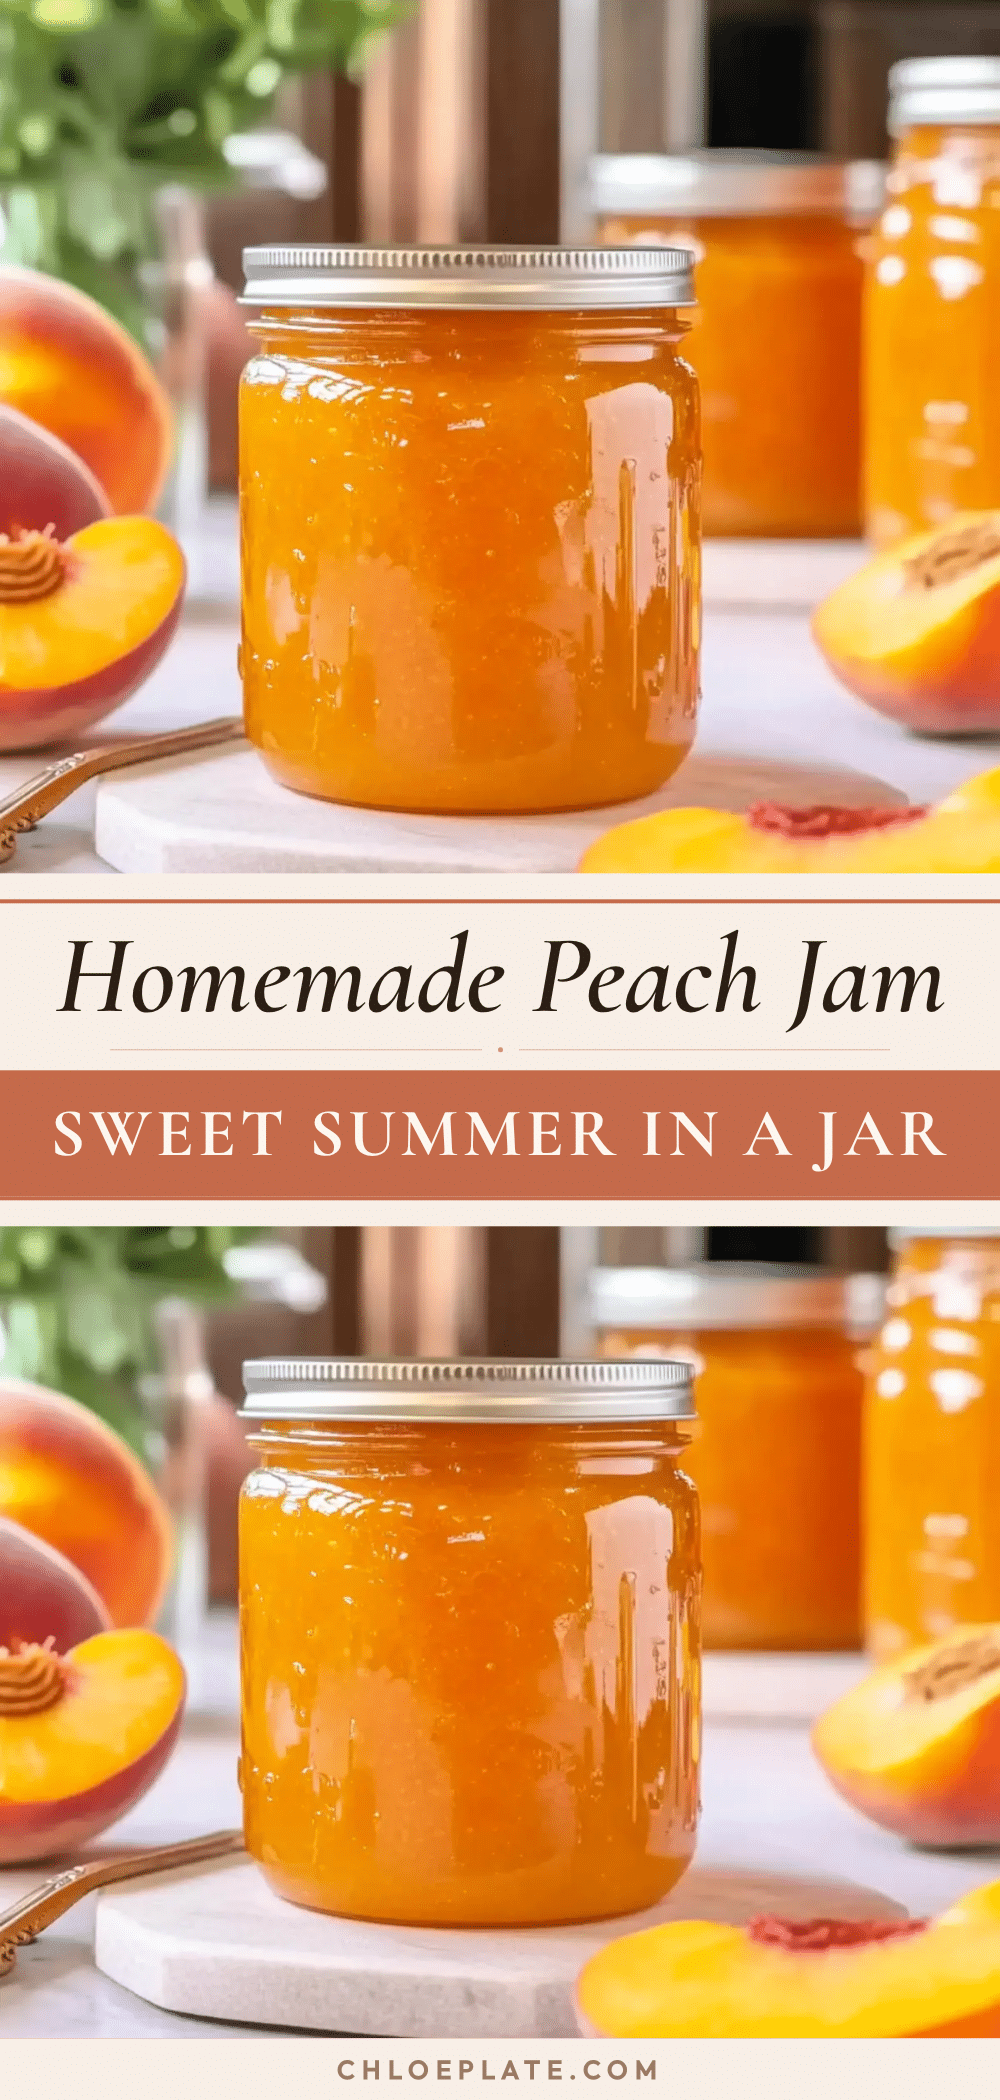
Homemade Peach Jam: Easy 5-Ingredient Summer Recipe
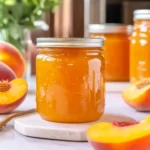
This easy homemade peach jam requires only five ingredients and about thirty minutes of hands-on time. No pectin powder or candy thermometer needed—just ripe peaches, sugar, lemon juice, and a little patience for a delicious, spreadable summer treat.
- Prep Time: 15 minutes
- Cook Time: 25 minutes
- Total Time: 40 minutes
- Yield: 4 half-pint jars 1x
- Category: Preserves
- Cuisine: American
Ingredients
- 3 pounds ripe peaches (about 8–10 medium peaches)
- 2 cups granulated sugar
- 2 tablespoons fresh lemon juice (from about 1 lemon)
- 1 tablespoon unsalted butter
- Pinch of fine sea salt
Instructions
- Prep your peaches: Bring a large pot of water to a boil. Score a small X on the bottom of each peach. Drop peaches into boiling water for 30-45 seconds, then transfer to a bowl of ice water. Peel, halve, remove pits, and roughly chop into 1-inch pieces (about 5-6 cups).
- Mash and combine: In a large pot, add chopped peaches and mash a few times with a potato masher. Stir in sugar, lemon juice, and salt. Let sit for 10-15 minutes to draw out juices.
- Start cooking: Place pot over medium-high heat and add butter. Stir constantly until butter melts and mixture comes to a full rolling boil (about 5-7 minutes).
- Boil and stir: Reduce heat to medium and cook for 15-20 minutes, stirring frequently. Skim off any foam that rises.
- Test for doneness: Place a small spoonful of jam on a frozen plate. Let sit for 30 seconds, then push with finger. If it wrinkles and doesn’t flood back, it’s ready. If still runny, cook 2-3 more minutes and test again.
- Rest and jar: Remove from heat and let rest for 5 minutes. Stir once gently, then ladle hot jam into sterilized jars, leaving 1/4-inch headspace. Wipe rims, screw on lids, and let cool completely at room temperature.
- Set and store: Let jars sit undisturbed for 12-24 hours. Once sealed, store in a cool, dark pantry for up to a year. Refrigerate after opening.
Notes
For refrigerator jam, skip water bath and refrigerate; keeps about 3 weeks. For longer storage, freeze jars (leave extra headspace) or process in water bath for 10 minutes. Don’t double the batch; make two separate batches if needed. Let jam rest 5 minutes before jarring to prevent fruit from floating.
Nutrition
- Serving Size: 1 tablespoon
- Calories: 35
- Sugar: 8
- Sodium: 5
- Fat: 0.2
- Carbohydrates: 9
Keywords: homemade peach jam, easy peach jam, 5-ingredient jam, summer jam, no pectin jam, peach preserves, small batch jam