Love this? Save it for later!
Share the inspiration with your friends
I was halfway through a stack of unread emails when my phone buzzed with a text from my neighbor, Sarah. “Tea at mine? 3pm. I have scones.” That was it. No context, no apology for the short notice, just the promise of scones. I hit send on a quick “OMW” and closed my laptop, honestly kind of relieved for an excuse to step away.
When I walked into her kitchen, there they were — a tray of golden, craggly-topped scones cooling on a wire rack. The kitchen smelled like warm butter and jam, and she was slicing apricots (the last of the season, she said) into tiny, jewel-like pieces. She handed me one, still faintly warm, split it open, and told me to add clotted cream. That first bite was a moment. The tart-sweet pop of apricot against the tender, buttery crumb was something I hadn’t expected. It was simple, but it felt special.
I asked for the recipe, and she shrugged. “It’s just my go-to cream scone base with apricots thrown in.” That “just” was doing a lot of heavy lifting. I spent the next few weeks tweaking that base — adjusting the butter-to-flour ratio, testing different drying methods for the fruit, and figuring out how to keep the scones tall and flaky instead of flat and dense. This version is the one I kept coming back to. It’s the one I reach for when I want to turn an ordinary afternoon into something worth closing your laptop for.
Why You’ll Love This Recipe
These apricot scones are the kind of baked good that makes you look like you spent hours in the kitchen when you really didn’t. They come together in about 30 minutes of active work, and the rest is just oven time. Here is why they work so well:
- Quick & Easy: From mixing bowl to cooling rack in under 40 minutes. No yeast, no proofing, no fuss.
- Simple Ingredients: You probably have flour, butter, cream, and sugar in your kitchen right now. The apricots are the only “special” ingredient.
- Perfect for Afternoon Tea: These scones are sturdy enough to hold a generous spread of clotted cream and jam, but tender enough to crumble slightly with each bite. They are the star of any tea spread.
- Crowd-Pleaser: I have brought these to book club, brunch, and a casual baby shower. Every single time, someone asks for the recipe. They disappear fast.
- Unbelievably Delicious: The combination of a buttery, flaky scone with the concentrated sweetness of dried apricots is honestly next-level. The edges are crisp, the inside is soft, and the fruit adds little bursts of chewy, tangy flavor.
What makes these different from other scone recipes? It’s the method. I use a technique that involves freezing the butter and grating it into the flour. It sounds extra, but it creates the flakiest layers without any complicated folding. Plus, I rehydrate the dried apricots briefly so they stay plump and juicy inside the scone instead of turning into tough little bits. It’s a small step, but it makes a big difference.
These scones aren’t just good. They are the kind that makes you close your eyes after the first bite. They are comfort food reimagined — fancy enough for a tea party, but simple enough for a quiet Tuesday afternoon.
What Ingredients You Will Need
This recipe relies on a handful of pantry staples to create something that feels far more luxurious than its ingredient list suggests. Each component has a specific job, from building structure to delivering that signature flaky texture.
- All-purpose flour (2 cups / 250g): The backbone of the scone. I use unbleached all-purpose flour for the best texture. Do not substitute with bread flour, which will make them tough.
- Granulated sugar (1/3 cup / 65g): Adds just enough sweetness to balance the tart apricots. You can reduce it to 1/4 cup if you prefer a less sweet scone.
- Baking powder (1 tablespoon): The primary leavening agent. Make sure yours is fresh — stale baking powder is the number one reason scones don’t rise properly.
- Salt (1/2 teaspoon): Essential for balancing sweetness and enhancing the buttery flavor.
- Unsalted butter (1/2 cup / 113g), very cold: This is the most important ingredient. The butter must be ice-cold. I put my butter in the freezer for 15 minutes before I start. The small, solid pieces of butter create steam as they melt in the oven, which creates those flaky layers.
- Heavy cream (3/4 cup / 180ml), plus more for brushing: The fat in heavy cream tenderizes the dough. Do not use milk or half-and-half; the lower fat content will result in a drier, denser scone. I prefer using a high-quality brand like Kalona SuperNatural for its rich, creamy texture.
- Dried apricots (1 cup / 150g), chopped: I use unsulphured dried apricots when I can find them — they have a deeper, more natural apricot flavor. Look for ones that are soft and pliable, not hard and leathery. You’ll want to chop them into small, raisin-sized pieces.
- Vanilla extract (1 teaspoon): A splash of vanilla rounds out the flavor and adds a subtle warmth.
Ingredient Selection Tips: For the best results, use a high-fat European-style butter like Plugrà or Kerrygold. It has a lower water content, which means less gluten development and a more tender scone. If your dried apricots are on the firmer side, soak them in hot water for 10 minutes, then drain and pat them dry before chopping. This step keeps them from pulling moisture out of the scone dough.
Equipment Needed
You don’t need a lot of fancy tools to make these scones, but a few specific items will make the process smoother and the results more consistent.
- Pastry cutter or two forks: For cutting the butter into the flour. I prefer a pastry cutter because it’s faster, but forks work just fine.
- Box grater: This is my secret weapon for cold butter. Grating the butter directly into the flour eliminates the need for a pastry cutter and creates perfectly distributed, tiny butter shards.
- Baking sheet: A light-colored, rimmed baking sheet works best. Dark sheets can cause the bottoms of the scones to brown too quickly.
- Parchment paper: Lining the baking sheet prevents sticking and makes clean-up a breeze.
- 2.5-inch round biscuit cutter: A sharp-edged cutter is key for clean cuts that help scones rise tall. If you don’t have a biscuit cutter, a clean, empty tuna can works in a pinch. Just wash it thoroughly!
- Pastry brush: For brushing the tops with cream before baking. A silicone brush is easy to clean.
Budget-Friendly Options: If you don’t have a biscuit cutter, you can simply shape the dough into a round and cut it into wedges like a pizza. They won’t be perfectly round, but they will taste exactly the same.
Preparation Method
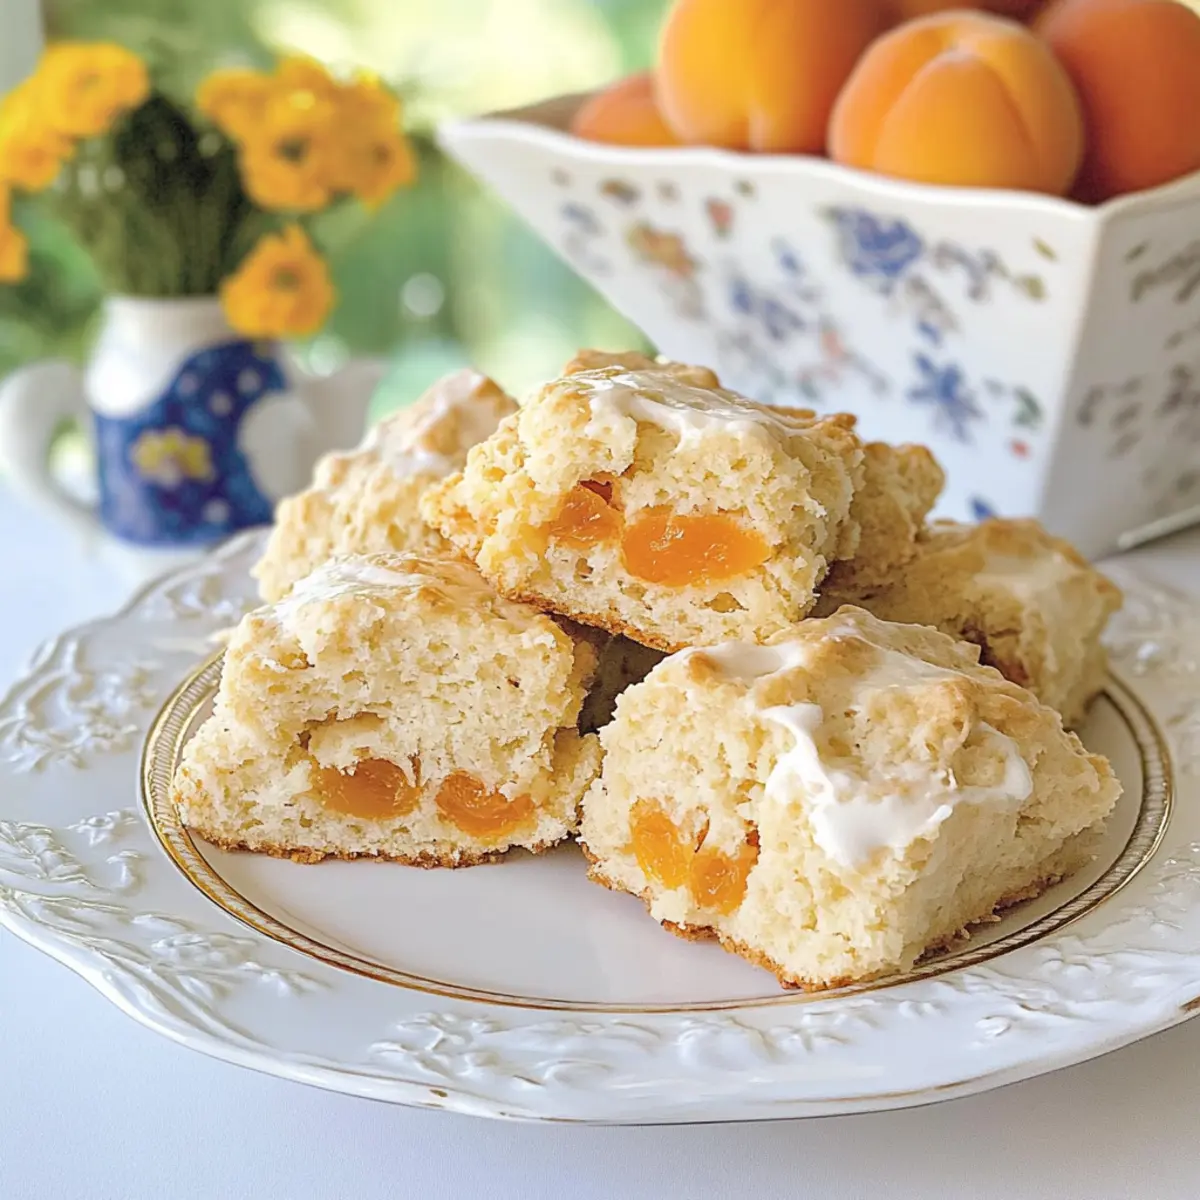
Let’s get baking. I’ll walk you through this step by step, with all the little details I’ve learned from making these scones more times than I can count.
- Preheat and prep: Preheat your oven to 400°F (200°C). Line a baking sheet with parchment paper. Place your stick of butter in the freezer for at least 15 minutes while you get everything else ready.
- Rehydrate the apricots (optional but recommended): If your dried apricots feel a bit tough, place the chopped apricots in a small bowl and cover them with boiling water. Let them sit for 10 minutes. Drain them well and pat them completely dry with a paper towel. This step ensures they stay soft and juicy inside the scone. If your apricots are already soft and pliable, you can skip this.
- Mix the dry ingredients: In a large mixing bowl, whisk together the flour, sugar, baking powder, and salt. Make sure the baking powder is evenly distributed — you don’t want a pocket of it in one scone.
- Grate the butter: Remove the butter from the freezer. Using the large holes of a box grater, grate the entire stick of butter directly into the bowl with the flour mixture. Toss the grated butter with the flour using your fingers or a fork until each piece of butter is coated. You should see flat, flour-coated shards of butter throughout the mixture. This is exactly what you want.
- Add the cream and vanilla: Make a well in the center of the flour-butter mixture. Pour in the heavy cream and vanilla extract. Use a fork to stir everything together until a shaggy, crumbly dough forms. It will look dry and not fully come together at first — that’s okay. Do not overmix.
- Add the apricots: Gently fold in the chopped, dried apricots with a few light turns of your fork. Try to distribute them evenly without overworking the dough.
- Bring the dough together: Turn the shaggy dough out onto a lightly floured surface. Gently bring it together with your hands, pressing it into a rough ball. The dough should be cohesive but still have visible pieces of butter. If it feels too dry, you can add a tablespoon more of cream. If it feels too sticky, add a light dusting of flour.
- Shape and cut: Pat the dough into a circle about 3/4-inch thick. Do not roll it with a rolling pin — that will overwork the dough and make the scones tough. Use your biscuit cutter to cut out scones by pressing straight down. Do not twist the cutter! Twisting seals the edges and prevents the scones from rising evenly. Gather the scraps, gently press them together, and cut out more scones. You should get about 8 scones.
- Chill the scones: Place the cut scones on the prepared baking sheet, spacing them about 2 inches apart. Pop the entire baking sheet in the refrigerator for 15 minutes. This re-chills the butter, which is crucial for tall, flaky scones. (I learned this the hard way after a batch of flat, sad scones.)
- Bake: Remove the scones from the fridge. Brush the tops with a little extra heavy cream — this gives them a beautiful golden-brown crust. Bake for 14-18 minutes, or until the scones are puffed up and the tops and edges are a deep golden brown. The bottoms should sound hollow when tapped.
- Cool: Transfer the scones to a wire rack to cool for at least 10 minutes before serving. They are best enjoyed warm, but they are still wonderful at room temperature.
Sensory Cues: When you press the dough together, it should feel cool to the touch and slightly crumbly, not sticky. The scones are done when the kitchen smells intensely of toasted butter and the tops are a rich, even gold. If you gently press the side of a scone, it should feel firm, not soft.
Cooking Tips & Techniques
Over the years, I’ve made every scone mistake in the book so you don’t have to. Here are the most important lessons I’ve learned.
Keep everything cold. This is the golden rule of scone-making. If your butter melts before it hits the oven, you will get dense, flat discs instead of tall, flaky scones. If your hands get warm while working the dough, run them under cold water and dry them off. If the dough starts to feel soft or greasy, pop it back in the fridge for 10 minutes.
Don’t overmix the dough. I know it’s tempting to keep stirring until everything looks smooth, but stop the second the dough comes together. Overmixing develops gluten, which makes scones tough and chewy. You want them to be tender and almost crumbly.
Use a sharp cutter. A dull or flimsy cutter will press the edges of the dough together, sealing them and preventing the scones from rising. Press straight down with a clean, sharp motion. No twisting. If you don’t have a sharp cutter, a sharp knife to cut the dough into squares works beautifully.
Chill before baking. That 15-minute chill in the fridge is non-negotiable. It firms up the butter one last time, ensuring that the scones will rise tall and develop those beautiful, flaky layers. I once skipped this step because I was in a hurry, and the scones spread out like pancakes. Never again.
Watch the oven. Oven temperatures vary wildly. Start checking your scones at the 14-minute mark. If they are browning too quickly on top but are still soft in the center, tent them loosely with a piece of aluminum foil for the last few minutes of baking.
Variations & Adaptations
One of the best things about this recipe is how adaptable it is. Here are a few ways to make it your own.
- Gluten-Free Version: Substitute the all-purpose flour with a good quality 1-to-1 gluten-free baking flour blend that contains xanthan gum. I’ve had great results with King Arthur Measure for Measure. The dough will be a bit more delicate, so handle it gently.
- Vegan Version: Use a high-quality vegan butter stick (like Miyoko’s) and substitute the heavy cream with full-fat coconut cream from a can. The flavor will be slightly different, but the texture is surprisingly close.
- Flavor Twists: Swap the dried apricots for an equal amount of dried cherries, chopped dried figs, or golden raisins. Add 1/2 teaspoon of orange zest to the dry ingredients for a bright, citrusy note. For a savory-sweet version, add 1/4 cup of finely chopped crystallized ginger along with the apricots.
- Spiced Variation: Add 1/2 teaspoon of ground cardamom or cinnamon to the flour mixture. The warm spice pairs beautifully with the apricots.
- Different Cooking Method: You can freeze the unbaked scones on the baking sheet, then transfer them to a freezer bag. Bake them directly from frozen, adding 2-3 minutes to the baking time. This is perfect for having fresh scones on demand.
I once tried a version with fresh apricots instead of dried. The fresh fruit released too much moisture during baking, and the scones turned out gummy and flat. Stick with dried apricots for this recipe — they provide concentrated flavor without the excess liquid.
Serving & Storage Suggestions
These scones are best served warm, split in half, and slathered with clotted cream and a generous spoonful of good-quality apricot jam. The combination of the warm, buttery scone with the cold, rich cream and the sweet-tart jam is pure magic.
Serving Temperature: While warm is ideal, room temperature scones are still delicious. If you are serving them for a tea party, you can reheat them gently in a 300°F (150°C) oven for 5 minutes before serving.
What to Serve With Them: A pot of Earl Grey tea is the classic pairing, but they are also wonderful with a cup of English Breakfast or a light, floral jasmine green tea. For a non-tea option, a tall glass of iced coffee works surprisingly well.
Storage: Store leftover scones in an airtight container at room temperature for up to 2 days. Do not refrigerate them — the fridge will dry them out.
Freezing: Baked scones freeze beautifully. Wrap them individually in plastic wrap, then place them in a freezer bag. They will keep for up to 3 months. To serve, thaw at room temperature, then reheat in a 300°F (150°C) oven for 5-7 minutes.
Reheating: The microwave will make them soft and rubbery. Always reheat scones in the oven or a toaster oven for the best texture. A quick 5-minute blast at 300°F (150°C) will make them taste freshly baked.
Flavor Development: Honestly, these scones are at their absolute best on the day they are baked. The texture is perfect, and the edges are still a little crisp. Day-old scones are still good, but they lose a bit of that initial magic.
Nutritional Information & Benefits
Here is an approximate nutritional breakdown for one scone (based on 8 servings):
| Nutrient | Amount per Scone |
|---|---|
| Calories | 320 |
| Total Fat | 18g |
| Saturated Fat | 11g |
| Cholesterol | 55mg |
| Sodium | 220mg |
| Total Carbohydrates | 37g |
| Dietary Fiber | 2g |
| Sugars | 16g |
| Protein | 4g |
Health Benefits: Dried apricots are a good source of fiber, potassium, and iron. They also contain antioxidants like beta-carotene, which your body converts into vitamin A. The butter and cream provide fat-soluble vitamins, though these scones are definitely a “treat yourself” food rather than a health food. I like to think of them as a wholesome indulgence — made with real ingredients, nothing artificial, and meant to be savored.
Dietary Considerations: This recipe contains gluten, dairy, and wheat. For a gluten-free or vegan adaptation, see the Variations section above.
Conclusion
These apricot scones have become my go-to for so many reasons. They are simple enough to whip up on a whim, but special enough to serve at a gathering. They remind me of that afternoon at Sarah’s kitchen table, where a simple baked good turned an ordinary day into something memorable. That is the power of a really good scone.
I hope you give this recipe a try. Don’t be afraid to make it your own — swap the apricots for your favorite dried fruit, add a pinch of spice, or just follow the recipe exactly as written. Either way, you will end up with a tray of golden, buttery, flaky scones that are perfect for afternoon tea, a cozy weekend breakfast, or just because.
When you make them, I would love to hear how they turn out. Leave a comment below and let me know if you tried any variations, or share a photo of your scones. Happy baking!
Frequently Asked Questions
Can I use fresh apricots instead of dried?
I do not recommend it. Fresh apricots contain too much moisture, which will make the scone dough soggy and the texture gummy. Dried apricots provide concentrated flavor and a chewy texture that works perfectly in this recipe.
Why did my scones turn out flat and dense?
This usually happens for one of three reasons: your butter was too warm, you overmixed the dough, or your baking powder was old. Make sure your butter is very cold, mix just until the dough comes together, and check the expiration date on your baking powder.
Can I make the dough ahead of time?
Yes! You can prepare the scone dough, cut out the scones, and place them on a baking sheet. Cover them tightly with plastic wrap and refrigerate for up to 24 hours. Bake them directly from the fridge, adding 1-2 minutes to the baking time.
What can I use instead of heavy cream?
For the best texture, heavy cream is really the best choice. However, in a pinch, you can substitute with full-fat Greek yogurt thinned with a little milk, or with canned full-fat coconut milk for a dairy-free option. The texture will be slightly less tender.
How do I keep my scones from sticking to the cutter?
Dip your biscuit cutter in flour before each cut. This prevents the dough from sticking and ensures a clean cut. Remember, do not twist the cutter — just press straight down and lift it up.
Pin This Recipe!

Perfect Apricot Scones: Best Easy Afternoon Tea Recipe

These apricot scones are the kind of baked good that makes you look like you spent hours in the kitchen when you really didn’t. They come together in about 30 minutes of active work, and the rest is just oven time.
- Prep Time: 30 minutes
- Cook Time: 18 minutes
- Total Time: 48 minutes
- Yield: 8 servings 1x
- Category: Dessert
- Cuisine: British
Ingredients
- 2 cups (250g) all-purpose flour
- 1/3 cup (65g) granulated sugar
- 1 tablespoon baking powder
- 1/2 teaspoon salt
- 1/2 cup (113g) unsalted butter, very cold
- 3/4 cup (180ml) heavy cream, plus more for brushing
- 1 cup (150g) dried apricots, chopped
- 1 teaspoon vanilla extract
Instructions
- Preheat your oven to 400°F (200°C). Line a baking sheet with parchment paper. Place your stick of butter in the freezer for at least 15 minutes while you get everything else ready.
- If your dried apricots feel a bit tough, place the chopped apricots in a small bowl and cover them with boiling water. Let them sit for 10 minutes. Drain them well and pat them completely dry with a paper towel. If your apricots are already soft and pliable, you can skip this.
- In a large mixing bowl, whisk together the flour, sugar, baking powder, and salt.
- Remove the butter from the freezer. Using the large holes of a box grater, grate the entire stick of butter directly into the bowl with the flour mixture. Toss the grated butter with the flour using your fingers or a fork until each piece of butter is coated.
- Make a well in the center of the flour-butter mixture. Pour in the heavy cream and vanilla extract. Use a fork to stir everything together until a shaggy, crumbly dough forms. Do not overmix.
- Gently fold in the chopped, dried apricots with a few light turns of your fork.
- Turn the shaggy dough out onto a lightly floured surface. Gently bring it together with your hands, pressing it into a rough ball.
- Pat the dough into a circle about 3/4-inch thick. Use a biscuit cutter to cut out scones by pressing straight down. Do not twist the cutter. Gather the scraps, gently press them together, and cut out more scones. You should get about 8 scones.
- Place the cut scones on the prepared baking sheet, spacing them about 2 inches apart. Refrigerate for 15 minutes.
- Remove the scones from the fridge. Brush the tops with a little extra heavy cream. Bake for 14-18 minutes, or until the scones are puffed up and the tops and edges are a deep golden brown.
- Transfer the scones to a wire rack to cool for at least 10 minutes before serving.
Notes
Keep everything cold. Don’t overmix the dough. Use a sharp cutter. Chill before baking. Watch the oven. For gluten-free, use a 1-to-1 gluten-free flour blend. For vegan, use vegan butter and full-fat coconut cream.
Nutrition
- Serving Size: 1 scone
- Calories: 320
- Sugar: 16
- Sodium: 220
- Fat: 18
- Saturated Fat: 11
- Carbohydrates: 37
- Fiber: 2
- Protein: 4
Keywords: apricot scones, afternoon tea, scone recipe, easy scones, dried apricot scones



